 Installation guide
 Owner’s manual




Are high efficiency dryers worth it?
High-efficiency dryers are worth it when you want shorter dry times, lower energy use per load, and gentler fabric care; the biggest real-world payoff comes from good airflow and correct installation. For your Speed Queen ADEE8RGS173TW01, proper venting and lint control protect efficiency and performance.
What “worth it” usually means (cost vs. benefit)
High-efficiency features help most when your laundry habits and setup support them.
- Lower energy use per load when sensors stop the cycle as soon as clothes are dry
- Less overdrying (helps reduce shrinkage and wear)
- Faster drying when airflow is strong and the exhaust duct is correctly sized and routed
- Better consistency across mixed loads (towels, cottons, synthetics)
- Potentially fewer heat-related issues when the dryer can regulate temperature accurately
The biggest factor: airflow and venting
Even the most efficient dryer wastes energy if the vent system is restricted. For the ADEE8RGS173TW01, the installation guidance emphasizes correct exhausting to the outdoors and not blocking airflow at the front bottom area.
Quick airflow checklist
- Clean the lint filter after every load
- Keep the area around the exhaust opening free of lint and dust
- Use rigid or semi-rigid metal venting where possible (avoid crushed or kinked duct)
- Keep the vent run as short and straight as you can
- Make sure the outside hood damper opens freely
For model-specific venting and electrical hookup details, follow the ADEE8RGS173TW01 installation guide.
When you will notice savings (and when you might not)
| Situation | Likely result with a high-efficiency dryer |
|---|---|
| Long or clogged vent run | Small savings until venting is corrected |
| Large household, frequent loads | Bigger savings and convenience |
| Mostly small loads | Modest savings |
| You already air-dry part-time | Smaller bill impact, still better fabric care |
Why it matters
Dryer efficiency is not just about the machine; it is about heat + airflow + control. Keeping lint under control and venting correctly helps your dryer dry faster, use less electricity, and reduce overheating stress on components like the heater and thermostats.
If your electric dryer is not heating or is taking too long, our electric dryer wont heat troubleshooting video walks through the most common causes.
Last updated: February 2026
What are common problems with Speed Queen dryers?
Common problems we see on the Speed Queen ADEE8RGS173TW01 dryer include not starting, not heating, long dry times, overheating, unusual noises, and the drum not turning. Many of these issues trace back to airflow restrictions, a door switch or control issue, or a failed heating or drive component; use the ADEE8RGS173TW01 owner's manual for model-specific checks and safety guidance.
Most common symptoms and what usually causes them
- Dryer will not start: door not fully closed, door switch issue, start switch issue, control problem, motor overload condition
- No heat or weak heat: heating element or heater circuit issue, temperature sensing issue, limit thermostat tripped, poor airflow
- Takes too long to dry: lint filter clogged, vent restriction, overloaded drum, moisture sensing behavior in auto cycles
- Overheating: blocked venting, lint buildup, failed high-limit/limit thermostat
- Drum not turning or stopped spinning: drive motor issue, worn drum support parts (rollers/glides), mechanical binding
- Grinding/squealing noises: worn drum rollers or glides, foreign object, blower wheel obstruction
Quick checks we recommend first (safe, high-impact)
- Clean the lint filter after every load; a lint layer reduces airflow and increases dry time.
- Check the exhaust vent path (behind the dryer to the outside hood) for kinks, crushing, lint, or a stuck damper.
- Confirm the door safety behavior: the dryer should stop tumbling when the door opens.
- If you see an “Er/ro” type code: press Start/Pause to clear and restart; if it returns, stop using the dryer and schedule service.
- Listen and observe: heat present, drum turning, and any abnormal noises help narrow the failed part.
Parts that commonly relate to these problems on this model
| Symptom | Common part to check | Example part for ADEE8RGS173TW01 |
|---|---|---|
| Overheating or shuts off on heat | Limit thermostat | Limit thermostat D515873 |
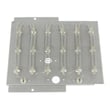
| No heat or weak heat | Heating element or heater kit | Dryer heating element D510329P |
| Long dry times, temperature issues | Thermistor | Thermistor assembly D510523 |
| Drum not turning, hums, stops | Drive motor | Dryer drive motor D511629P |
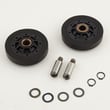
| Thumping, squealing | Drum support | Cylinder roller D510708P |
Why it matters
A dryer that overheats or runs with restricted airflow can damage components and shorten the life of the heater and motor. Keeping airflow clear and addressing early noise or heat symptoms prevents bigger repairs.
Last updated: February 2026
What is the lifespan of the Speed ADEE8RGS173TW01?
Most Speed Queen dryers like model ADEE8RGS173TW01 typically last about 20 to 25 years with normal residential use and routine vent and lint maintenance. Lifespan depends most on airflow (venting), load habits, and keeping safety thermostats from overheating.
What affects lifespan the most
- Restricted venting (long runs, crushed flex duct, clogged hood) causes high heat and shortens heater and thermostat life.
- Overloading increases drum, roller, and motor wear.
- Lint buildup inside the cabinet or blower housing raises operating temperature.
- Frequent high-heat cycles accelerate wear on heating components.
- Ignoring early symptoms (squealing, thumping, long dry times) lets small issues become major repairs.
Maintenance checklist (high impact)
We recommend these habits to get the full service life from your Speed Queen dryer:
- Clean the lint screen every load.
- Inspect and clean the full vent path routinely (dryer outlet to exterior hood).
- Keep loads sized so clothes tumble freely (bulk matters more than weight).
- Stop using the dryer if it repeatedly shows a fault code and arrange service.
- Follow the care and operating guidance in the ADEE8RGS173TW01 owner’s manual.
Common wear items and what they usually cause
| Symptom | Most common area | Typical result |
|---|---|---|
| Long dry times | Venting, airflow | Overheating, shortened heater life |
| Squealing or rumbling | Drum support | Roller/glide wear |
| No heat | Heating circuit | Heater, thermostat, thermistor issues |
| Stops mid-cycle | Overheat protection | Limit thermostat opens to protect dryer |
If overheating is part of the problem, a failed or weak limit thermostat is a common fix; for this model, see the Speed queen limit thermostat D515873.
Why it matters
A dryer can run for decades, but chronic overheating from poor airflow is the fastest way to burn out heating parts and trip safety controls. Good venting and correct load size protect the heater, motor, and drum support system.
Last updated: February 2026
Why is my dryer taking 2 hours to dry clothes?
If your Speed Queen ADEE8RGS173TW01 dryer is taking around 2 hours to dry, the most common cause is restricted airflow (lint screen or exhaust duct). Load size, cycle selection (Auto-Sensing vs. timed), and a heating or temperature-sensing problem can also extend dry times. See the ADEE8RGS173TW01 owner's manual for load and cycle guidance.
Fast checks that fix most long dry times
- Clean the lint filter before every load (even a thin film reduces airflow).
- Check the exhaust duct for kinks, crushing, lint buildup, or a stuck vent hood flap.
- Keep the duct run short and straight; long runs slow drying.
- Avoid overloading; most loads should tumble freely.
- Do not open the door mid-cycle; it dumps heat and adds time.
Load size and cycle settings that affect time
Your manual notes that dry time varies with load size, fabric type, moisture level, airflow, and room conditions. Auto-Sensing cycles estimate time based on recent cycles and adjust as the moisture sensing system detects dryness.
| Situation | What you see | What to do |
|---|---|---|
| Overloaded drum | Clothes stay damp, hot outside, wet inside | Reduce load; aim for 1/3 to 1/2 full when wet |
| Very small load | Items ball up, tumble poorly | Add a couple towels to improve tumbling |
| Wrong cycle/dryness | Cycle “runs forever” or ends damp | Use the correct fabric cycle; adjust Dryness on Auto-Sensing |
When airflow is good but drying is still slow
If the venting is clear and loads are correct, check for heat control issues that can reduce heater on-time:
- A weak or failed heating element
- A temperature-sensing problem (thermistor)
- A safety thermostat opening early due to overheating or poor internal airflow
For this model, common heat-related parts include the dryer heating element D510329P, thermistor assembly (black) D510523, and limit thermostat D515873.
Why it matters
Long dry times usually mean the dryer is moving too little air. That wastes energy, overheats components, and can shorten the life of parts like the heating element and thermostats.
Last updated: February 2026





