Owner’s manual


How do I reset my LG dryer control board?
To reset the controls on your LG DLEX4000B dryer, power the dryer off, cut power at the breaker (or unplug it) for 1 minute, then restore power and press Power. This clears many temporary control glitches and restores normal operation.
- Press Power to turn the dryer off.
- Unplug the dryer or switch OFF the circuit breaker.
- Wait 60 seconds.
- Restore power.
- Press Power, select a cycle, then press Start/Pause.
- If the display shows CL, turn off Control Lock (below).
On DLEX4000B, Control Lock can make it look like the control board is frozen even though it is working.
- With the dryer powered on, press and hold Damp Dry Signal for 3 seconds to toggle Control Lock.
- Confirm CL disappears, then try starting a cycle again.
A reset helps with software-like glitches. It will not correct power-supply problems or sensor failures.
| What you see | What it usually means | What to do next |
|---|---|---|
| Dryer will not start at all | Power issue, door not closed, or control lock | Check breaker, door, then Control Lock |
| PF, PS, or nP error | Power cord/house power issue | Verify terminal block connection and supply per the DLEX4000B owner's manual |
| tE1/tE2 or HS error | Temperature or humidity sensor fault | Turn dryer off and arrange service |
Resetting the dryer (and checking Control Lock) prevents unnecessary part replacement and helps you quickly separate a simple control issue from a real electrical or sensor problem. If you’re troubleshooting an error message, our LG dryer error codes guide helps you match the code to the next best step.
Last updated: February 2026
How to take the front off of a LG sensor dryer?
To remove the front panel on an LG sensor dryer like model DLEX4000B, we unplug the dryer, remove the top panel first, then release the front panel fasteners and lift the panel off while disconnecting the door switch or drum light wiring as needed. Use the DLEX4000B owner's manual for the exact panel and screw locations.
- Unplug the dryer (or switch off the breaker); electric dryers use 240V.
- If stacked, unstack it first; front-panel removal is not safe while stacked.
- Wear gloves; sheet metal edges are sharp.
- Have a container ready for screws.
- Take a quick photo of wire connectors before unplugging them.
- Remove the top panel: take out the rear screws, slide the top back, then lift it off.
- Remove the control panel fasteners (if they block the front panel): lift/tilt the control panel forward and support it without straining wires.
- Open the door and remove front-panel screws around the door opening (locations vary by revision).
- Release the front panel: remove any lower screws, pull the panel slightly forward, then lift up to unhook it from the cabinet clips.
- Disconnect wiring: unplug the door switch harness and any drum light connector before fully separating the panel.
| Item | Why it’s in the way | What to do |
|---|---|---|
| Control panel | Covers top front-panel screws | Support it; do not pull on wires |
| Door switch harness | Attached to front panel | Unplug connector before lifting panel away |
| Lint duct/housing | Can attach to front bulkhead on some builds | Remove screws and set aside if needed |
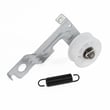
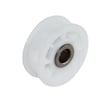
Removing the front correctly prevents broken plastic tabs, pinched wiring, and air leaks that can cause long dry times and Flow Sense alerts. If you are opening the cabinet for noise or no-tumble issues, common wear items include the LG dryer drum belt 4400EL2001F and idler pulley.
Last updated: February 2026
What is the average lifespan of an LG dryer?
An LG dryer typically lasts about 10 to 13 years with normal household use and routine maintenance. For your LG DLEX4000B, keeping airflow strong (clean lint filter, clear venting) is one of the biggest factors in reaching that lifespan; see the DLEX4000B owner's manual for care and operating guidance.
- Airflow and venting: restricted exhaust makes the dryer run hotter and longer
- Lint control: cleaning the lint screen every load reduces strain on the blower system
- Load habits: frequent overloading stresses the drum, belt, and motor
- Heat management: repeated overheating can shorten the life of thermostats and sensors
- Wear parts: belts, rollers, and idlers wear gradually and can be replaced
- Clean the lint screen before every load.
- Check the outside vent hood for strong airflow.
- Keep the exhaust duct short, smooth, and free of lint buildup.
- Avoid overloading; the drum should tumble freely.
- If you hear squealing or thumping, inspect common wear parts like the LG dryer drum belt 4400EL2001F and drum support rollers.
| Symptom | Often caused by | Usually fixable? |
|---|---|---|
| Long dry times | Vent restriction, lint buildup, moisture sensor issues | Yes |
| Squealing/grinding | Belt, idler pulley, support rollers | Yes |
| No heat | Heating circuit components, airflow problems | Often |
| Won’t start | Door switch, control issues, power supply | Often |
A dryer that is maintained for good airflow dries faster, runs cooler, and puts less stress on key components (motor, drum support, thermostats). That directly improves reliability and helps your LG DLEX4000B reach the typical 10 to 13 year lifespan.
Last updated: February 2026