Get free shipping on your order, with any water filter subscription. Find my filter

Open Hamburger Menu
Sears Parts Direct
Tips to find your model number

Diehard 20071234 battery charger Parts

Here are the diagrams and repair parts for Diehard 20071234 battery charger, as well as links to manuals and error code tables, if available.

Diehard 20071234 battery charger
By Schematic
SELECT DIAGRAM
?

This is the number corresponding to the part on the diagram / schematic

Browse Parts for 20071234 Battery Charger

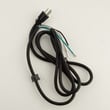
  • Diehard Ac Power C for Diehard 20071234 - Part 90026177

    Cabinet parts diagram

    Diehard Ac Power C

    Part #90026177

    The manufacturer no longer makes this part, and there's no substitute part

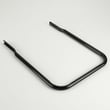
  • Craftsman Handle for Diehard 20071234 - Part 3599000262

    Cabinet parts diagram

    Craftsman Handle

    Part #3599000262

    The manufacturer no longer makes this part, and there's no substitute part

  • Diehard Battery Charger Circuit Breaker for Diehard 20071234 - Part 3999000108

    Cabinet parts diagram

    Diehard Battery Charger Circuit Breaker

    Part #3999000108

    The manufacturer no longer makes this part, and there's no substitute part

  • Craftsman Foot for Diehard 20071234 - Part 1199005112

    Cabinet parts diagram

    Craftsman Foot

    Part #1199005112

    The manufacturer no longer makes this part, and there's no substitute part

  • Axle for Diehard 20071234 - Part 0099000066

    Cabinet parts diagram

    Axle

    Part #0099000066

    The manufacturer no longer makes this part, and there's no substitute part

  • Faceplate for Diehard 20071234 - Part 0899002622

    Cabinet parts diagram

    Faceplate

    Part #0899002622

    The manufacturer no longer makes this part, and there's no substitute part

  • Power Board for Diehard 20071234 - Part 2299001467

    Cabinet parts diagram

    Power Board

    Part #2299001467

    The manufacturer no longer makes this part, and there's no substitute part

  • Top Cover for Diehard 20071234 - Part 3799004100

    Cabinet parts diagram

    Top Cover

    Part #3799004100

    The manufacturer no longer makes this part, and there's no substitute part

  • Owner's Manual for Diehard 20071234 - Part 0099000539

    Cabinet parts diagram

    Owner's Manual

    Part #0099000539

    The manufacturer no longer makes this part, and there's no substitute part

  • Cable W/clamp,red for Diehard 20071234 - Part 3899001165

    Cabinet parts diagram

    Cable W/clamp,red

    Part #3899001165

    The manufacturer no longer makes this part, and there's no substitute part

Diehard Battery Charger 20071234 FAQs

To connect the Diehard battery charger model 20071234, we connect the red (positive) clamp to the battery’s POS (+) post first, then connect the black (negative) clamp to a safe ground point (or the NEG (-) post, depending on setup). After the clamps are secure, we plug the charger into a grounded 120V outlet and select the charging mode. See the owner's manual for the exact connection steps for your situation.

Connection steps (most vehicles: negative-ground system)

  1. Set the charger POWER switch to OFF.
  2. Confirm battery polarity: POS (+) and NEG (-).
  3. Connect red clamp to the ungrounded POS (+) battery post.
  4. Connect black clamp to an unpainted, heavy metal part of the chassis or engine block, away from the battery.
  5. Rock or twist the clamps to ensure a solid connection.
  6. Plug the power cord into a 3-prong grounded 120V AC wall outlet.

Important safety tips

  • Wear safety glasses and keep your face turned away from the battery while making the final connection.
  • Do not clamp to carburetor, fuel lines, or sheet metal.
  • Keep clamps from slipping; a solid connection reduces sparking.
  • Turn vehicle accessories and lights OFF before charging.

Which connection method should I use?

Setup Red clamp goes to Black clamp goes to
Negative-ground vehicle (most cars) POS (+) battery post Chassis/engine ground away from battery
Positive-ground system Chassis/engine ground away from battery NEG (-) battery post
Battery removed from vehicle POS (+) battery post NEG (-) post (often via a cable to keep sparks away)

Why it matters

Correct clamp placement helps prevent reverse polarity, reduces the chance of sparks near the battery, and lets the charger accurately analyze the battery and charge safely.

Last updated: February 2026

Pricing depends on the exact Diehard charger model and features (automatic charging, engine start amps, battery testing, and GFCI outlets). For the Diehard battery charger model 20071234, use the parts list and specifications in the 20071234 owner's manual to confirm what version you have, then compare current listings by model.

What affects the price most

  • Charge rate/output (low/medium/high amp charging)
  • Engine start feature (higher amp boost capability typically costs more)
  • Battery tester functions (built-in meter/display features)
  • Safety features (GFCI outlets, circuit breaker)
  • Condition (new vs. used, complete cables/clamps vs. missing accessories)

Quick feature snapshot for model 20071234

Based on the manual, this charger is an automatic battery charger/engine starter and battery tester with GFCI outlets, aimed at home or light commercial use.

Feature What it means for cost Notes for 20071234
Automatic charging Usually higher than basic manual chargers Designed for safer, more controlled charging
Engine start assist Often increases price Engine start delivers 275A (12V) or 125A (6V)
Built-in testing Can increase price Meter shows battery voltage
GFCI outlets Can increase price Adds convenience and protection

How we recommend you price-check the right unit

  1. Confirm the model number is 20071234 on the label.
  2. Match key features (engine start, 6V/12V capability, GFCI outlets).
  3. Verify it includes the positive (red) and negative (black) cables with clamps.
  4. Compare listings using the full model number so you are not mixing similar Diehard chargers.

Why it matters

Battery chargers vary widely in price because output and features change what the charger can safely do. A unit like the Diehard 20071234 (with engine start and testing) typically prices higher than a basic maintainer.

Last updated: February 2026

Charge time on the Diehard battery charger model 20071234 depends on the battery’s amp-hour (AH) rating, how discharged it is, and the charge-rate setting (2A, 20A, or 60A). In AUTO mode, the charger stops when the battery is fully charged; in MANUAL mode, you set a time (up to 18 hours).

Typical charge-time estimate (use the manual’s formula)

We estimate charge time using the method in the owner's manual:

  • Find the battery’s AH rating (often on the battery label)
  • Estimate how much charge is needed (example: 50% needed means 0.50)
  • Choose a charger setting (2, 20, or 60 amps)
  • Calculate hours: (AH × % needed ÷ amps) × 1.25
  • Add 1 extra hour for a deep-cycle battery

Example (from the manual’s method)

If you have a 100 AH battery that needs 50% charge at 20A:

Battery AH % needed Charge rate Estimated time
100 0.50 20A ~3.1 hours

Quick guidance by charge-rate setting

These are practical expectations for many 12V automotive batteries:

  • 60A: fastest for short boosts and quicker recovery; monitor closely in MANUAL mode
  • 20A: common “normal” charging speed for many car batteries
  • 2A: slow charge for maintaining or gently charging smaller batteries

Why it matters

Charging too fast or too long can overheat a battery or overcharge it in MANUAL mode. AUTO mode is the simplest choice because it shuts off when the battery reaches full charge.

Safety and usage notes we follow

  • Set the correct 6V/12V battery switch before charging
  • In MANUAL mode, set a charge time (up to 18 hours) and reset if more time is needed
  • To avoid overcharging in MANUAL mode, monitor the meter frequently
  • When fully charged, switch POWER to OFF and unplug before disconnecting clamps

Last updated: February 2026

Most common symptoms to help you fix your refrigerators

Choose a symptom to see related refrigerator repairs.

Main causes: leaky door gasket, defrost system failure, evaporator fan not running, dirty condenser coils, condenser fan…

Main causes: control board or cold control failure, broken compressor start relay, compressor motor failure, defrost tim…

Main causes: blocked vents, defrost system problems, evaporator fan failure, dirty condenser coils, bad sensors, condens…

Main causes: blocked air vents, compressor problems, condenser or evaporator fan not working, control system failure, se…

Main causes: water valve leaking, frozen or broken defrost drain tube, overflowing drain pan, cracked water system tubin…

Main causes: damaged door seal, faulty defrost sensor or bi-metal thermostat, broken defrost heater, bad defrost timer o…

Things to do: clean condenser coils, replace the water filter, clean the interior, adjust doors to prevent air leaks, cl…

Main causes: jammed ice cubes, broken ice maker assembly, dirty water filter, kinked water line, bad water valve, freeze…

Most common repair guides to help fix your refrigerators

These step-by-step repair guides will help you safely fix what’s broken on your refrigerator.

How to replace a refrigerator temperature control board

How to replace a refrigerator temperature control board

If the temperature in your refrigerator doesn't match the temperature you set, the problem could be the temperature cont…

Repair time and Difficulty

 30 minutes or less
How to replace a refrigerator water valve

How to replace a refrigerator water valve

Replace the water valve that feeds water to the ice maker and water dispenser if it no longer controls the flow of water…

Repair time and Difficulty

 15 minutes or less
How to clean refrigerator condenser coils

How to clean refrigerator condenser coils

Help your refrigerator run more efficiently by cleaning the condenser coils. It's easy and takes just a few minutes.…

Repair time and Difficulty

 15 minutes or less

Effective articles & videos to help repair your refrigerators

Use the advice and tips in these articles and videos to get the most out of your refrigerator.

How to Replace the Water Filter in a Universal/Multiflex Refrigerator

How to Replace the Water Filter in a Universal/Multiflex Refrigerator

Learn how easy replacing the water filter in a Universal/Multiflex refrigerator is.…

How to Replace the Water Filter in a KitchenAid Refrigerator

How to Replace the Water Filter in a KitchenAid Refrigerator

Discover how easy it is to replace the water filter in your KitchenAid refrigerator.…

Troubleshooting a refrigerator not cooling video

Troubleshooting a refrigerator not cooling video

Learn what to check if the inside of your fridge is wayyyy too warm.…

Parts & More

Automotive
Cooktop
Dryer
Electric Range
Garage Door Opener
Gas Chainsaw
Microwave
Parts
Range
Refrigerator
Sewing Machine
Top-Mount Refrigerator
Treadmill
Wet/Dry Vacuum