




What is the most common problem with GE dishwashers?
The most common problems we see on GE dishwashers like model GDT535PYV6FS are not draining, leaking, and not starting or stopping mid-cycle. In many cases, the fix is basic maintenance (filter cleaning, clearing a drain restriction) or correcting a door-latch or power issue.
Most common issues (and what they usually point to)
- Not draining: clogged filter, blocked drain hose/air gap, drain pump obstruction
- Leaking: door gasket wear, loose hose connections, over-sudsing from wrong detergent
- Won’t start: door not latching, control lock enabled, power supply problem
- Stops mid-cycle: float/overfill protection triggered, heating or control fault, intermittent latch
- Poor cleaning: clogged spray arms, low water fill, filter packed with debris
Quick checks we recommend first
- Reset power: turn the breaker off for 1 minute, then back on.
- Check the door latch: close the door firmly; confirm nothing is blocking the latch area.
- Clean the filter area: remove debris and rinse the filter and sump screen.
- Inspect the drain path: look for kinks in the drain hose and clogs at the sink connection.
- Use the right detergent: dishwasher detergent only; avoid hand soap and excess rinse aid.
Symptom-to-fix guide
| Symptom | Most likely cause | Best first action |
|---|---|---|
| Water left in tub | Drain restriction or clogged filter | Clean filter; check hose/air gap |
| Water on floor | Door seal or loose connection | Inspect gasket; check inlet/drain hoses |
| Has power but won’t run | Door latch or control setting | Re-latch door; check control lock |
| Dishes gritty | Filter or spray arm blockage | Clean filter; clear spray arm holes |
Why it matters
Drain clogs and small leaks can quickly lead to odor, poor wash results, and repeated cycle failures. Catching the cause early usually prevents bigger repairs like replacing a drain pump or control.
When to use error codes
If your GDT535PYV6FS shows a code or beeps in a pattern, use our code list to narrow the failure to a specific system (drain, fill, heating, or control): GE electronic dishwasher error codes.
Last updated: February 2026
What is the average lifespan of a GE dishwasher?
A GE dishwasher typically lasts 10 to 12 years. For your GE GDT535PYV6FS, lifespan depends most on water quality, how often it runs, and routine care like cleaning the filter area and keeping the door seal clean.
Typical lifespan range (what to expect)
Most GE dishwashers fall into this range with normal household use:
| Usage and care level | Typical lifespan | What usually ends it |
|---|---|---|
| Light use, good maintenance | 12 to 15 years | Rack wear, minor leaks, pump noise |
| Average use, basic maintenance | 10 to 12 years | Drain/pump issues, heating/drying problems |
| Heavy use, little maintenance | 8 to 10 years | Motor/pump failure, repeated leaks |
How to help your GDT535PYV6FS reach the high end of the range
- Clean the filter area and sump regularly (food buildup strains the wash pump).
- Run hot water at the sink before starting a cycle (improves wash performance).
- Use the right detergent amount; too much can cause residue and odor.
- Keep spray arms clear of labels, seeds, and broken glass.
- Wipe the door gasket and bottom edge of the door to prevent slow leaks.
- Avoid overloading; blocked spray patterns shorten component life.
Signs your dishwasher is nearing end of life
- Dishes stay gritty or cloudy even after cleaning the filter and spray arms.
- Water remains in the tub after cycles (intermittent or frequent drain failures).
- Burning smell, repeated tripped breaker, or control panel resets.
- New leaks from the door area or underneath the tub.
- Loud grinding or buzzing that returns soon after cleaning debris.
Why it matters
Knowing the average lifespan helps you decide whether to troubleshoot a symptom (like not draining or not starting) or plan for a larger repair. When problems repeat, checking error codes can quickly point to the system involved.
For code-related issues on GE models, use GE electronic dishwasher error codes.
Last updated: February 2026
What are the commonly replaced parts in a dishwasher?
In a GE dishwasher like model GDT535PYV6FS, the most commonly replaced parts are the ones that handle water flow, heating, sealing, and washing action. We typically see wear from heat, detergent, hard water, and clogs, so parts like pumps, valves, spray arms, and door seals are frequent fixes.
Most commonly replaced dishwasher parts
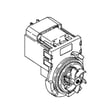
- Circulation pump and motor: drives water through the spray arms; failures cause poor cleaning or unusual noise.
- Drain pump: removes water; failures cause standing water at the end of the cycle.
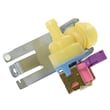
- Water inlet valve: controls fill; failures cause no fill, slow fill, or overfilling.
- Heating element (or heater circuit components): supports drying and water heating; failures cause poor drying or cooler washes.
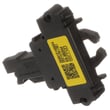
- Door latch and door switch: confirms the door is closed; failures cause a dishwasher that will not start.
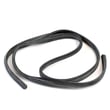
- Door gasket and bottom door seal: prevents leaks; wear causes drips at the corners or along the bottom.
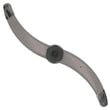
- Spray arms and filters: clogs and cracks reduce wash pressure and cleaning performance.
Quick symptom-to-part guide
| Symptom | Most likely parts to check first | What we usually find |
|---|---|---|
| Not draining | Drain pump, drain hose, filter | Debris blockage or weak pump |
| Not cleaning | Circulation pump, spray arms, filter | Clogged spray holes, low pressure |
| Leaking | Door gasket, bottom seal, float/overfill parts | Seal wear, misalignment, suds |
| Will not start | Door latch/switch, control, user interface | Latch not engaging, keypad issues |
| Not drying | Heater circuit, vent, rinse aid system | Heater not heating, vent stuck |
What to check before replacing parts
- Clean the filter area and clear debris from the sump.
- Inspect spray arm holes for mineral buildup; rinse and clear obstructions.
- Confirm the sink drain and garbage disposer knockout (if present) are not restricting flow.
- Use the right detergent and avoid hand-soap contamination (suds can cause leaks and poor washing).
- If the dishwasher shows an error, match it to the code list before buying parts using GE electronic dishwasher error codes.
Why it matters
Replacing the correct part first saves time and prevents repeat failures. Many “bad part” symptoms are caused by clogs, loading issues, or a restricted drain path, so a quick inspection often narrows the repair to one component.
Last updated: February 2026
Can I replace dishwasher parts myself?
Yes, for the GE GDT535PYV6FS dishwasher, we replace many common parts ourselves with basic tools, especially cleaning and wear items. For electrical diagnostics, leak-related repairs, or anything involving wiring and live voltage, we use a qualified technician.
Good DIY repairs vs. better left to a pro
Usually DIY-friendly (most homeowners):
- Filter and sump area cleaning (clogs, odors, poor wash)
- Spray arm cleaning or replacement
- Dishrack roller and rack track issues
- Door gasket inspection and replacement
- Drain hose routing checks (kinks, high loop)
Often better for a technician (higher risk):
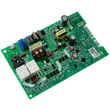
- Control board, user interface, or wiring harness work
- Water inlet valve replacement if plumbing access is tight
- Circulation pump or motor replacement
- Leak troubleshooting that requires pulling the dishwasher
Safety checklist before you start
- Turn off power at the breaker (do not rely on the door switch)
- Shut off the dishwasher water supply valve
- Protect the floor; keep towels ready for residual water
- Take photos of wire and hose routing before disconnecting anything
- Run a short test cycle after reassembly and watch for leaks
Quick “is this worth DIY?” guide
| What you’re fixing | Tools typically needed | DIY difficulty |
|---|---|---|
| Not cleaning well | Screwdriver, brush | Easy to medium |
| Not draining | Pliers, bucket, brush | Medium |
| Won’t start | Multimeter, driver | Medium to hard |
| Leaking | Driver, flashlight | Medium to hard |
Why it matters
Dishwashers combine water, heat, and electricity in a tight space. Choosing the right repair level helps prevent repeat failures, nuisance leaks, and damage to the control area.
Helpful troubleshooting resources
- Use GE electronic dishwasher error codes to interpret beeps, blinking lights, and fault codes before buying parts.
- If the unit has power but won’t run, follow dishwasher wont start video to check door latch engagement, cycle selection, and common no-start causes.
Last updated: February 2026





