Get free shipping on your order, with any water filter subscription. Find my filter

Open Hamburger Menu
Sears Parts Direct
Tips to find your model number

KitchenAid KEMC307KSS05 electric built-in oven with microwave Parts

Here are the diagrams and repair parts for KitchenAid KEMC307KSS05 electric built-in oven with microwave, as well as links to manuals and error code tables, if available.

KitchenAid KEMC307KSS05 electric built-in oven with microwave
By Schematic
By Part
SELECT DIAGRAM
?

This is the number corresponding to the part on the diagram / schematic

Browse Parts for KEMC307KSS05 Electric Built-In Oven with Microwave

  • Microwave Door Interlock Switch for KitchenAid KEMC307KSS05 - Part W10211972

    Cabinet and stirrer parts diagram

    Microwave Door Interlock Switch

    Part #4375346

    Replaced by #W10211972

    Info Icon
    Manufacturer substitution
    This part replaces 4375346. Substitute parts can look different from the original.
    In Stock
    $36.30
    14% OFF Phone Price : $42.30Info Icon
    Minus Item
    Qty
    Plus Item
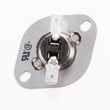
  • Whirlpool Wall Oven Temperature Sensor for KitchenAid KEMC307KSS05 - Part WPW10131825

    Oven parts diagram

    Wall Oven Temperature Sensor

    Part #4455636

    Replaced by #WPW10131825

    Info Icon
    Manufacturer substitution
    This part replaces 4455636. Substitute parts can look different from the original.
    In Stock
    $67.65
    8% OFF Phone Price : $73.65Info Icon
    Minus Item
    Qty
    Plus Item
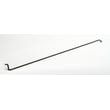
  • Microwave Door Torsion Spring for KitchenAid KEMC307KSS05 - Part WP4452395

    Cabinet and stirrer parts diagram

    Microwave Door Torsion Spring

    Part #4452395

    Replaced by #WP4452395

    Info Icon
    Manufacturer substitution
    This part replaces 4452395. Substitute parts can look different from the original.
    In Stock
    $86.13
    7% OFF Phone Price : $92.13Info Icon
    Minus Item
    Qty
    Plus Item
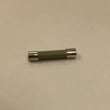
  • Wall Oven Microwave Fuse for KitchenAid KEMC307KSS05 - Part WP4375321

    Cabinet and stirrer parts diagram

    Fuse (black)

    Part #4375321

    Replaced by #WP4375321

    Info Icon
    Manufacturer substitution
    This part replaces 4375321. Substitute parts can look different from the original.
    In Stock
    $17.12
    10% OFF Phone Price : $19.12Info Icon
    Minus Item
    Qty
    Plus Item
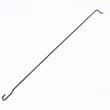
  • Microwave Door Torsion Spring for KitchenAid KEMC307KSS05 - Part WP4451009

    Microwave Door Torsion Spring

    Part #4451009

    Replaced by #WP4451009

    Info Icon
    Manufacturer substitution
    This part replaces 4451009. Substitute parts can look different from the original.
    In Stock
    $72.02
    8% OFF Phone Price : $78.02Info Icon
    Minus Item
    Qty
    Plus Item
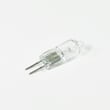
  • Microwave Light Bulb for KitchenAid KEMC307KSS05 - Part WPW10440740

    Cabinet and stirrer parts diagram

    Oven Baseless Lamp

    Part #4375348

    Replaced by #WPW10440740

    Info Icon
    Manufacturer substitution
    This part replaces 4375348. Substitute parts can look different from the original.
    In Stock
    $26.09
    19% OFF Phone Price : $32.09Info Icon
    Minus Item
    Qty
    Plus Item
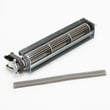
  • Whirlpool Wall Oven Cooling Fan for KitchenAid KEMC307KSS05 - Part WPW10016550

    Latch parts diagram

    Blower

    Part #6610168

    Replaced by #WPW10016550

    Info Icon
    Manufacturer substitution
    This part replaces 6610168. Substitute parts can look different from the original.
    In Stock
    $164.00
    7% OFF Phone Price : $176.00Info Icon
    Minus Item
    Qty
    Plus Item
  • Microwave Door Torsion Spring for KitchenAid KEMC307KSS05 - Part WP4452396

    Cabinet and stirrer parts diagram

    Microwave Door Torsion Spring

    Part #4452396

    Replaced by #WP4452396

    Info Icon
    Manufacturer substitution
    This part replaces 4452396. Substitute parts can look different from the original.
    In Stock
    $79.62
    7% OFF Phone Price : $85.62Info Icon
    Minus Item
    Qty
    Plus Item
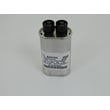
  • Microwave High-voltage Capacitor for KitchenAid KEMC307KSS05 - Part WP4375020

    Cabinet and stirrer parts diagram

    Microwave High-voltage Capacitor

    Part #4375020

    Replaced by #WP4375020

    Info Icon
    Manufacturer substitution
    This part replaces 4375020. Substitute parts can look different from the original.
    In Stock
    $143.25
    8% OFF Phone Price : $155.25Info Icon
    Minus Item
    Qty
    Plus Item
  • Microwave Door Interlock Switch for KitchenAid KEMC307KSS05 - Part W10727408

    Cabinet and stirrer parts diagram

    Mounting Bracket

    Part #4375336

    Replaced by #W10727408

    Info Icon
    Manufacturer substitution
    This part replaces 4375336. Substitute parts can look different from the original.
    In Stock
    $86.90
    6% OFF Phone Price : $92.90Info Icon
    Minus Item
    Qty
    Plus Item

KitchenAid Electric Built-In Oven with Microwave KEMC307KSS05 FAQs

For the KitchenAid KEMC307KSS05 wall oven/microwave combo, a power outage typically triggers a power-failure message (such as “PF id = 27” or “PF id = 30”). To reset normal operation, press LOWER OVEN CANCEL to clear the display, then reset the clock if needed using the steps in the KEMC307KSS05 owner's manual.

What you should see after power is restored

When power is first supplied, the control display(s) usually:

  • Light up for about 5 seconds
  • Show “PF id = 27” or “PF id = 30” to indicate a power failure
  • Return to normal once you clear the message

If you see “Err”, it usually means an invalid pad was pressed; press LOWER OVEN CANCEL and re-enter your selection.

Reset steps (control panel)

Use these steps to get the lower oven controls back to a ready state:

  • Press LOWER OVEN CANCEL once to clear the PF message
  • Wait a few seconds for the display to return to the time-of-day or blank (inactive) mode
  • Reset the clock if the time is wrong
  • Re-enter your cooking mode and press START within 5 seconds when prompted

Clock reset (time of day)

Task What to do
Set the clock Touch CLOCK SET•START, enter time with number pads, then touch CLOCK SET•START (or START)
Hide time of day Touch and hold CLOCK SET•START for 5 seconds
Show time of day again Touch CLOCK SET•START

Important notes that affect “reset” behavior

These situations can make it seem like the oven did not reset, even though it did:

  • Cooling fan keeps running: the fan may continue after you press LOWER OVEN CANCEL depending on oven temperature
  • Control Lock is on: when locked, only clock and timer pads work; unlock Control Lock before trying to bake
  • Sabbath Mode was enabled: Sabbath Mode can remain on after a power failure if it was set before the outage; turn it off by pressing and holding the 6 pad for about 5 seconds

Why it matters

Clearing the PF message and resetting the clock restores normal control logic for timed cooking, delay start, and accurate temperature cycles. It also helps you avoid canceled settings if START is not pressed within the allowed time window.

Last updated: January 2026

On the KitchenAid KEMC307KSS05 wall oven/microwave combo, the PF code means the control detected a power failure or the oven was powered up for the first time. Clear it by pressing LOWER OVEN CANCEL, then reset the clock if needed (see the KEMC307KSS05 owner's manual).

What you should do when PF appears

  • Press LOWER OVEN CANCEL to clear the message.
  • Check whether the time of day is correct; reset the clock if it is flashing or incorrect.
  • If PF returns repeatedly, check for a loose power cord connection (if accessible) or a tripped breaker.
  • If the oven was baking when power dropped, verify food safety and restart cooking as needed.

What you might see on the display

On this model, PF can appear with an ID number.

Display message What it means What to do
PF Power interruption or first power-up Press LOWER OVEN CANCEL
PF ID = 27 Power interruption or first power-up Press LOWER OVEN CANCEL, reset clock
PF ID = 30 Power interruption or first power-up Press LOWER OVEN CANCEL, reset clock

Why it matters

PF is a normal “power was interrupted” indicator, but it can also be a clue that the oven is losing power intermittently. Clearing the code and confirming stable power helps prevent interrupted cooking, incorrect timed cooking, and clock or timer issues.

Last updated: January 2026

A KitchenAid built-in oven typically lasts 15 years with normal household use and basic maintenance. For the KitchenAid KEMC307KSS05 wall oven and microwave combo, keeping vents clear, using correct cookware, and fixing heating or door issues early helps you reach that expected lifespan.

Typical lifespan and what affects it

Most electric wall ovens reach about 15 years; heavy use, high-heat cooking, and skipped maintenance can shorten that.

  • Usage frequency: daily baking and broiling wears elements and controls faster
  • Heat management: blocked cooling airflow increases stress on electronics
  • Door seal and hinges: heat loss forces longer run times
  • Power quality: surges can damage the touch control system
  • Cleaning habits: harsh cleaners and moisture can damage finishes and wiring

Quick maintenance checklist (high impact)

Use these habits to get the full service life from your KEMC307KSS05:

  • Keep the oven and microwave cooling vents unobstructed
  • Avoid slamming the oven door; protect hinges and glass
  • Wipe spills after the oven cools to reduce smoke and overheating
  • If baking temps seem off, test and replace the temperature sensor if needed
  • Replace failed lights and worn parts promptly to prevent secondary damage

Common “end-of-life” symptoms vs. fixable problems

Many issues that feel like “the oven is dying” are normal wear parts.

Symptom Common cause Often fixable with
Oven not heating or weak heat Failed bake element Bake element 4451175
Food overcooks or undercooks Temperature sensor drifting Wall oven temperature sensor WPW10131825
Microwave runs then stops or will not start Door interlock issue Microwave door interlock switch W10211972
Unit goes dead intermittently Blown fuse or overheating Fuse (black) WP4375321

Why it matters

Knowing the 15-year typical life expectancy helps you decide whether to repair or replace. If your KEMC307KSS05 is near that age, focusing on high-wear parts (elements, sensors, door components) usually restores performance at a reasonable cost.

For model-specific care and operating guidance, follow the KEMC307KSS05 owner's manual.

Last updated: January 2026

Symptoms for gas chainsaws

Choose a symptom to see related chainsaw repairs.

Main causes: bad gas, engine needs tune up, cracked fuel lines, dirty carburetor…

Main causes: cracked fuel lines, leaky carburetor seals, damaged fuel tank cap, cracked fuel tank…

Main causes: stale gasoline, cracked fuel lines, dirty carburetor, damaged spark plug, worn piston rings…

Repair guides for gas chainsaws

These step-by-step repair guides will help you safely fix what’s broken on your chainsaw.

How to replace chainsaw fuel lines

How to replace chainsaw fuel lines

The fuel line on a chainsaw becomes brittle over time and can crack. Replacing it doesn't require a lot of DYI experienc…

Repair time and Difficulty

 15 minutes or less
How to rebuild a chainsaw carburetor

How to rebuild a chainsaw carburetor

If your chainsaw isn't running well, a dirty carburetor could be the problem. You can take it apart, clean it and rebuil…

Repair time and Difficulty

 15 minutes or less
How to replace a chainsaw carburetor

How to replace a chainsaw carburetor

If the engine won't start even though there's fuel in the chainsaw, the carburetor could be the problem. Sometimes, it's…

Repair time and Difficulty

 15 minutes or less

Articles and videos for gas chainsaws

Use the advice and tips in these articles and videos to get the most out of your chainsaw.

When to replace a chainsaw bar

When to replace a chainsaw bar

Chainsaw bar wear leads to crooked cuts and chain damage. Learn the signs of wear and how to choose the right replacemen…

Top 10 electric lawn and garden tools

Top 10 electric lawn and garden tools

Learn about the top 10 must-have electric lawn & garden tools for 2023…

5 tips for a hard-to-start chainsaw

5 tips for a hard-to-start chainsaw

These tips may help you get your hard-to-start chainsaw running.…

Parts & More

Blender
Central Air Conditioner
Dishwasher
Drill Press
Dryer
Electric Range
Generator
Jointer/Planer
Microwave
Power Drill
Range
Refrigerator
Snowblower
Top-Mount Refrigerator
Washer
Wet/Dry Vacuum