
What is the 4 inch rule for drill press?
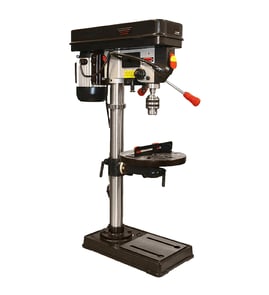
The 4-inch rule for a drill press means we keep our hands and fingers at least 4 inches away from the rotating drill bit, chuck, and spindle while the Craftsman 11324520 drill press is running. This reduces the risk of contact injuries and helps keep the work controlled.
How to follow the 4-inch rule (practical steps)
- Clamp the workpiece to the table; do not hold small parts by hand.
- Use a drill press vise, V-block, or hold-down clamp for round stock.
- Use a scrap backer board under the work to reduce grabbing and tear-out.
- Stop the drill press before clearing chips; use a brush, not your fingers.
- Remove the chuck key immediately after tightening the bit.
- Tie back long hair and avoid loose sleeves, gloves, and jewelry near rotation.
What to do when the hole location is close to your fingers
When the hole is too close to safely keep 4 inches of clearance, change the setup instead of “cheating” the rule.
| Situation | Safer setup | Why it helps |
|---|---|---|
| Small part (short, narrow, or thin) | Clamp it in a drill press vise | Keeps hands away from the bit |
| Round stock | Use a V-block or V-jaws in a vise | Prevents spinning like a propeller |
| Awkward angle | Use a jig or fixture, then clamp the jig | Stabilizes the work and your feed |
| Chip buildup | Stop machine; brush chips away | Avoids cuts and entanglement |
Why it matters
A drill press can grab the workpiece or pull material upward into the bit. Keeping a 4-inch buffer, plus clamping and controlled feed pressure, prevents sudden rotation, kickback, and hand contact.
Parts and maintenance notes that support safe drilling
Even without model-specific part callouts for the Craftsman 11324520, these checks improve control and safety:
- Confirm the chuck is seated and the bit is straight (reduces wobble).
- Check belt tension and pulley alignment (reduces slipping and sudden grabs).
- Verify the table lock and depth stop hold firmly (prevents shifting).
For replacement parts and diagrams for the Craftsman 11324520, start with the model parts list, or search by model number on Sears PartsDirect.
Last updated: February 2026
What is a good horsepower for a drill press?
A good horsepower (HP) range for a drill press depends on what you drill most often. For typical home shop work on a Craftsman 11324520 heavy-duty drill press, 1/2 HP handles most wood and light metal drilling; 3/4 HP to 1 HP is the better target for larger bits, thicker stock, and frequent metalwork.
Quick HP recommendations by job type
- 1/3 to 1/2 HP: wood, plastics, small twist bits, occasional light steel
- 3/4 HP: frequent drilling, larger Forstner bits, hole saws, thicker hardwoods
- 1 HP: regular metal drilling, larger diameter holes, higher duty cycle (less bogging)
- More than 1 HP: specialty or production-style use; usually less important than speed control and rigidity
What matters as much as horsepower
Horsepower helps prevent stalling, but drill press performance also depends on speed range, belt condition, and how rigidly the work is held.
- Speed control: low RPM for large bits and metal; higher RPM for small bits
- Quill travel (stroke): longer travel reduces repositioning on thicker work
- Chuck and spindle condition: runout causes wobble and oversized holes
- Belts and pulleys: slipping belts mimic “low power”
- Workholding: a vise and clamps reduce bit grabbing and motor strain
HP vs. common drilling tasks (rule-of-thumb)
| Task | Typical bit size | HP that works well | Notes |
|---|---|---|---|
| Wood drilling | 1/8 to 3/8 in. | 1/3 to 1/2 HP | Most home projects |
| Forstner bits | 1 to 2 in. | 3/4 to 1 HP | Use low speed |
| Hole saws | 1-1/4 to 3 in. | 3/4 to 1 HP | Clamp work securely |
| Mild steel | 1/8 to 1/2 in. | 1/2 to 1 HP | Cutting oil, slow RPM |
Why it matters
Choosing enough HP reduces stalling, belt slip, and overheating, especially when drilling metal or using large diameter bits. That also improves hole quality and helps protect the motor, chuck, and spindle bearings over time.
Finding parts and model-specific diagrams
For Craftsman 11324520 drill press parts, use the parts list for this model; for broader search by model number or category, shop on Sears PartsDirect.
Last updated: February 2026
What is the difference between a drill press and a pedestal drill?
A drill press and a pedestal drill are the same type of tool in most shops; “pedestal drill” usually describes a drill press mounted on a floor-standing pedestal, while “drill press” is the broader term that also includes bench-mounted versions. For Craftsman model 11324520, the key difference is the mounting style, not how the drilling mechanism works.
Quick definitions (what people mean)
- Drill press: General term for a stationary drill with a column, adjustable table, and a lever-fed quill/spindle.
- Pedestal drill: A drill press on a floor stand/pedestal (often called a floor drill press).
- Bench drill press: A drill press designed to bolt to a workbench.
- Pillar drill: Another common name for a drill press (regional terminology).
What actually changes between “bench” and “pedestal” styles
Most performance differences come from size and setup, not the name.
- Footprint and height: Pedestal units take floor space but give more vertical clearance.
- Stability: Pedestal bases are heavier; both styles should be bolted down for accuracy.
- Work capacity: Floor models often handle taller workpieces and larger swing.
- Typical use: Bench models suit smaller parts; pedestal models suit larger stock and repeated drilling.
Comparison table
| Feature | Bench drill press | Pedestal (floor) drill press |
|---|---|---|
| Mounting | Bolts to bench | Bolts to floor/base |
| Best for | Small to medium work | Medium to large work |
| Stability | Depends on bench rigidity | Typically higher due to heavier base |
| Setup focus | Bench height, lighting, clamping | Floor leveling, anchoring, clearance |
Why it matters for parts and repairs
When ordering parts for a Craftsman drill press like 11324520, the “pedestal vs drill press” wording rarely changes the part you need. What matters is the exact model number, plus the specific assembly (motor, pulleys, belts, quill, chuck, switch, or table lift).
- Use the model number 11324520 to match diagrams and hardware
- Identify the failed system (drive, spindle/quill, electrical, table support)
- Confirm mounting hardware needs (bench bolts vs floor anchors)
For parts lookup and model-based searching, start with the parts list for this model and expand your search on Sears PartsDirect.
Last updated: February 2026
What to look for in a good drill press?
A good drill press gives you accurate, repeatable holes with enough power and speed control for your materials. For a Craftsman drill press like model 11324520, focus on quill travel, a wide speed range, a solid depth stop, and a rigid table and column so the bit does not wander under load.
Key features that matter most
- Quill travel: More travel means fewer setup changes; 3-1/2 inches or more is a strong target for general shop work.
- Speed range and changes: Look for a low minimum RPM for large bits and metal, plus higher speeds for small bits and clean wood drilling.
- Depth stop design: Choose a stop you can set quickly and repeat accurately (locking nut style is fast; turret style is also effective).
- Runout and rigidity: A tight spindle and sturdy head/column reduce wobble and improve hole accuracy.
- Table adjustability: Easy height changes, tilt, and a reliable table lock help with angled drilling and larger workpieces.
- Chuck quality and capacity: A good chuck grips small bits well and stays centered.
Bench vs. floor drill press: quick comparison
| Feature | Bench drill press | Floor drill press |
|---|---|---|
| Footprint | Smaller | Larger |
| Typical stability | Good (best when bolted down) | Excellent |
| Work height range | Limited by bench/cabinet | Wider range |
| Best for | Small to medium projects | Larger stock, frequent drilling |
Setup checks we recommend before you buy or tune up
- Verify the table is square to the bit (use a small machinist square).
- Check for spindle play by pushing the chuck side-to-side with power unplugged.
- Confirm the belt and pulleys run smoothly across speeds (no excessive vibration).
- Make sure the depth stop repeats the same hole depth across multiple test holes.
- Plan to bolt the base to a bench or floor for best accuracy.
Why it matters
Most drilling problems (oversized holes, chatter, broken bits, wandering starts) come from limited speed control, poor rigidity, or inconsistent depth stops. Prioritizing quill travel, speed range, and stiffness gives cleaner holes and safer operation.
If you are shopping for parts or accessories by model number, we recommend starting with the model listing for 11324520, then expanding your search on Sears PartsDirect.
Last updated: February 2026