 Owner’s manual
 Error Codes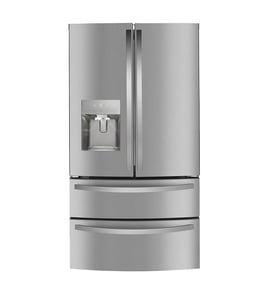




Can I replace fridge parts myself?
Yes. With a Whirlpool EL88TRRWS03 refrigerator, we can safely replace many “access” parts ourselves (shelves, bins, light bulb, some fans) as long as we disconnect power first and reinstall all panels before running the fridge again; follow the EL88TRRWS03 owner's manual for the exact steps and safety rules.
These tasks are typically straightforward and match the procedures shown in the manual for removing shelves, drawers, and bins:
- Remove and reinstall refrigerator shelves and crisper drawers
- Remove and reinstall door bins
- Clean condenser coils and the defrost pan (after removing the base grille)
- Replace the interior light bulb with the same size, shape, and wattage
- Replace certain airflow parts if you are comfortable removing panels, such as the refrigerator evaporator fan WPW10236142 or refrigerator evaporator fan blade WP2169142
We recommend professional service for repairs that involve refrigerant handling, complex electrical diagnosis, or major disassembly.
- Sealed system work (compressor, refrigerant lines, evaporator)
- Compressor replacement or start device diagnosis
- Persistent cooling failures after basic airflow and cleaning checks
- Wiring harness repairs inside insulated cabinet areas
The EL88TRRWS03 manual calls out key precautions that matter for DIY repairs.
- Unplug the refrigerator (disconnect power before servicing)
- Use a grounded 3-prong outlet; do not use an adapter or extension cord
- Support doors during hinge work; do not rely on door magnets to hold the door
- Replace all parts and panels before operating
- Use nonflammable cleaner and avoid harsh/abrasive chemicals on plastic and gaskets
| Repair type | Typical DIY? | Why |
|---|---|---|
| Shelves, bins, drawers | Yes | Tool-light, low risk |
| Light bulb | Yes | Simple access after unplugging |
| Condenser coil cleaning | Yes | Prevents overheating and poor cooling |
| Evaporator fan/blade | Sometimes | Requires panel removal and careful reassembly |
| Compressor/sealed system | No | Specialized tools and refrigerant handling |
DIY repairs can save time and money, but refrigeration and electrical hazards are real. Following the manual’s “disconnect power before servicing” and “replace all parts and panels before operating” guidance helps prevent shocks, airflow problems, and repeat failures.
Last updated: February 2026
How to remove Whirlpool filter without arm on door?
Whirlpool model EL88TRRWS03 is an all-refrigerator style that typically does not use a door-mounted water filter or a filter release arm. If you are trying to remove a “filter,” it is usually either an air filter (inside the fresh food compartment) or a base grille/toe grille piece at the bottom front; use the steps below to identify what you have and remove it safely.
Use these quick checks before you pry on anything:
- If it is a cylindrical cartridge connected to water tubing, that is a water filter (common on dispenser models).
- If it is a small vented box or cartridge inside the refrigerator, that is usually an air filter.
- If it is a long plastic panel at the bottom front, that is the base grille (toe grille).
- If there is no water dispenser and no ice maker, a water filter is normally not part of the design.
For model-specific component locations, use the EL88TRRWS03 manual.
| What you have | Where it’s usually found | How to remove it |
|---|---|---|
| Air filter | Upper rear wall or side wall | Open the cover, slide the filter out, install the new one in the same orientation |
| Base grille (toe grille) | Bottom front of cabinet | Pull the grille straight off the retaining clips, then reinstall by pressing evenly |
| Inline water filter (rare on this style) | Behind unit or under sink | Shut off water, relieve pressure, then follow the filter’s arrow/lock direction |
- Unplug the refrigerator before working near wiring or fans.
- Use a dry towel for grip; pull straight rather than twisting plastic covers.
- Warm the area slightly with room-temperature air if a cover feels brittle.
- If clips will not release, stop and confirm the fastener style in the manual.
Forcing the wrong part can crack a cover, break retaining clips, or damage door trim. Correct identification prevents unnecessary parts replacement and keeps the cabinet sealed properly.
Last updated: February 2026
What are the most commonly replaced parts in a refrigerator?
In a Whirlpool refrigerator like model EL88TRRWS03, the most commonly replaced parts are the ones that wear out from daily use or get affected by airflow, frost, and door sealing. In our experience, that usually means door gaskets, thermostats/temperature controls, fan parts, and defrost components; compressors are replaced less often.
These are the parts we see replaced most often across refrigerators (including Whirlpool models):
- Door gaskets (seals): stop warm air leaks that cause sweating, frost, and long run times
- Temperature control parts: thermostats or sensors that regulate cooling (for this model, a common control part is the refrigerator temperature control thermostat WPW10424991)
- Evaporator fan parts: move cold air through the fresh food section (examples for this model include the refrigerator evaporator fan WPW10236142 and refrigerator evaporator fan blade WP2169142)
- Defrost system parts: timer, bi-metal thermostat, heater, or fuse that prevent ice buildup on the evaporator
- Light bulbs and door switches: interior light and “door open” functions (a common switch listing for this model is Switch W11384469)
| Symptom | What it often points to | What to check first |
|---|---|---|
| Fridge warm, freezer cold | Evaporator fan or airflow restriction | Listen for fan noise; check for frost buildup |
| Heavy frost on back wall/freezer | Defrost system issue | Look for ice on evaporator cover; check defrost timer/bi-metal |
| Moisture or sweating around doors | Door gasket leak or door alignment | Inspect gasket for gaps; clean and warm-shape gasket |
| Runs constantly, temps drift | Temperature control issue or dirty coils | Verify control setting; clean condenser coils |
Replacing the right “high-wear” part early can prevent food spoilage and reduce energy use. Your EL88TRRWS03 manual also calls out routine care like cleaning condenser coils regularly (sometimes as often as every other month) to help the refrigerator run efficiently; see the EL88TRRWS03 owner’s manual.
- Keep condenser coils clean and dust-free
- Minimize door-open time and avoid overpacking vents
- Keep gaskets clean so they seal evenly
- Set temperatures to recommended ranges (colder settings do not cool faster)
- Disconnect power before servicing and reinstall all panels before operating
Last updated: February 2026








