

How good are Hotpoint dryers?
Hotpoint dryers like model HTX26EASW0WW are good, no-frills electric dryers: they are built for straightforward drying, simple controls, and solid day-to-day reliability at a budget-friendly price. They are a strong choice when you want basic performance and easy maintenance over premium features.
What you can expect from a Hotpoint electric dryer
- Simple, proven design (fewer “extras” to troubleshoot)
- Good drying performance for typical mixed loads when airflow is strong
- Easy routine upkeep, especially lint removal and vent cleaning
- More noticeable operating noise than many premium dryers (common on value models)
- Longer dry times if the vent is restricted or the lint screen is clogged
Quick performance checklist (what affects “how good” it feels)
A dryer’s real-world performance is usually about airflow and heat control. For HTX26EASW0WW, check these first:
- Clean the lint screen every load; replace a damaged screen such as the g.e. dryer lint screen WE03X23881
- Confirm the drum tumbles smoothly; a worn belt like the g.e. dryer drum belt WE03X29897 can slip and reduce tumbling
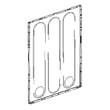
- If it runs but does not heat, the heating circuit parts are common suspects, including the dryer heating element WE11M10001
- If it overheats or shuts down, inspect thermostats like the dryer high-limit thermostat WE04X26139
- If it will not start, check the door switch and start circuit (for example, the dryer door switch WE04X28977)
Common “good vs not so good” symptoms
| What you notice | Most common cause | What to check first |
|---|---|---|
| Takes too long to dry | Restricted venting or lint buildup | Vent path, lint screen, outside hood |
| Runs but no heat | Heating circuit issue | Heating element, thermostats, wiring |
| Loud squeal or thump | Wear items in drum drive | Belt, idler, glides, drum support |
| Will not start | Door/start circuit problem | Door switch, push-to-start switch |
Why it matters
Hotpoint dryers earn their reputation as “workhorse” machines when airflow is correct and wear parts are kept up. A clean vent and a healthy belt, idler, and lint screen do more for drying speed, safety, and energy use than almost any feature upgrade.
For airflow and dry-time tips, use our dryer takes a long time to dry guide.
Last updated: February 2026
How to remove top of Hotpoint tumble dryer?
On the Hotpoint HTX26EASW0WW electric dryer, the top panel typically comes off after you remove the rear mounting screws and then slide the top back slightly to release the front retaining tabs. Unplug the dryer first so you can work safely around wiring and sharp edges.
Steps to remove the top panel
- Unplug the dryer (or switch off the breaker) and pull it forward for access.
- Remove the screws along the back edge that secure the top panel.
- Slide the top panel back about 1 to 2 inches to disengage the front clips.
- Lift the rear of the top panel up, then lift it off.
- Set the panel aside on a protected surface to avoid bending it.
What you may need
| Item | Why it helps |
|---|---|
| 1/4-inch nut driver or Phillips screwdriver | Removes common rear/top screws |
| Work gloves | Protects hands from sharp cabinet edges |
| Small container | Keeps screws from getting lost |
If the top will not slide back
- Check for hidden screws at the back corners and along the rear lip.
- Look for lint buildup or slight cabinet distortion that can bind the panel.
- Apply gentle upward pressure at the rear while sliding back (do not pry hard at the front).
- If you are opening the cabinet to reach the belt or drum, plan to inspect the g.e. dryer drum belt WE03X29897 while you are inside.
Why it matters
Removing the top correctly prevents broken retaining tabs, stripped screw holes, and cabinet misalignment. It also makes common repairs (belt, idler, drum support, door switch) faster and helps the dryer reassemble square so it runs quietly.
Last updated: February 2026
Is a Hotpoint dryer a GE?
Yes. Hotpoint is a brand within the GE Appliances family, so a Hotpoint electric dryer like model HTX26EASW0WW is built and supported under the GE Appliances umbrella.
What this means for parts and repairs
When you’re shopping parts for a Hotpoint dryer, many components are shared with GE-designed platforms. For HTX26EASW0WW, we recommend matching parts by model number and part ID to ensure correct fit.
- Use your full model number (HTX26EASW0WW) when searching parts.
- Match the part ID exactly, not just a description.
- If your dryer won’t tumble, start with the belt and idler system.
- If your dryer won’t heat, focus on the heating circuit parts (element, thermostats).
- If your dryer won’t start, check door switch and start switch first.
Common GE-family parts you may see on this model
Here are examples of parts commonly replaced on HTX26EASW0WW:
| Symptom | Likely area | Example part for this model |
|---|---|---|
| Drum not turning | Drive system | G.e. dryer drum belt WE03X29897 |
| No heat | Heating circuit | Dryer heating element WE11M10001 |
| Won’t start | Start/door circuit | Dryer door switch WE04X28977 |
Why it matters
Knowing Hotpoint is part of the GE Appliances family helps set expectations for part numbering, design style, and troubleshooting approach. The most reliable way to get the right replacement is still to shop by the exact model number and confirm the exact part ID.
Last updated: February 2026
What are the common problems with Hotpoint dryers?
Common problems we see on Hotpoint electric dryers like model HTX26EASW0WW include no heat, long dry times, not starting, loud squealing or thumping, and timer or control issues. Many of these symptoms trace back to airflow restrictions, worn drum support parts, or failed heating and safety components.
Most common symptoms and what they usually mean
- Drum turns but no heat: heating circuit issue (element, heater assembly, thermostats) or power supply problem.
- Takes too long to dry: restricted venting, clogged lint path, or weak airflow.
- Won’t start: door switch, start switch, timer, or power problem.
- Squealing, scraping, thumping: worn belt, idler, drum glides, felt seal, or rear bearing.
- Timer won’t advance or cycles act odd: timer contacts or heat/airflow problems affecting cycle behavior.
Quick checks we recommend first (fast, high-impact)
- Clean the lint screen and confirm strong airflow at the outside vent hood.
- Inspect the vent duct for kinks, crushing, or heavy lint buildup.
- Verify the dryer is getting full power (electric dryers typically need 240V; a tripped breaker can leave you with 120V and no heat).
- Listen for belt slip or squeal during startup.
- Check that the door closes firmly and the door switch clicks.
Common parts that match these problems on HTX26EASW0WW
| Symptom | Likely part(s) | Example part anchor |
|---|---|---|
| No heat | Heating element, heater assembly, thermostats | Dryer heating element WE11M10001 |
| Won’t start | Door switch, push-to-start switch, timer | Dryer door switch WE04X28977 |
| Squeals or won’t tumble | Belt, idler pulley/assembly, drum glides | G.e. dryer drum belt WE03X29897 |
Why it matters
Heat and airflow problems do more than slow drying; they can overheat the dryer and repeatedly trip safety thermostats. Fixing venting first often prevents repeat failures of heating parts and improves drying performance.
Helpful DIY reading
For cleaning and airflow tips that prevent long dry times, use dryer takes a long time to dry.
Last updated: February 2026
What are the main parts of a dryer?
On the Hotpoint HTX26EASW0WW electric dryer, the main parts work together to tumble clothes, move heated air through the drum, and safely control temperature. The core systems are the drive (motor and belt), heat (heating element and thermostats), airflow (blower and venting), and controls (timer and switches).
Main dryer parts and what they do
- Drum: holds and tumbles the load.
- Drive system: motor turns the drum using a belt and idler pulley.
- Heating system (electric): heating element produces heat; thermostats regulate it.
- Airflow system: blower wheel moves air through the drum and out the exhaust vent.
- Lint filtration: lint screen captures lint before it enters the duct.
- Controls and safety switches: timer and door/start switches control operation.
Common parts you may replace on HTX26EASW0WW
These are some of the most frequently serviced components for this model:
| Symptom | Likely system | Example part for this model |
|---|---|---|
| Drum will not tumble | Drive | G.e. dryer drum belt WE03X29897 |
| Runs but no heat | Heating | Dryer heating element WE11M10001 |
| Overheats or shuts off on heat | Temperature safety | Dryer high-limit thermostat WE04X26139 |
| Will not start | Start/door circuit | Dryer door switch WE04X28977 |
| Takes too long to dry | Airflow/lint | G.e. dryer lint screen WE03X23881 |
Why it matters
Knowing the main parts helps you troubleshoot faster. For example, “no heat” points to the heating element or thermostats, while “won’t tumble” points to the belt, idler, or motor. Airflow issues (lint screen, ducting) often cause long dry times and overheating.
Quick troubleshooting tip
Before replacing parts, we recommend checking these basics:
- Clean the lint screen and confirm it is seated correctly.
- Inspect the vent path for kinks, crushing, or heavy lint buildup.
- Verify the dryer is getting full power (electric dryers typically need 240V to heat).
- Listen for motor hum, drum movement, and strong exhaust airflow.
For more background on components and how they work together, see what are the main parts of a clothes dryer.
Last updated: February 2026
What brand of dryer has the least problems?
Speed Queen has the fewest problems overall because its dryers are built with a simpler, commercial-style design that holds up for years. For mainstream home dryers, LG and Whirlpool typically deliver low service rates and strong owner satisfaction when you choose a basic model with fewer electronic features.
What to look for if you want fewer repairs
- Choose a simpler control panel (fewer sensors and “smart” features means fewer failure points).
- Prioritize strong airflow and easy venting; poor venting causes overheating and repeated thermostat failures.
- Pick a common platform with widely available parts and straightforward service access.
- Avoid chronic overloading; it wears the drum support system and belt faster.
- Keep up with lint and vent cleaning to protect the heater, thermostats, and motor.
Reliability quick comparison (typical)
| Brand tier | What it’s known for | Best fit for |
|---|---|---|
| Speed Queen | Maximum durability, simpler design | “Buy it once” longevity |
| LG / Whirlpool | Strong reliability in many consumer surveys | Feature-light, everyday households |
| GE / Maytag | Generally solid, broad service network | Balanced price and repairability |
Why it matters for your Hotpoint HTX26EASW0WW
Even the most reliable dryer brand will have problems if airflow is restricted or wear parts are ignored. On an electric dryer like Hotpoint model HTX26EASW0WW, the most common “problem” complaints (long dry times, overheating, squealing, no heat) often trace back to maintenance or normal-wear parts.
Common wear parts that drive “problem” reports
| Symptom | Often involved | Example part for this model |
|---|---|---|
| Drum not turning | Belt or idler issue | G.e. dryer drum belt WE03X29897 |
| No heat or weak heat | Heating circuit components | Dryer heating element WE11M10001 |
| Overheating | Airflow restriction or thermostat | Dryer high-limit thermostat WE04X26139 |
Practical steps to reduce problems (any brand)
- Clean the lint screen every load and wash it periodically to remove fabric softener film.
- Inspect and clean the vent path (dryer outlet to exterior hood) to keep drying times normal.
- Do not run the dryer with a crushed or extra-long vent run.
- If you hear squealing or thumping, address it early to prevent secondary damage.
For maintenance habits that prevent the most common dryer failures, use our how to clean and maintain your clothes dryer guide.
Last updated: February 2026
What is the lifespan of an electric dryer?
A Hotpoint electric dryer like model HTX26EASW0WW typically lasts 10 to 13 years. With consistent airflow maintenance (lint screen and venting) and prompt replacement of wear items, it’s common to reach 15 years of service.
What affects dryer lifespan the most
- Vent restriction (long runs, crushed duct, clogged hood) that overheats the heater and thermostats
- Lint buildup inside the cabinet or blower housing
- Overloading that strains the drum belt, idler, and motor
- High-heat cycles used constantly instead of mixed or timed drying
- Delayed repairs after squealing, thumping, or weak heat starts
Maintenance that adds years (simple, high impact)
- Clean the lint screen every load; replace a torn or warped screen such as the g.e. dryer lint screen WE03X23881.
- Inspect and clean the full vent path regularly; strong airflow prevents overheating and long dry times.
- Avoid overfilling; heavy loads accelerate wear on the belt and drum supports.
- If you hear squealing or the drum stops turning, address drive wear early (belt, idler, glides).
- Keep the area around the dryer clean so the motor and heater area do not ingest lint.
Common “end-of-life” symptoms and likely fixes
| Symptom | Most common cause | Typical repair direction |
|---|---|---|
| Drum won’t turn, motor runs | Broken/slipping belt | Replace belt and inspect idler |
| Long dry times | Vent restriction or lint blockage | Clean venting and internal lint |
| No heat | Heater or thermostat issue | Test heater and safety controls |
| Won’t start | Door switch or start switch | Test switches and timer circuit |
Why it matters
Most electric dryer failures are wear or airflow related, not “the dryer is worn out.” Keeping airflow strong and replacing inexpensive wear parts early helps protect higher-cost components like the heating system and motor.
Last updated: February 2026
Where can I find my Hotpoint dryer model number?
On your Hotpoint electric dryer model HTX26EASW0WW, the model number is typically on a label inside the dryer door opening, either on the door itself or on the front frame just behind the door. Use that exact model number when ordering parts and checking fit.
Where to look on the dryer
Check these common label locations first:
- Inside the door opening on the front frame (most common)
- On the inside face of the dryer door
- Along the door opening edge near the latch area
- On the cabinet opening near the top or bottom lip
- On the back panel (less common)
What the label looks like and what to write down
The label usually includes several identifiers. For parts lookup, we recommend recording:
- Model number (for this unit: HTX26EASW0WW)
- Serial number (helps with production variations)
- Electrical rating (volts/amps) if you are troubleshooting heat or power
Quick ID guide
| You see on the label | What it’s used for | Example |
|---|---|---|
| Model number | Correct parts list and diagrams | HTX26EASW0WW |
| Serial number | Version and production run details | (varies) |
| Electrical rating | Diagnosing power and heating issues | (varies) |
Why it matters
Hotpoint dryers often share similar-looking cabinets across multiple models, but parts like the belt, heater, timer, and door switch can vary by model. Using the exact model number helps ensure the right fit the first time.
If the label is worn or missing
If you cannot read the label, a common next step is to match parts by what you can identify on the machine. For example, if you are diagnosing a no-tumble issue, the g.e. dryer drum belt WE03X29897 is a frequent wear item on this model family.
Last updated: February 2026