 Owner’s manual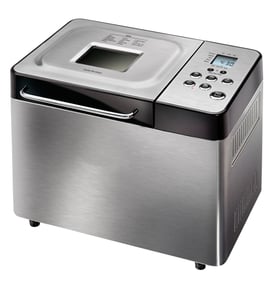
What is one drawback of using a bread machine?
One common drawback of using a bread machine like the Kenmore 10012934 is limited loaf shape control; most machines bake a tall, rectangular loaf, so it is harder to make artisan shapes (such as baguettes) compared with oven baking.
- Loaf size limits: bread makers have a maximum capacity; overloading can cause poor results and potential mess.
- Faster staling: homemade bread often stales sooner than packaged bread because it typically has fewer preservatives.
- Less crust customization: crust color and texture options are more limited than baking on a stone or in a Dutch oven.
- Cleanup and care: the bread pan and kneading blade need regular cleaning; the manual advises not using a dishwasher for the bread pan to protect the non-stick finish.
| Feature | Bread machine | Oven baking |
|---|---|---|
| Loaf shapes | Mostly one pan shape | Any shape you can form |
| Hands-on time | Low | Medium to high |
| Crust control | Limited | High |
| Batch size | Limited by machine capacity | Flexible |
Knowing the main tradeoff helps you decide when to use the bread maker for convenience (mix, knead, rise, bake) versus when to bake in the oven for shape, crust, and larger loaves. For best results and safe operation, follow the capacity, placement, and cleaning guidance in the 10012934 owner's manual.
Last updated: February 2026
How do I know what size my bread maker is?
Your Kenmore 10012934 bread maker size is best identified by its loaf capacity. This model lets you select 1.0 lb, 1.5 lb, or 2.0 lb loaf sizes on the control panel, so it is a 2-pound class bread machine. See the loaf size details in the owner's manual.
- Check the Loaf size button options on the display (1.0, 1.5, 2.0 lb).
- Look for recipes in the manual that list ingredients for 2 lb loaves (for example, French bread).
- Use the bread pan water-fill method (below) to estimate pan volume.
- Match your typical recipe yield to the loaf size settings (1 lb is small, 2 lb is large).
- If you are shopping for accessories, use model 10012934 to ensure fit.
| Loaf size setting | Typical use | What to expect |
|---|---|---|
| 1.0 lb | Small loaf | Best for 1 to 2 people; smaller slices |
| 1.5 lb | Medium loaf | Most common family size |
| 2.0 lb | Large loaf | Largest loaf this machine supports |
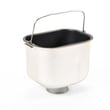
- Remove the bread pan and kneading blade.
- Fill the pan with water to the normal maximum fill level you would use for dough.
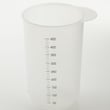
- Pour the water into a measuring cup.
- Use the result to estimate loaf size:
- About 4 cups water: roughly 1.0 lb class
- About 5 to 6 cups water: roughly 1.5 lb class
- About 7 to 8 cups water: roughly 2.0 lb class
Choosing the right loaf size helps the heating element bake evenly and prevents overflows during kneading and rising. It also keeps recipes aligned with the machine’s programmed cycles and timing.
Last updated: February 2026
Why did bread machines lose popularity?
Bread machines lost popularity mostly because many home bakers did not love the loaf texture or crust they got, and because buying fresh bread became easier and cheaper than making it at home. With a Kenmore 10012934 bread maker, good results depend heavily on ingredient order, pan handling, and consistent heat conditions (drafts and nearby heat sources can affect baking).
- Inconsistent results: small measuring errors can change rise, crumb, and crust.
- Texture expectations: many people prefer artisan-style crust and open crumb that a bread maker does not always produce.
- Convenience shifted: grocery and bakery options expanded, so fewer people wanted a countertop appliance.
- Cleanup and storage: the bread pan and kneading blade add steps, and the machine takes space.
- Environment sensitivity: drafts, direct sunlight, and heat from nearby appliances can affect internal temperature and outcomes.
We see the best improvement when you focus on the basics the machine depends on:
- Add ingredients with the bread pan removed to prevent spills onto the heater (spills can burn and smoke).
- Load ingredients in the order listed for the recipe/program.
- Keep steam vents uncovered and allow air space on all sides for airflow.
- Avoid placing the unit in direct sunlight, near hot appliances, or in a draft.
- If power blips, plug back in quickly; this model has short power-interruption protection (about 6 to 12 minutes).
| Issue you notice | Most common cause | What to do next |
|---|---|---|
| Dense or short loaf | Too much flour, old yeast, wrong order | Re-measure by weight if possible; follow ingredient order in the owner's manual |
| Burnt smell or smoke | Ingredients spilled into oven chamber | Always fill pan outside the machine; clean after cooling |
| Uneven bake | Drafts or heat nearby | Move to a stable, well-ventilated spot |
Bread makers are very consistent when the setup is consistent. Once you control measuring, ingredient order, and placement, the Kenmore 10012934 can produce reliable loaves and quick breads with minimal hands-on time.
Last updated: February 2026
What are common problems with bread makers?
Common bread maker problems usually come from ingredient ratios, yeast condition, water temperature, or heat and airflow around the machine. For the Kenmore 10012934 bread maker, the fastest way to prevent repeat issues is to follow the cycle, capacity, and temperature guidance in the 10012934 owner's manual.
- Dense or heavy loaf: dough did not rise enough.
- Loaf rises too high then collapses: dough is too wet or yeast is overactive.
- Crust too dark or too light: crust setting does not match your goal.
- Coarse texture: salt was missed or measured incorrectly.
- Overflow or “volcano” loaf: recipe exceeded the machine’s maximum capacity.
- Sticky loaf that won’t release: pan non-stick is compromised or pan was cleaned incorrectly.
- Keep the bread maker away from drafts, direct sunlight, and nearby hot appliances; temperature swings cause poor results.
- Do not overload the bread maker; exceeding capacity leads to overflow and uneven baking.
- If bread is too heavy, reduce flour in small steps (about 1 teaspoon at a time).
- If bread is too high, reduce yeast in small steps (about 1/4 teaspoon at a time).
- If bread is too light, choose a darker crust and do not open the lid during baking.
| Program type | Water temperature | Why it matters |
|---|---|---|
| Most breads | 80°F to 90°F | Supports steady yeast activity |
| Rapid/Rapid bake | 110°F to 120°F | Helps match faster rise timing |
Also: avoid delay-bake with perishable ingredients; it is not used for Fast Bake.
Most “machine problems” are consistency problems. Small changes in flour, yeast, water temperature, and kitchen airflow directly affect loaf height, crumb texture, and crust color.
Last updated: February 2026