



How to fix rubber seal on KitchenAid dishwasher?
On KitchenAid dishwasher model KDTE304LPA0, a “rubber seal” problem is usually a door gasket that has slipped out of its channel or a lower door seal that is torn or deformed. We fix it by cleaning the channel, pressing the seal in evenly end-to-end, then checking for a smooth, continuous contact when the door latches.
Quick fix steps (reseat the seal)
- Turn off power at the breaker and open the door.
- Wipe the gasket channel and the seal with warm water and mild dish soap; remove grit and detergent film.
- Start at the top center and press the gasket into the channel a few inches at a time; keep the “bulb” facing the tub.
- Work down both sides evenly; avoid stretching the gasket.
- Close and latch the door for several hours so the seal relaxes into position.
When you should replace the seal
Replace the seal if you see any of these:
- Tears, splits, or missing sections
- Permanent flattening that prevents contact with the tub
- Hard, brittle rubber that will not stay seated
- Leaks that continue after reseating and cleaning
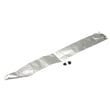
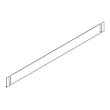
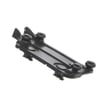
If the leak is coming from the bottom edge of the door, the part to focus on is the dishwasher door seal, lower W11664713.
What to check if it still leaks
| What you notice | Most likely cause | What to do next |
|---|---|---|
| Water at bottom center of door | Lower door seal not sealing | Inspect and replace lower seal if warped or torn |
| Water at corners/sides | Door gasket not seated evenly | Reseat gasket; confirm corners are fully in channel |
| Drips during fill | Overfilling or splash from spray | Check fill level symptoms; inspect inlet components |
| Leaks only with heavy loads | Items blocking door closure | Reload so nothing protrudes past racks |
Why it matters
A properly seated door seal prevents leaks that can damage flooring and also helps the dishwasher maintain correct wash pressure for better cleaning and drying.
Related help: dishwasher leaks video.
Last updated: February 2026
What are the commonly replaced parts in a dishwasher?
For KitchenAid dishwasher model KDTE304LPA0, the most commonly replaced parts are the water-fill and wash components (inlet valve, fill valve, spray arms), door sealing and latching parts, and drain components. These parts typically fail from normal wear, mineral buildup, clogs, or leaks.
Commonly replaced parts (and what they affect)
- Water fill: inlet and fill valves control how the dishwasher fills; failures cause no-fill, slow-fill, or overfill symptoms.
- Washing: spray arms and manifolds can clog or crack, leading to poor cleaning.
- Door closure and sealing: latches and seals wear, causing leaks or a unit that will not start.
- Draining: drain hoses can clog, kink, or leak, causing standing water.
- Racks and hardware: racks and screws get damaged, rust, or loosen over time.
Model-specific examples for KDTE304LPA0
These are examples of commonly replaced items available for this model:
- Fill valve assembly W11434044
- Water inlet W11535094
- Dishwasher manifold and spray arm assembly W11545334
- Latch assembly (includes switch) W11412299
- Hose-drain,e W11414944
Quick symptom-to-part guide
| Symptom | Most likely area | Example part for KDTE304LPA0 |
|---|---|---|
| Not filling or fills slowly | Water fill | Fill valve, water inlet |
| Poor cleaning, food left behind | Spray system | Manifold/spray arm, lower spray arm |
| Leaks at the door | Door sealing | Door seal, tub gasket |
| Will not start or stops when door moves | Door latch/switch | Latch assembly |
| Water left in bottom | Drain path | Drain hose |
Why it matters
Replacing the correct part first saves time and prevents repeat failures. For example, a “not cleaning” complaint is often a clogged spray arm or restricted feed tube, not a control problem.
Helpful troubleshooting resources
If you are diagnosing a fault code or a no-run condition, we use these guides often:
Last updated: February 2026
What's the average lifespan of a KitchenAid dishwasher?
A KitchenAid dishwasher like model KDTE304LPA0 typically lasts 10 to 14 years. Lifespan depends most on how often it runs, water quality, and whether key wear items (seals, inlet parts, and wash components) are kept clean and replaced when they start leaking or underperforming.
What affects dishwasher lifespan the most
- Hard water and scale buildup (can shorten valve, spray, and heating performance)
- Heavy daily use (more cycles equals more wear on the motor, seals, and latch)
- Drain and fill issues (standing water, slow fill, or repeated error conditions)
- Door sealing and leaks (water damage and corrosion accelerate failures)
- Maintenance habits (filter cleaning and periodic deep cleaning help a lot)
Maintenance that helps you reach the 10 to 14 year range
- Run a monthly cleaning cycle and wipe the door edges and gasket area.
- Keep spray paths clear; remove labels, seeds, and debris from the tub bottom.
- Use the right detergent amount for your water hardness to reduce residue.
- Fix small leaks early; a slow drip often becomes a bigger seal or door issue.
- If you see poor wash coverage, inspect the lower spray arm and manifold for clogs.
Common “end-of-life” symptoms and likely areas to check
| Symptom | What it often points to | Example model-matched part to inspect |
|---|---|---|
| Not filling or fills slowly | Water supply, inlet valve, inlet path | Fill valve assembly W11434044 |
| Leaks at the door | Door seal wear or misalignment | Dishwasher door seal, lower W11664713 |
| Poor cleaning, weak spray | Spray arm/manifold clogs or wear | Dishwasher manifold and spray arm assembly W11545334 |
| Won’t start or stops mid-cycle | Door latch/switch not proving closed | Latch assembly (includes switch) W11412299 |
Why it matters
Knowing the typical lifespan helps you decide whether to repair or replace. If your KDTE304LPA0 is under about 10 years old, fixing a targeted issue (like a leak, fill problem, or latch failure) often restores reliable performance for years.
For troubleshooting that can extend life, we recommend checking KitchenAid he dishwasher error codes when the control shows a fault or the cycle behavior changes.
Last updated: February 2026
Can I replace dishwasher parts myself?
Yes, for KitchenAid KDTE304LPA0 you can replace many dishwasher parts yourself if you’re comfortable with basic hand tools and can safely shut off power and water. Common DIY-friendly jobs include replacing seals, racks, and spray components; more involved repairs include water and electrical parts.
What we recommend you do first
- Turn off power at the breaker (dishwashers are typically hardwired or on a dedicated circuit).
- Shut off the water supply valve under the sink.
- Pull the dishwasher out only as far as needed; protect the floor and water line.
- Take photos of wire and hose routing before disconnecting anything.
- Run a quick test cycle after reassembly to check for leaks.
DIY difficulty by part type (KDTE304LPA0)
| Repair type | Examples for this model | DIY level | Main risk |
|---|---|---|---|
| Mechanical, no wiring | Dishwasher spray arm, lower W11550888, racks | Easy | Stripped screws, misalignment |
| Sealing and leak points | Dishwasher door seal, lower W11664713, gaskets | Easy to moderate | Leaks if seal is twisted or pinched |
| Water fill components | Fill valve assembly W11434044, water inlet W11535094 | Moderate | Leaks, cross-threaded fittings |
| Drain path | Hose-drain,e W11414944 | Moderate | Kinks, poor draining, leaks |
| Electrical interlocks | Latch assembly (includes switch) W11412299 | Moderate | Miswiring, door not latching |
When we suggest a technician
Some repairs are still DIY possible, but we recommend pro help when you see any of these:
- Burnt smell, melted wiring, or repeated breaker trips
- Standing water plus a suspected motor or control issue
- You need to remove the dishwasher fully and disconnect multiple utilities
Why it matters
Dishwashers combine water, heat, and electricity in a tight space. Using the right replacement part for KDTE304LPA0 and restoring seals, clamps, and hose routing correctly prevents leaks, poor cleaning, and repeat failures.
For troubleshooting before buying parts, use dishwasher wont start video or dishwasher not filling video when symptoms match.
Last updated: February 2026
What is the most common problem with a KitchenAid dishwasher?
The most common issue we see on KitchenAid dishwashers like model KDTE304LPA0 is poor cleaning (dishes come out dirty) caused by restricted water flow from clogged spray arms, a dirty filter area, or low fill. Drain problems and door leaks are also frequent.
Most common symptoms and what they usually mean
- Dirty dishes or grit left behind: spray arm holes blocked, wash system restriction, or weak water fill
- Standing water in the bottom: drain hose restriction or a drain path blockage
- Water leaking at the door: worn seals or door not closing/latching evenly
- Won’t start or stops mid-cycle: door latch/switch issue or a control-related fault
- Not drying well: cycle selection, rinse aid issues, or venting problems
Quick checks we recommend first (no parts swapping)
- Confirm the spray arms spin freely and are not hitting tall items.
- Clear debris from the sump area and check for labels, glass, or food bits.
- Run hot water at the sink until it’s hot, then start the cycle (helps fill temperature).
- Check the drain hose routing for kinks and make sure the high loop is in place.
- If the unit won’t run, test the door closure and latch engagement.
Parts that commonly fix these problems on KDTE304LPA0
If symptoms point to a specific failure, these model-matched parts are common solutions:
| Symptom | Likely area | Model-matched part to consider |
|---|---|---|
| Not filling or fills slowly | Water inlet/valve | Fill valve assembly W11434044 |
| Poor wash coverage | Spray delivery | Dishwasher manifold and spray arm assembly W11545334 |
| Door won’t latch or won’t start | Door latch/switch | Latch assembly (includes switch) W11412299 |
| Leaks at the bottom of the door | Lower door seal | Dishwasher door seal, lower W11664713 |
| Not draining | Drain path | Hose-drain,e W11414944 |
Error codes can narrow it down fast
When the dishwasher displays a fault or behaves like it’s “stuck,” we use the error code family to pinpoint whether the problem is filling, draining, heating, or a sensor/control issue. See KitchenAid microclean he dishwasher error codes.
Why it matters
Dishwashers depend on correct fill level, strong spray action, and a clear drain path. A small restriction (spray arm debris, drain hose kink, or a weak fill valve) can look like a major failure because it affects every step of the cycle.
Last updated: February 2026