 Owner’s manual
 Error Codes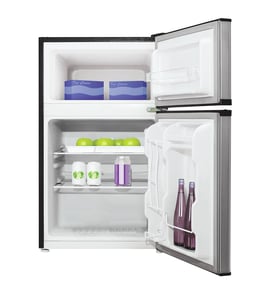

What are the components of a mini fridge?
A mini fridge like the Danby DCR412BL uses the same basic refrigeration system as a full-size refrigerator: a sealed cooling system moves heat out of the cabinet, while internal controls and door sealing help maintain a steady temperature. For the exact layout and features, use the DCR412BL owner's manual.
Main components you will typically find
Most compact refrigerators (including the DCR412BL) include these core parts and features:
- Thermostat dial: controls cabinet temperature by cycling the cooling system on and off
- Freezing compartment with freezer door: small freezer area for ice and small frozen items
- Evaporator/freezer surface: the cold surface that absorbs heat from inside the cabinet
- Drip tray: catches water during defrosting
- Magnetic door gasket: creates a tight seal to keep cold air in
- Shelves and door storage: removable shelves plus bottle/can storage areas
How the cooling system works (simple overview)
A mini fridge relies on a sealed refrigeration cycle to move heat:
| Component | What it does | What you may notice if it has a problem |
|---|---|---|
| Compressor (sealed system) | Pumps refrigerant through the system | Warm cabinet, clicking, or long run times |
| Condenser (coils) | Releases heat to the room | Hot exterior sides, poor cooling if dusty |
| Evaporator (cold plate/freezer area) | Absorbs heat inside the fridge | Frost buildup, uneven cooling |
| Thermostat control | Tells the system when to run | Too warm or too cold settings |
Model-specific parts you can replace
Some components are service parts you can order for the DCR412BL when wear or damage affects performance:
- If the door sags or won’t close smoothly, check the Danby refrigerator door hinge 0549
- If you see water during defrosting, inspect the refrigerator drip tray 1020304003
- If interior storage is broken or missing, look at the shelf bar 1020701050
Why it matters
Knowing the main components helps you troubleshoot faster. For example, a weak door seal or misaligned hinge can cause warm temperatures and frost because the cooling system has to run longer to keep up.
Last updated: February 2026
What are the most commonly replaced parts in a refrigerator?
In a Danby DCR412BL compact refrigerator, the most commonly replaced parts are usually the ones that get bumped, wear from daily use, or are affected by moisture, such as door hardware, interior storage pieces, and defrost-related items. For model-specific diagrams and part identification, use the owner's manual.
Most common refrigerator parts people replace
These are the parts we see replaced most often across compact refrigerators like the Danby DCR412BL:
- Door hinge and door alignment hardware (door sagging, not sealing well): Danby refrigerator door hinge 0549
- Interior storage and accessories (cracked or missing): refrigerator ice tray 43235 and shelf bar 1020701050
- Defrost water handling parts (water during/after defrost): refrigerator drip tray 1020304003
- Leveling and stability parts (unit rocks, door swings open): foot 1021206034
- Small control or trim pieces (lost or broken knobs/buttons): refrigerator button 1441217
Quick symptom-to-part guide
| Symptom | Commonly involved part | What you typically notice |
|---|---|---|
| Door won’t close evenly | Door hinge | Door rubs or sits low on one side |
| Water under or behind fridge | Drip tray | Puddles after defrosting |
| Ice tray missing or cracked | Ice tray | Hard to make or remove cubes |
| Fridge wobbles | Foot/leveling | Vibrates, door won’t stay shut |
Why these parts fail first
Compact refrigerators are frequently moved and opened often, so mechanical and “touch” parts wear out sooner than sealed-system components. Also, manual defrosting creates water that must drain and evaporate correctly; the manual notes defrosting is needed when ice buildup reaches about 1/4 inch (6 mm), which makes drip management parts more important.
Tips to reduce repeat replacements
- Keep the refrigerator level so the door closes consistently.
- Avoid overloading door racks and shelves.
- During defrosting, remove frozen food and manage meltwater so it drains to the tray.
- Do not cover shelves with foil or liners that block airflow.
- Limit unnecessary door openings to reduce frost buildup.
Last updated: February 2026
What does code 412 mean?
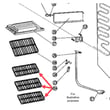
On the Danby DCR412BL compact refrigerator, “412” is not an error code. It’s a parts-list identifier used in the manual for door and door-shelf components (for example, door shelf bars and the door liner). For part lookups and diagrams, use the DCR412BL owner's manual.
What “412” usually refers to on this model
In the DCR412 series parts list, “412.x” numbers are used to label several door-related items. Common examples include:
- Upper door shelf bar (listed as 412.1)
- Middle door shelf bar (listed as 412.2)
- Lower door shelf bar (listed as 412.3)
- Door liner (listed as 412.4)
- Egg rack (listed as 412.5)
If you saw “412” on a sticker, diagram callout, or packaging, it’s typically pointing to a door-shelf family part, not a fault.
Quick checks if you’re troubleshooting a problem (not a code)
If your fridge is warm, noisy, or leaking and you thought “412” was an error, focus on symptoms instead:
- Not cooling: confirm the thermostat setting, allow 24 hours after changes, and keep vents clear
- Door not closing: check hinge alignment and gasket contact
- Water under the unit: inspect the drain/drip area and make sure the cabinet is level
- Rattling: verify shelves and bins are seated fully
For water on the floor, our guide how to get rid of refrigerator puddles walks through the most common causes.
Related parts you can replace
If the issue is a loose or sagging door, these model-matched parts are commonly involved:
| Symptom | Likely area | Example part on this model |
|---|---|---|
| Door sags or won’t align | Hinge | Danby refrigerator door hinge 0549 |
| Door bins feel loose | Door shelf support | Shelf bar 1020701050 |
Why it matters
Treating “412” like an error code can send you in the wrong direction. On the DCR412BL, it’s a parts-list reference, so the fastest fix is identifying the symptom and matching the correct Danby replacement part.
Last updated: February 2026
Why is my Danby mini fridge leaking water?
Water leaking from your Danby DCR412BL compact refrigerator is usually caused by normal defrost water not evaporating fast enough, the cabinet not being level, or warm air leaking in through the magnetic door gasket and creating excess frost that later melts. Use the DCR412BL owner's manual to confirm leveling and care steps.
Most common causes (and what to check first)
- Drip tray overflow or misplacement: This model uses a drip tray to catch water during defrost; if it is out of position or overfilled, water can escape.
- Unit not level: If the cabinet tilts forward or to one side, defrost water can run the wrong direction.
- Door not sealing: A weak seal lets humid air in, causing heavy frost that later melts into water.
- High humidity location: Very moist rooms make frost form quickly, increasing melt water.
- Frequent door openings or overloading: More warm air entering means more condensation and frost.
Step-by-step: stop the leak
- Unplug the refrigerator and remove items near the leak.
- Check the drip tray for cracks, correct placement, and overflow; replace it if damaged (see refrigerator drip tray 1020304003).
- Level the cabinet on a strong, level floor; adjust the feet so the refrigerator sits steady with no rocking.
- Inspect the magnetic gasket for gaps, tears, or areas not touching the cabinet; clean the sealing surfaces.
- Reduce frost buildup: If you see heavy frost, defrost the unit; after defrosting, run the temperature control on maximum for 2 to 3 hours, then return to your normal setting.
Quick diagnosis table
| What you see | Most likely cause | Best next step |
|---|---|---|
| Water under front edge | Not level or door not sealing | Level cabinet; check gasket seal |
| Water inside bottom | Condensation from frequent openings | Improve loading habits; verify seal |
| Water after defrosting | Drip tray issue | Re-seat or replace drip tray |
| Heavy frost then puddles | Humid air entering | Clean/inspect gasket; limit openings |
Why it matters
Leaks are often a symptom of excess moisture and frost. Fixing leveling and door sealing helps the DCR412BL cool more consistently, reduces defrost water, and prevents floor damage.
Last updated: February 2026
Is 1 or 7 colder on a Danby mini fridge?
On the Danby DCR412BL compact refrigerator, 7 is colder than 1. This model uses a mechanical thermostat dial; higher numbers increase cooling run time, and setting the dial to 0 temporarily shuts off the cooling cycle.
How the DCR412BL temperature dial works
The DCR412BL owner's manual describes a temperature control dial used to select the desired cooling level.
- Higher number = colder (more compressor run time)
- Lower number = warmer (less compressor run time)
- 0 = cooling off (temporary disconnect of the cooling cycle)
- Interior temperature changes with food load and door openings
Quick reference
| Dial setting | Cooling level | Typical use |
|---|---|---|
| 0 | Off | Defrosting or temporary shutoff |
| 1 to 2 | Warmest | Cool rooms, light use |
| 3 to 5 | Medium | Everyday use |
| 6 to 7 | Coldest | Hot rooms, frequent openings |
Best way to set it (simple method)
Use a consistent process so you do not over-adjust.
- Start at 4
- Wait 24 hours for temperatures to stabilize
- Adjust one number at a time
- If items freeze in the fresh-food area, turn the dial down
- If drinks are not cold enough, turn the dial up
Why it matters
Running the dial at 6 to 7 all the time can increase frost buildup in the freezer/evaporator area and lead to more frequent defrosting. Small dial changes make a noticeable difference in a compact refrigerator.
Last updated: February 2026







