Installation guide
 Owner’s manual

How do I find the model of my KitchenAid oven?
For KitchenAid model KEMS378SSS05, the model (and serial) information is on the model/serial number rating plate located at the bottom of the right-hand mounting rail. Use that exact model number when ordering parts or checking electrical requirements in the KEMS378SSS05 installation guide.
On this 27-inch KitchenAid built-in wall oven/microwave combo, check these common spots first:
- Open the oven door and look along the right-hand side trim area near the bottom
- Look for a metal rating plate or label on the right-hand mounting rail
- Use a flashlight; the plate can be low and partially recessed
- Write down the full model number and serial number exactly as shown
The rating plate typically includes more than just the model number. Capture all of this:
- Model number (example: KEMS378SSS05)
- Serial number
- Electrical rating (voltage, frequency, and kW)
- Any additional codes that help match factory-specified parts
We use the model number to match the correct KitchenAid parts and to confirm installation requirements like the dedicated circuit size (commonly 30-amp or 40-amp depending on the kW rating shown on the plate).
| Item | What to do | Tip |
|---|---|---|
| Find the plate | Check bottom of right-hand mounting rail | Open the door fully |
| Record details | Model and serial number | Take a clear photo |
| Use for parts | Match exact parts for your unit | Avoid guessing by appearance |
Last updated: January 2026
How do I reset my KitchenAid wall oven?
To reset your KitchenAid KEMS378SSS05 wall oven/microwave combo, turn the power off at the breaker (or remove the fuse) for about 1 minute, then restore power. When power returns, the display may briefly show “PF”, which indicates a power interruption reset.
- Turn the oven off using the OFF/CANCEL key.
- Switch the circuit breaker for the oven to OFF (or remove the household fuse).
- Wait about 60 seconds.
- Turn the breaker back ON (or reinstall the fuse).
- Set the clock if prompted.
- Test a basic function like BROIL for a few minutes to confirm heat.
This model has a Control Lock feature that disables most keys. If the display shows a lock message or most buttons do nothing, unlock it:
- Touch and hold START for about 5 seconds.
- Confirm normal keys respond again.
| What you see | What it means | What to do |
|---|---|---|
| “PF” on the display | Power failure/interruption was detected | Set clock and test cooking |
| Display lights briefly | Control powered up normally | Select a cooking mode |
| No display at all | No power to the unit | Check breaker, wiring, and connections |
A hard power reset clears many temporary control glitches (blank display, unresponsive keypad, odd beeping) and is also the first step after an installation or power outage. If the oven still will not operate after reset, the troubleshooting steps in the KEMS378SSS05 owner’s manual help narrow it down.
Last updated: January 2026
What is the life expectancy of a KitchenAid oven?
Most KitchenAid built-in ovens, including the KitchenAid KEMS378SSS05 wall oven/microwave combo, typically last 15 years with normal household use and basic maintenance. Keeping airflow clear, cleaning correctly, and addressing heating or control issues early helps you reach that lifespan.
- Heat exposure and ventilation: Built-in units rely on proper cabinet airflow; restricted airflow can shorten the life of controls and wiring.
- Cleaning habits: Using non-abrasive cleaners helps protect stainless and door surfaces.
- Electrical health: Power surges, loose connections, and overheating can stress the electronic control.
- Usage patterns: Daily high-heat baking, frequent broiling, and long self-clean cycles add wear.
- Part replacement history: Replacing common wear parts can extend overall appliance life.
| Component | Typical lifespan | Common symptom when failing |
|---|---|---|
| Bake/broil/convection heating elements | 8 to 15 years | Slow preheat, uneven baking, no heat |
| Temperature sensor | 8 to 12 years | Overheats, underheats, temperature swings |
| Cooling fan assembly | 7 to 12 years | Loud fan, fan not running, overheating shutdown |
| Electronic control | 7 to 12 years | Dead display, erratic buttons, random beeping |
- Clean stainless surfaces gently and avoid abrasive pads; follow the cleaning guidance in the KEMS378SSS05 owner’s manual.
- Keep vents and intake areas clear so the cooling fan can move air.
- Use self-clean only when needed; let the oven cool fully before trying to open the door.
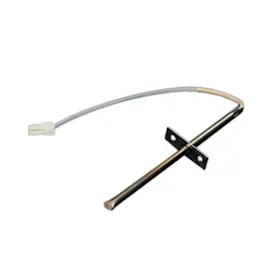
- If baking temperatures seem off, test and replace the sensor if needed (for this model, see wall oven temperature sensor WPW10131825).
- If the oven overheats or shuts down, inspect the cooling system (for this model, see wall oven cooling fan assembly WP8303972).
A 27-inch electric built-in oven/microwave combo is expensive to replace; extending life often comes down to preventing heat damage to electronics and keeping temperature control accurate.
Last updated: January 2026
How to fix F2E1 error code KitchenAid oven?
On KitchenAid model KEMS378SSS05, the F2E1 error points to a problem with the touchpad or keypad input (a stuck key or a shorted key circuit). We start by resetting power, then checking for moisture or contamination on the control area; if the code returns, the touch control system typically needs service.
- Turn the circuit breaker OFF for 5 minutes, then turn it back ON.
- If the display prompts for time, set the clock and try a simple function (like BROIL) to confirm operation.
- Wipe the control panel with a soft, barely damp cloth; dry it completely (moisture can trigger false key signals).
- If the error appears immediately after power-up, avoid repeated resets; focus on inspection and diagnosis.
- Stuck key feel: Press each key once; none should feel physically stuck.
- Steam and cleaner residue: Heavy steam from boiling pots or overspray from cleaners can seep into the keypad area.
- Power supply issues: A loose house fuse or tripped breaker can cause odd behavior; confirm stable power.
- Wiring connections: If you are qualified to access the control area, look for loose connectors or pinched wires.
| What you see | Most likely cause | Typical fix |
|---|---|---|
| F2E1 returns right after reset | Keypad circuit short or stuck input | Service or replace touch control system components |
| F2E1 appears after cleaning or heavy steam | Moisture contamination | Dry thoroughly; allow time to air out; retry |
| Random beeping, unresponsive keys | Touch control failure | Service diagnosis; control-related repair |
An F2E1 code is the oven telling us it cannot reliably read the keypad. That can prevent baking, broiling, or safe temperature control, and it can also cause unexpected beeping or canceled cycles.
Use the troubleshooting and control-operation guidance in the KEMS378SSS05 owner’s manual. If the display shows an error code and normal operation does not return, the installation instructions also direct you to stop operation and contact a qualified technician; see the KEMS378SSS05 installation guide.
Last updated: January 2026