



Can I replace dishwasher parts myself?
Yes. For the GE GDF450PGR3WW dishwasher, we see many customers successfully replace common wear parts (filters, spray arms, latches) with basic hand tools after shutting off power and water. For electrical and leak-related repairs, plan extra time and use careful troubleshooting before replacing parts.
Good DIY repairs vs. better left to a pro
Usually DIY-friendly
- Cleaning or replacing the filter and checking the sump area for debris
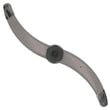
- Replacing a spray arm such as the GE dishwasher spray arm, lower WD22X33499
- Replacing a door latch such as the dishwasher door latch lock WD01X29878
- Replacing a tub seal such as the dishwasher tub gasket WD08X23476
Often more advanced
- Diagnosing no-heat or poor drying issues (heater, wiring, control)
- Diagnosing fill problems (water valve, float, pressure sensing)
- Control and wiring repairs (requires safe electrical testing)
Safety checklist before you start
- Turn off power at the breaker (dishwashers are hardwired or plugged in under the sink)
- Shut off the dishwasher water supply valve
- Protect the floor; keep towels and a shallow pan ready for residual water
- Take photos of wire connections and hose routing before removal
- Use the correct driver bits; many GE dishwashers use Torx screws
Quick “symptom to part” guide
| Symptom | Common checks | Parts that may be involved |
|---|---|---|
| Not cleaning well | Clogged spray arm holes, filter/sump debris | GE dishwasher spray arm, lower WD22X33499, dishwasher fine filter assembly WD12X25995 |
| Not draining | Kinked drain hose, blocked sump, disposer plug | Dishwasher drain pump WD19X25461 |
| Won’t start | Door not latching, UI/control issue | Dishwasher door latch lock WD01X29878, dishwasher electronic control board WD21X32938 |
| Not filling | Supply valve off, inlet screen clogged | Water valve assembly WD15X27703 |
Why it matters
Replacing the right part the first time saves money and downtime. Simple mechanical parts on the GDF450PGR3WW are great DIY wins; electrical and leak symptoms usually need step-by-step diagnosis so you do not replace good parts.
For code-based troubleshooting, use GE electronic dishwasher error codes.
Last updated: February 2026
Why is my GE dishwasher leaking from the bottom of the door?
A leak from the bottom of the door on your GE GDF450PGR3WW dishwasher is usually caused by a worn door seal area, a door that is not pulling fully closed (latch/strike issue), or the unit not sitting level so water sloshes past the seal during wash. Start by checking the door closing and the tub gasket condition.
Quick checks we recommend first
- Stop the cycle and open the door; look for food debris, glass, or detergent buildup along the sealing surfaces.
- Confirm the door closes firmly with a clear “click”; if it feels loose, inspect the latch and strike.
- Check that the dishwasher is level front-to-back and side-to-side; a forward tilt can push water toward the door.
- Look for a torn, flattened, or hardened door/tub gasket.
- Make sure tall items are not preventing the door from closing fully.
- Reduce oversudsing: use dishwasher detergent only and avoid pre-rinsing with hand soap.
Parts that commonly fix a door-bottom leak
If the door is closing but water still escapes at the bottom edge, these are the most common repair paths for this model:
| What we find | Most likely fix | What it changes |
|---|---|---|
| Gasket is split, stiff, or deformed | Replace the dishwasher tub gasket WD08X23476 | Restores the seal between the door and tub |
| Door doesn’t latch tightly | Inspect/replace the dishwasher door latch lock WD01X29878 and align the dishwasher door latch strike WD13X10071 | Pulls the door fully against the seal |
| Leak happens mainly during wash, not fill/drain | Check spray pattern and obstructions; consider the GE dishwasher spray arm, lower WD22X33499 if damaged/clogged | Reduces water spray aimed at the door |
Why it matters
A door-area leak can drip onto the floor, swell cabinetry, and lead to repeated cycle interruptions. Fixing the seal or latch early also improves cleaning because the dishwasher can maintain proper water level and spray pressure.
Helpful DIY guidance
- Use our dishwasher leaks video to match the leak location (bottom center vs corners) to the most likely cause.
Last updated: February 2026
How do I find the model number on my GDF450PGR3WW?
On a GE dishwasher like model GDF450PGR3WW, the model number is printed on the appliance’s rating label, usually located on the tub frame where the door closes. Open the door and look around the top or side edge of the opening for a sticker or metal tag.
Where to look on your dishwasher
Check these common GE dishwasher label locations:
- Along the left or right tub frame (vertical edge) where the door seals
- On the top lip of the tub opening (under the countertop overhang)
- On the inner edge of the door itself (near the latch area)
- Occasionally on the side of the tub just behind the front frame
What you should write down
We recommend recording the full model number and the full serial number exactly as shown.
- Model number (example format: GDF450PGR3WW)
- Serial number (used to identify production date and version)
- Any suffixes or extra characters on the label
| Label item | Why it matters | Example |
|---|---|---|
| Model number | Ensures correct diagrams and part fit | GDF450PGR3WW |
| Serial number | Helps match the correct revision of parts | (varies) |
Why it matters
GE often uses multiple design revisions within the same dishwasher family. Using the exact model number from the rating label helps us match the correct parts list and diagrams so items like a door latch, control board, or pump assembly fit correctly.
If the label is hard to read
- Wipe the label gently with a damp cloth to remove residue
- Use a flashlight and take a close-up photo to zoom in
- If the label is damaged, check for a second label on the door edge
For common “won’t start” situations that can look like a model ID issue (controls not responding, cycle not beginning), see our dishwasher wont start video.
Last updated: March 2026





