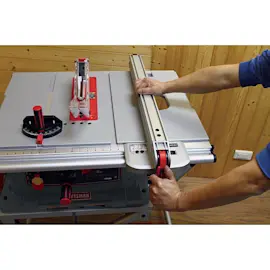
Owner’s manual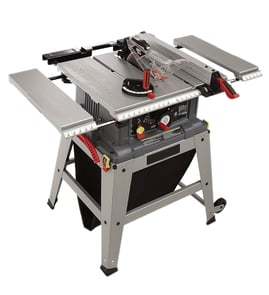
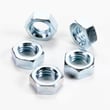

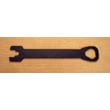
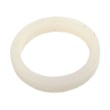
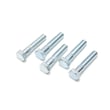
Are all table saw arbor nuts the same size?
No. Table saw arbor nuts are not all the same size or thread; they must match the saw’s arbor shaft. On the Craftsman 113295820, the arbor nut is a specific replacement part listed for this model, and the correct fit is confirmed in the 113295820 owner's manual.
What is standardized (and what is not)
Many 10-inch table saw blades share a common arbor hole size, but that does not mean the arbor nut is universal.
- Often standardized: blade arbor hole size (commonly 5/8 inch on many 10-inch blades)
- Not standardized: arbor nut thread diameter and thread pitch
- Not standardized: nut thickness, flange style, or whether a washer/collar is required
- Model-specific: the arbor collars and how they seat against the blade
How to confirm the correct arbor nut for your saw
We recommend matching the arbor nut to the exact model and parts list, then verifying the installation steps.
- Confirm your model number is 113295820.
- Use the parts list in the 113295820 owner's manual to identify the correct “Nut, Arbor.”
- When installing a blade, keep the blade and collars clean and seated correctly, then tighten the arbor nut securely.
Quick compatibility check
| Item | Commonly shared across saws? | What to match on 113295820 |
|---|---|---|
| Blade arbor hole | Often | Blade bore to arbor size (blade spec) |
| Arbor nut threads | No | Arbor shaft threads for this model |
| Arbor collars | No | Collar orientation and seating |
| Tightening direction | Usually | Follow the model’s procedure |
Why it matters
Using the wrong arbor nut (wrong thread or seating) can prevent proper tightening, cause blade wobble, and lead to poor cuts or unsafe operation. Correct collars and a properly tightened nut help keep the blade running true.
Last updated: February 2026
Can you use an 8 inch blade on a 10 inch table saw?
Yes, you can use an 8-inch blade on the Craftsman 113295820 table saw as long as the blade is rated for at least 3450 RPM and is installed correctly on the arbor. You will get less maximum cutting depth than with a full 10-inch blade; use the owner's manual for the correct setup and safety steps.
What changes when you use an 8-inch blade
An 8-inch blade sits lower in the table, so it reduces how deep you can cut and can change how well the guard and spreader line up.
- Reduced maximum depth of cut compared to a 10-inch blade
- More blade height adjustment needed to reach the workpiece
- Guard, spreader, and anti-kickback pawls alignment becomes more critical
- Not ideal for heavy ripping where maximum blade diameter is safest and most efficient
Safety and compatibility checks to do first
Before you run the saw, we recommend these quick checks (they match the manual’s key safety requirements):
- Confirm the blade’s RPM rating is 3450 RPM or higher
- Never install a blade larger than the saw was designed for (smaller is acceptable)
- Verify the arbor nut and arbor collars are installed properly
- Confirm the blade rotation is correct (top of blade rotates toward you in the normal operating position)
- Use the proper table insert for the operation; never run without the correct insert installed
When an 8-inch blade is commonly used
Many owners use smaller diameter cutters for non-through operations.
| Use case | 8-inch blade OK? | Notes |
|---|---|---|
| Through-cutting (cuts fully through) | Yes, if guard setup works | Guard must be in place and functioning properly for thru-sawing. |
| Dadoing or molding | Often, yes | Use the correct dado/molding insert and follow the manual’s setup. |
| Deep ripping (max depth needed) | Not preferred | A 10-inch blade gives more depth and keeps the spreader closer to the blade. |
Why it matters
Blade diameter affects cutting depth, guard effectiveness, and kickback protection. On the 113295820, keeping the guard system working properly and using the correct insert are key to safe, accurate cuts.
Last updated: February 2026
How to reset overload on table saw?
On the Craftsman 113295820 table saw, reset the overload by turning the switch OFF, letting the motor cool, then pressing the red RESET button on the front of the saw until it snaps back in; once it resets, turn the saw ON normally (with the saw upright).
Reset steps (manual-reset thermal overload)
- Move the saw switch lever to OFF immediately when it trips.
- Unplug the saw for safety.
- Let the motor cool down; if the reset will not latch, it needs more cooling time.
- Press the red RESET button on the front of the saw until it snaps into the running position.
- Plug the saw back in, then move the switch lever to ON.
- If it trips again quickly, reduce load and check the cut setup before continuing.
What to check if it keeps tripping
Frequent overload trips usually mean the motor is working too hard or the power supply is weak.
- Dull or dirty blade, or feeding stock too fast
- Blade height set too high for the cut
- Binding from misalignment (fence, miter gauge, blade, or spreader)
- Extension cord too long or too small gauge (voltage drop)
- Loose or incorrect electrical connections
Important safety notes for this model
The motor uses a gravity-sensitive starting relay. Keep these points in mind:
| Situation | What to do | Why |
|---|---|---|
| Saw is upside down | Do not turn power on | Can damage the motor/starting relay |
| Power failure | Turn switch OFF and remove the key | Helps prevent unexpected restart |
| Rapid on/off cycling | Avoid it | Can loosen the saw blade/arbor nut |
Why it matters
The overload protector is there to open the power circuit when motor temperature gets too high. Resetting it without fixing the cause can lead to repeated trips, poor cutting performance, and unnecessary motor strain.
For switch location, reset button identification, and operating cautions, follow the owner's manual.
Last updated: February 2026