Get free shipping on your order, with any water filter subscription. Find my filter

Open Hamburger Menu
Sears Parts Direct
Tips to find your model number

Whirlpool WED8127LC1 laundry, residential, electric dryer Parts

Here are the diagrams and repair parts for Whirlpool WED8127LC1 laundry, residential, electric dryer, as well as links to manuals and error code tables, if available.

Whirlpool WED8127LC1 laundry, residential, electric dryer
By Schematic
By Part
SELECT DIAGRAM
?

This is the number corresponding to the part on the diagram / schematic

Browse Parts for WED8127LC1 LAUNDRY, RESIDENTIAL, ELECTRIC DRYER

  • Baffle Symme for Whirlpool WED8127LC1 - Part W11782150

    Bulkhead parts diagram

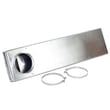
    Drum Baffle

    Part #697693

    Replaced by #W11782150

    Info Icon
    Manufacturer substitution
    This part replaces 697693. Substitute parts can look different from the original.
    In Stock
    $107.03
    Minus Item
    Qty
    Plus Item
  • Screw for Whirlpool WED8127LC1 - Part W10916641

    Cabinet parts diagram

    10-32 X .562

    Part #W10704731

    Replaced by #W10916641

    Info Icon
    Manufacturer substitution
    This part replaces W10704731. Substitute parts can look different from the original.
    In Stock
    $28.75
    Minus Item
    Qty
    Plus Item
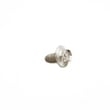
  • Range Screw for Whirlpool WED8127LC1 - Part WP308685

    Screw

    Part #3357011

    Replaced by #WP308685

    Info Icon
    Manufacturer substitution
    This part replaces 3357011. Substitute parts can look different from the original.
    This item is not returnable
    In Stock
    $5.09
    16% OFF Phone Price : $6.09Info Icon
    Minus Item
    Qty
    Plus Item
  • Cover for Whirlpool WED8127LC1 - Part W11662367

    Cabinet parts diagram

    Inglis Cover-termin

    Part #W11394868

    Replaced by #W11662367

    Info Icon
    Manufacturer substitution
    This part replaces W11394868. Substitute parts can look different from the original.
    In Stock
    $64.60
    Minus Item
    Qty
    Plus Item
  • Dryer Motor Clamp for Whirlpool WED8127LC1 - Part WPW10121316

    Cabinet parts diagram

    Dryer Motor Clamp

    Part #W10121316

    Replaced by #WPW10121316

    Info Icon
    Manufacturer substitution
    This part replaces W10121316. Substitute parts can look different from the original.
    This item is not returnable
    In Stock
    $21.16
    22% OFF Phone Price : $27.16Info Icon
    Minus Item
    Qty
    Plus Item
  • Dryer Toe Panel (white) for Whirlpool WED8127LC1 - Part W11551367

    Cabinet parts diagram

    Skirt-front,

    Part #W11186879

    Replaced by #W11551367

    Info Icon
    Manufacturer substitution
    This part replaces W11186879. Substitute parts can look different from the original.
    In Stock
    $74.18
    Minus Item
    Qty
    Plus Item
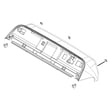
  • Console Shel for Whirlpool WED8127LC1 - Part W11401366

    Top and console parts diagram

    Console Shel

    Part #W11178520

    Replaced by #W11401366

    Info Icon
    Manufacturer substitution
    This part replaces W11178520. Substitute parts can look different from the original.
    In Stock
    $218.11
    Minus Item
    Qty
    Plus Item
  • Range Screw for Whirlpool WED8127LC1 - Part W10850756

    Top and console parts diagram

    10-32 X .500

    Part #W10773242

    Replaced by #W10850756

    Info Icon
    Manufacturer substitution
    This part replaces W10773242. Substitute parts can look different from the original.
    This item is not returnable
    In Stock
    $4.91
    17% OFF Phone Price : $5.91Info Icon
    Minus Item
    Qty
    Plus Item
  • Dryer Drum Light Lens for Whirlpool WED8127LC1 - Part W11226088

    Bulkhead parts diagram

    Lens

    Part #3402841

    Replaced by #W11226088

    Info Icon
    Manufacturer substitution
    This part replaces 3402841. Substitute parts can look different from the original.
    This item is not returnable
    In Stock
    $24.60
    20% OFF Phone Price : $30.60Info Icon
    Minus Item
    Qty
    Plus Item
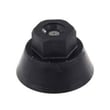
  • Nozzle for Whirlpool WED8127LC1 - Part W11230609

    Bulkhead parts diagram

    Nozzle Cap

    Part #W11100488

    Replaced by #W11230609

    Info Icon
    Manufacturer substitution
    This part replaces W11100488. Substitute parts can look different from the original.
    This item is not returnable
    In Stock
    $4.50
    18% OFF Phone Price : $5.50Info Icon
    Minus Item
    Qty
    Plus Item

Whirlpool LAUNDRY, RESIDENTIAL, ELECTRIC DRYER WED8127LC1 FAQs

Your Whirlpool dryer model WED8127LC1 does not have one single “dryer part number”; each replacement part has its own part number. Start by finding the dryer’s model number tag, then use that model to look up the exact part you need (for example, a dryer drum support roller WPW10314173).

Where to find the model number tag on a Whirlpool dryer

Check these common locations on WED8127LC1-STYLE dryers:

  • Inside the door opening on the front panel (most common)
  • On the door itself (edge or inner surface)
  • On the front frame behind the door
  • On the back panel of the dryer cabinet
  • Near the lint screen housing (less common)

How to use the model number to get the right part number

Once you have WED8127LC1, match the symptom to the part category, then confirm the exact part number for your dryer.

  • Squealing or thumping: drum support rollers, idler pulley, belt
  • No heat: heater, thermal fuse, high-limit thermostat
  • Runs but poor airflow: blower wheel, lint duct, screen
  • Shuts off mid-cycle: thermistor, thermal fuse
What you have What it’s used for Why it matters
Model number (WED8127LC1) Identifies the exact dryer design Ensures parts fit and wire/connect correctly
Part number / part ID Identifies the exact replacement part Prevents ordering the wrong revision
Symptom Points to likely failed parts Saves time and repeat repairs

Why it matters

Whirlpool often uses similar-looking parts across many dryers, but mounting points, connectors, and temperature ratings can differ. Using the WED8127LC1 model number first is the fastest way to land on the correct replacement part.

Last updated: February 2026

On your Whirlpool WED8127LC1 electric dryer, a blown thermal fuse commonly shows up as a dryer that will not start or runs but will not heat. The sure way to confirm is a continuity test with a multimeter; a thermal fuse is a one-time safety device and must be replaced if it tests open.

Quick symptoms to look for

  • Dryer will not start (no motor run)
  • Drum tumbles but there is no heat
  • Heat cuts out mid-cycle and does not return
  • Long dry times paired with very hot cabinet or strong “hot” smell
  • Lint buildup or restricted venting (common root cause)

How we test the thermal fuse (simple continuity check)

  1. Unplug the dryer (or switch off the breaker) before opening any panels.
  2. Access the fuse location (often on the blower housing or exhaust duct area).
  3. Remove at least one wire from the fuse terminal.
  4. Set your multimeter to continuity or ohms (Ω).
  5. Test across the fuse terminals.

What the meter reading means

Meter result What it means What to do next
Beep or near 0 Ω Fuse is good (closed) Keep troubleshooting heat or airflow issues
No beep or OL/infinite Ω Fuse is blown (open) Replace the fuse and correct the airflow restriction

A common replacement for this model is the thermal fuse W10909685.

Why the fuse blows (and how to keep it from happening again)

A thermal fuse usually opens because the dryer overheats. Overheating is most often caused by restricted airflow.

  • Clean the lint screen every load (replace a damaged screen such as screen W10120998)
  • Inspect and clear the exhaust duct and outside vent hood
  • Avoid crushed or extra-long vent runs
  • Make sure the blower wheel is not loose or clogged
  • If heat is erratic, check temperature sensing parts like the dryer thermistor WP8577274

Why it matters

Replacing a blown fuse without fixing the venting problem often leads to repeat failures, longer dry times, and overheating that can damage other parts like the heater.

Last updated: February 2026

Common Whirlpool dryer problems (including model WED8127LC1) are no-start issues, no heat, long dry times, loud squealing or thumping, and the drum not turning. Most of these trace back to airflow restrictions, power supply problems, or worn drive components such as the belt, rollers, or idler.

Most common symptoms and what they usually mean

  • Dryer will not start: door switch, start switch, thermal fuse, or power supply issue
  • Drum not spinning: broken belt, seized drum roller, or failed idler pulley
  • No heat or weak heat: heater circuit problem, thermostat/thermistor issue, or restricted venting
  • Long dry times: clogged lint screen or ducting, crushed vent hose, or failing blower wheel
  • Squealing, grinding, thumping: worn drum rollers, idler pulley, or drum support hardware

Quick checks we recommend first (fast, no parts)

  1. Confirm the dryer has 240V power (a tripped breaker can leave the dryer running but not heating).
  2. Clean the lint screen and check the housing for buildup.
  3. Inspect the vent path to the outside for kinks, crushing, or lint blockage.
  4. Run a timed cycle and verify strong airflow at the exterior vent.

Parts that commonly fix these problems on WED8127LC1

Symptom Common fix Example part for this model
Loud squeal or rumble Replace rollers and wear items together Dryer repair kit 4392067
Drum not turning smoothly Replace idler pulley Dryer idler pulley W10837240
Long dry times, poor airflow Replace damaged blower wheel Dryer blower wheel WP697772
No heat Check heater and safety devices Element, heater 5400w WP3387747
No start (or stops mid-cycle) Check safety cutoff Thermal fuse W10909685

Why it matters

A dryer that runs hot with poor airflow can overheat and shut down on a safety device, while worn rollers or an idler pulley can quickly damage the belt and leave the drum unable to turn. Fixing the root cause usually restores normal drying and reduces repeat failures.

Last updated: February 2026
Most common symptoms to help you fix your dryers

Choose a symptom to see related dryer repairs.

Main causes: bad gas valve coils, broken heating element, tripped safety thermostat or fuse, bad operating thermostat, c…

Main causes: clogged exhaust system, heating system failure, deposits on moisture sensor, control system failure…

Main causes: clogged exhaust vent, bad motor relay, loose dryer door catch, bad door switch, control system failure, fau…

Main causes: door switch failure, lack of power, broken belt, blown thermal fuse, bad drive motor, control system failur…

Main causes: damaged door strike, worn door catch…

Main causes: lack of electrical power, bad power cord, wiring failure, bad control board, blown thermal fuse, bad door s…

Main causes: bad timer or electronic control board, door switch failure…

Main causes: bad drum support roller, damaged idler pulley, broken blower fan blade, worn drum glide bearing, bad drive …

Most common repair guides to help fix your dryers

These step-by-step repair guides will help you safely fix what’s broken on your dryer.

How to replace an electronic control board in an electric dryer

How to replace an electronic control board in an electric dryer

The electronic control board manages the components and controls the cycle times in your electric dryer. Follow these st…

Repair time and Difficulty

 45 minutes or less
How to replace an igniter in a gas dryer

How to replace an igniter in a gas dryer

The igniter in a gas dryer glows white hot during the to light the gas that heats the air in the dryer. If the dryer air…

Repair time and Difficulty

 60 minutes or less
How to replace a dryer thermistor

How to replace a dryer thermistor

The thermistor senses the air temperature in the dryer. If your dryer overheats or doesn't heat at all, the thermistor …

Repair time and Difficulty

 30 minutes or less

Effective articles & videos to help repair your dryers

Use the advice and tips in these articles and videos to get the most out of your dryer.

How to use your clothes dryer efficiently

How to use your clothes dryer efficiently

Get expert tips on using your dryer efficiently to save energy.…

Are DIY appliance repairs safe?

Are DIY appliance repairs safe?

Find out how to stay safe when repairing your appliances.…

Keeping your smart appliances secure from hackers

Keeping your smart appliances secure from hackers

Find out how to protect your smart appliances from malevolent invasions by hackers.…