
Can I replace AC parts myself?
Yes, you can replace some parts on your Ruud URKA-A030 gas/electric package unit yourself, but we recommend limiting DIY work to low-risk electrical and maintenance items. Anything involving refrigerant, gas piping, or combustion setup should be handled by a qualified technician.
- Replace a run capacitor if you match the microfarads (µF) and voltage rating exactly (wiring must go back on the same terminals).
- Replace a start capacitor or hard-start kit when the compressor struggles to start.
- Replace a condenser fan motor if the fan won’t run but the unit has power.
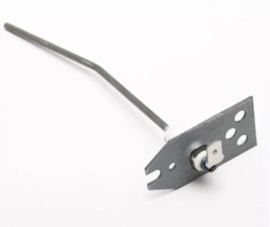
- Replace a furnace flame sensor when the burners light then shut off quickly.
- Replace a limit switch if the furnace overheats and shuts down repeatedly.
- Refrigerant work (leak repair, evacuating, charging, opening the sealed system)
- Gas valve, manifold, burner setup, or combustion adjustments
- Heat exchanger or venting changes
- Control board diagnostics that require live-voltage testing in tight compartments
| Task | Typical DIY-friendly? | Why |
|---|---|---|
| Swap capacitor | Often yes | Simple part match; careful wiring |
| Swap condenser fan motor | Sometimes | Mechanical fit and wiring must match |
| Clean/replace flame sensor | Often yes | Basic hand tools; restores flame proving |
| Compressor replacement | No | Refrigerant handling and specialized tools |
Using exact model-matched parts helps avoid wiring and rating mismatches.
- Motor WG840465 (condenser fan motor)
- Limit switch 470015
On a gas/electric package unit like the URKA-A030, a “simple” repair can affect safety controls, airflow, and compressor protection. Correct part ratings and correct wiring prevent repeat failures, nuisance shutdowns, and damage to major components.
Last updated: February 2026
What is the most common part to fail on an AC unit?
On most AC systems (including the cooling section of your Ruud URKA-A030 gas/electric package unit), the most common failure is a capacitor because it handles high electrical stress and heat every time the compressor or fan motor starts. A weak capacitor often causes hard-starting, humming, or no cooling.
- Outdoor fan or compressor hums but won’t start
- Unit starts sometimes, then struggles on the next cycle
- Breaker trips during startup
- Warm air from vents even though the thermostat is calling for cooling
- Fan runs but cooling is weak (or the compressor never kicks on)
If your URKA-A030 won’t start or struggles to start, these parts are the first ones we check because they directly affect motor and compressor startup:
| Symptom | Most likely area | Example part on this model |
|---|---|---|
| Clicks, struggles to start | Start components | Central air conditioner start capacitor 43-17075-04 |
| Fan not spinning, overheating | Fan motor | Motor WG840465 |
| Starts hard, then runs | Start assist | Start kit sk-a1 |
- Turn off power at the disconnect and breaker before opening panels.
- Inspect the capacitor for bulging, leaking oil, or burnt terminals.
- Check wiring connections for looseness or heat damage.
- Test the capacitor with a meter that has capacitance (µF) capability.
- If the compressor needs extra help starting, a start kit is the next step.
For safe electrical testing basics, use how to use a multimeter to test electrical parts video.
A weak capacitor can make the compressor and fan motor draw higher amperage during startup, which increases heat and can shorten the life of expensive components like the compressor.
Last updated: February 2026
What is the most expensive part to replace on an AC unit?
On a Ruud URKA-A030 gas/electric package unit, the most expensive AC-related part to replace is typically the compressor because it is part of the sealed refrigerant system and the repair includes major labor plus refrigerant recovery and recharge. Coils can also be high-cost repairs.
Compressor replacement is expensive because the job commonly includes:
- Refrigerant recovery and recharge (handled by a qualified technician)
- Cutting and brazing refrigerant lines, then pressure testing
- Leak checks and evacuation before recharging
- Electrical diagnosis (capacitor, contactor, wiring, overload)
- Cleanup steps if the old compressor failed electrically
A failed start component can mimic a bad compressor, so we always recommend testing the start circuit first.
Totals vary by region and system condition, but this shows why the compressor is usually the priciest.
| Part type | Typical relative cost | What drives the total |
|---|---|---|
| Compressor | Highest | Sealed-system labor, refrigerant work, diagnosis time |
| Evaporator or condenser coil | High | Refrigerant work, access, leak/corrosion issues |
| Fan motor | Medium | Motor type, mounting, wiring changes |
| Capacitor or start kit | Low | Quick replacement if diagnosis is correct |
| Limit/safety switch | Low to medium | Root-cause troubleshooting can add labor |
These steps often identify a lower-cost fix:
- Verify the condenser fan runs; a failed fan motor can overheat the compressor
- Test the capacitor; a weak capacitor can prevent compressor start
- Check for burnt wiring or loose terminals at the contactor
- Confirm correct voltage at the unit during a call for cooling
For DIY electrical testing basics, use our how to use a multimeter to test electrical parts video.
Misdiagnosing a compressor can turn a simple capacitor or fan-motor repair into an unnecessary major expense. Confirming airflow, capacitor health, and proper voltage protects the compressor and your repair budget.
Last updated: February 2026