Owner’s manual


What's the life expectancy of a whirlpool duet dryer?
A Whirlpool Duet dryer typically lasts about 10 to 13 years with normal household use. For your Whirlpool gas dryer model WGD5100HW1, consistent venting and lint maintenance (as outlined in the WGD5100HW1 owner's manual) is the biggest factor in reaching that lifespan.
Typical lifespan and what changes it
Most dryers fail early due to heat stress and restricted airflow, not because the drum stops turning.
- Normal use: 10 to 13 years
- Light use (1 to 3 loads/week): often closer to the high end
- Heavy use (daily loads): often closer to the low end
- Poor venting or lint buildup: can shorten life significantly
Maintenance that extends dryer life (most important)
The WGD5100HW1 manual emphasizes keeping airflow strong; long or kinked vents and too many elbows increase drying time and can shorten dryer life.
- Clean the lint screen before every load
- Use 4-inch rigid metal venting (avoid plastic or foil)
- Keep the vent run short and direct with minimal turns
- Clean lint from the full vent system at least every 2 years
- Keep the area in front of the dryer clear for proper air intake
Venting quick check table
| What we see | What it usually means | What to do |
|---|---|---|
| Loads take longer to dry | Restricted airflow | Clean venting and exhaust hood |
| Dryer runs hot, shuts off early | Overheating protection may trip | Check vent length, elbows, and lint buildup |
| Burning smell or excessive lint | Lint accumulation | Stop using and clean vent path before running |
Parts that commonly wear as a dryer ages
If the dryer is noisy, squeals, or thumps but still heats, wear items are often the cause.
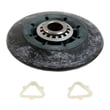
- Drum support rollers (example: dryer drum support roller WPW10314173)
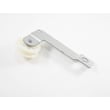
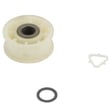
- Idler pulley
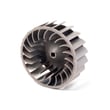
- Blower wheel
- Moisture sensor bars (drying performance issues)
Why it matters
A dryer that is vented correctly dries faster, runs cooler, and puts less strain on the motor, rollers, and gas burner system. That directly improves reliability and helps you get the full expected service life.
Last updated: February 2026
Where is my dryer part number?
On your Whirlpool WGD5100HW1 gas dryer, the most reliable place to find identifying numbers is the model/serial rating plate. For this model, it’s located in the door well (open the dryer door and look around the opening). Use that information to match the correct replacement part.
What to look for on the rating plate
You’ll typically see several identifiers; any of these can help us match parts correctly:
- Model number (for example: WGD5100HW1)
- Serial number (helps confirm production details)
- Gas type/burner information (important for gas dryers)
- Electrical information (outlet and grounding requirements)
- Certification and safety markings
For diagrams and labeling details, use the WGD5100HW1 owner's manual.
Quick locations checklist (most common spots)
If you do not see the plate immediately in the door opening, check these common dryer label locations:
- Door well (most common on Whirlpool dryers)
- Inside the door on the cabinet frame
- Behind the lint screen housing area
- Rear panel area (label on the cabinet)
Part number vs. part ID: what’s the difference?
When shopping for parts, you may see both a manufacturer part number and a Sears PartsDirect part ID.
| You might see | Example from this model | What it’s used for |
|---|---|---|
| Part ID | WPW10314173 | Our catalog identifier for the part listing |
| Part number | W10314171 | Manufacturer number used across brands/models |
Example: if you’re replacing a noisy roller, the dryer drum support roller WPW10314173 listing shows both identifiers.
Why it matters
Using the rating plate information prevents ordering the wrong component (especially on a gas dryer where burner and gas type details matter). It also helps us match the correct version of parts like rollers, idler pulleys, and sensors.
Last updated: February 2026
What are the common problems with Whirlpool dryers?
Common problems we see on Whirlpool gas dryers like model WGD5100HW1 include a dryer that will not start, a drum that will not tumble, no heat or intermittent heat, long dry times from poor airflow, and overheating from a blocked lint screen or vent. Many issues trace back to power, door/controls, airflow, or a worn drive system.
Quick checks first (fastest fixes)
- Make sure the door is fully closed and the Start button is pressed firmly.
- Confirm the dryer is plugged in and the household breaker or fuse is OK.
- Clean the lint screen before every load; do not wash it with water.
- If the display shows “Check Vent”, inspect for a crushed or blocked vent run.
- If you get an L2 code, focus on the home power supply issue noted in the troubleshooting section.
For model-specific operating and troubleshooting details, use the WGD5100HW1 owner's manual.
Most common symptoms and likely causes
| Symptom | Most likely causes | Parts that often fix it |
|---|---|---|
| Won’t start | Door not shut, control setting issue, power/breaker problem | (Usually no parts) |
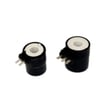
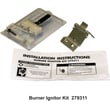
| Runs but won’t heat | Gas ignition problem, sensor issue, airflow restriction | Dryer valve coil kit 279834, igniter 279311 |
| Noisy or squealing | Worn rollers, idler pulley, belt wear | Dryer drum support roller WPW10314173, dryer idler pulley W10837240 |
| Long dry times | Clogged lint screen, blocked venting, weak airflow | (Venting and cleaning) |
| Stops early or dries unevenly | Lint screen residue, airflow problems, moisture sensing issues | Dryer moisture sensor WP3387223 |
Why it matters
Airflow and lint control are the biggest performance drivers on a gas dryer. A restricted vent or clogged lint screen increases dry time, wastes energy, and can overheat components, which leads to more part failures over time.
When a repair is more likely than a setting issue
- The drum turns hard by hand or you hear thumping or squealing.
- Heat starts, then quits mid-cycle (common with gas ignition components).
- “Check Vent” keeps returning after you clean the lint screen and confirm the vent is clear.
Last updated: February 2026