Installation guide
 Owner’s manual
 Error Codes



How do I find the right GE part number?
For your GE JGB650SEF1SS gas range, the right part number starts with the exact model number from the rating label, then matching the part by location and description in the parts breakdown. This prevents ordering a look-alike part that will not fit or connect correctly.
Step-by-step: how we match the correct part
- Find the model number tag on the range (commonly on the oven frame behind the door, the drawer area, or the back panel).
- Write the full model number exactly as shown: JGB650SEF1SS.
- Use the exploded-view diagrams and parts list in the JGB650SEF1SS owner's manual to identify the part name and where it sits on the range.
- Confirm the part by function and symptom (for example: no bake heat often points to an igniter issue).
- Cross-check the part ID and manufacturer part number before ordering.
Quick examples for this model
If you already know what is failing, these common items are easy to misidentify without the diagram:
| What you are fixing | What to verify before ordering | Example part for JGB650SEF1SS |
|---|---|---|
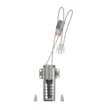
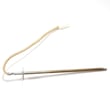
| Oven will not heat (bake) | Correct burner circuit (bake vs broil), wire connector style | Oven igniter WB13K21 |
| Cooktop burner lights poorly | Cap size and burner position match | Range surface burner cap (match by location) |
| No clicking or no spark at burners | Spark module vs electrode vs switch issue | Range spark module (match by diagram) |
Tips that prevent wrong-part returns
- Match by part location (front right burner vs center burner) and not just by appearance.
- For gas ranges, confirm whether the issue is bake, broil, or surface burner ignition; each uses different components.
- If you are replacing electrical parts, shut off power at the breaker first; the installation instructions call out switching power off at the service panel before work.
Why it matters
GE ranges often use similar-looking parts across multiple models, but small differences (mounting holes, connector type, orifice sizing, burner cap diameter) can stop the range from lighting or heating correctly. Matching by model number and diagram keeps the repair safe and accurate.
Last updated: February 2026
How to order GE appliance parts?
To order parts for your GE JGB650SEF1SS gas range, use the complete model number and serial number, then order the exact replacement by part ID or part number. If you need help identifying the right part or placing an order, contact Sears PartsDirect support.
The fastest way to order the right part
- Confirm the model number is JGB650SEF1SS (use the rating label on the range).
- Identify the failed part by symptom (no bake, no broil, no spark, etc.).
- Match the part by part ID first, then confirm the part number.
- Use the diagrams and part lists in the JGB650SEF1SS owner's manual to verify the component location and naming.
- For installation-related parts (gas connection, anti-tip, electrical), follow the JGB650SEF1SS installation guide requirements.
Common parts customers order for this model
If you are ordering because a function stopped working, these are frequent replacements for the JGB650SEF1SS:
| Symptom | Likely area | Example part for this model |
|---|---|---|
| Oven will not heat (bake) | Bake ignition | Oven igniter WB13K21 |
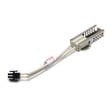
| Oven will not heat (broil) | Broil ignition | Range broil igniter WB13X25261 |
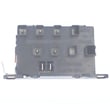
| Cooktop won't spark | Ignition system | Range spark module WB13X26360 |
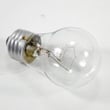
| Oven light out | Lighting | 40a15bulb 40A15 |
What you should have ready before you order
- Complete model number and serial number
- Fuel type in use (natural gas vs. LP conversion status)
- A clear symptom description (for example: "bake igniter glows but no flame")
- Basic electrical info (this range uses a grounded 120-volt dedicated circuit per the installation instructions)
Why it matters
Gas ranges combine gas supply, ignition, and 120-volt controls. Ordering the exact GE JGB650SEF1SS part prevents fit issues and helps avoid repeat failures caused by mismatched igniters, burner parts, or electrical components.
Last updated: March 2026
What model is my GE gas range?
Your GE gas range model number is printed on the rating label. On many GE ranges like model JGB650SEF1SS, the label is behind the rear control panel on a small metal “flag” you can flip up to read the model and serial information.
Where to find the model label on JGB650SEF1SS
Check these common GE range label locations in this order:
- Behind the rear control panel: reach behind the middle of the rear control panel and feel for a small metal flag; rotate it up to view the label
- Inside the oven cavity: along the frame edge near the oven door opening
- Storage or broil drawer area: on the frame behind the drawer front
- Back of the range: on the rear panel near the gas connection area
For diagrams and model-specific details, use the JGB650SEF1SS owner’s manual.
Quick checklist before you write the number down
- Copy the full model number exactly as shown (letters and numbers)
- Record the serial number too; it helps match production changes
- Take a clear photo of the label for ordering parts later
- If the label is greasy, wipe gently with a damp cloth and mild dish soap, then dry
Model number vs. serial number (what each one does)
| Label item | What it tells us | Why it matters for parts |
|---|---|---|
| Model number (example: JGB650SEF1SS) | The exact range design | Ensures parts fit your burner system, oven, and control layout |
| Serial number | Build date and factory info | Helps confirm the correct revision when parts changed mid-production |
Why it matters
GE often uses multiple part versions across similar-looking gas ranges. Using the exact model number helps us match the correct igniter, burner parts, control board, and hardware the first time.
Last updated: February 2026
Why does my GE gas cooktop igniter keep clicking?
On our GE JGB650SEF1SS gas range, a cooktop igniter that keeps clicking usually means the spark system is still “seeing” a call for ignition. The most common causes are moisture, spillover, or a burner cap/head that is not seated correctly, so the burner does not prove flame and the clicking continues.
Quick checks that fix most constant clicking
- Turn all burner knobs to OFF.
- Remove grates and lift off the burner caps; re-seat each cap so it sits flat and centered (a misaligned cap is a top cause).
- Dry the burner head area and the electrode tip thoroughly after cleaning or boil-overs.
- Clean around the burner head ports and cap lip; food residue can distort the flame and delay ignition.
- If clicking happens when no knob is on LITE, wipe under and around the knobs; a wet/dirty switch area can keep the circuit “closed.”
What “normal” sounds like on this model
During ignition, you should hear clicking when you push and turn a knob to LITE. After the burner lights, the clicking should stop when you rotate the knob out of LITE (the installation instructions note burners should light within about 4 seconds once air is purged). See the installation guide.
If the burner lights but clicking continues
Use this checklist to narrow it down:
| Symptom | Most likely cause | What to do next |
|---|---|---|
| Clicking stops after drying | Moisture at electrode/switch | Dry thoroughly; avoid spraying cleaner directly at electrodes/knobs |
| One burner clicks more than others | Cap/head not seated or dirty | Re-seat and clean that burner cap/head |
| Clicking with all knobs OFF | Stuck/wet igniter switch or spark module issue | Dry/clean knob area; if it persists, plan a repair |
Parts that are commonly involved (when cleaning and re-seating do not help)
If the clicking is constant with knobs OFF or multiple burners misbehave, these parts are often checked by a technician:
- Range spark module WB13X26360 (creates the clicking spark)
- Range surface burner head WB16K10062 (burner head alignment and flame pattern)
- Range surface burner cap WB28K10222 (proper seating over the burner head)
Why it matters
Continuous sparking can wear the ignition components faster and can mask a burner that is not lighting consistently. Getting the cap/head alignment and dryness right restores normal ignition and safer, steadier flame.
Last updated: February 2026