Installation guide
 Owner’s manual


How do I reset my KitchenAid wall oven?
To reset your KitchenAid KOCE500EBL01 wall oven, we recommend doing a simple power reset: turn the breaker OFF for about 1 minute, then turn it back ON and set the clock. This clears many temporary control glitches.
Quick reset options (most common)
- Power reset (best first step): Switch the oven’s circuit breaker OFF for 60 seconds, then ON.
- Cancel a stuck cooking mode: Touch CANCEL to stop lower-oven cooking functions.
- Unlock the controls (if keys do not respond): Touch and hold START for about 3 seconds to toggle Control Lock off.
- Clear a timer-only issue: Touch TIMER SET/OFF to stop the kitchen timer (the timer does not start or stop cooking).
Step-by-step: power reset (breaker reset)
- Make sure the oven is not actively cooking; touch CANCEL.
- Turn the wall oven/microwave combo breaker OFF.
- Wait 60 seconds.
- Turn the breaker ON.
- Set the time of day using CLOCK/TOOLS, number keys, then START (see the owner's manual).
If the display is on but the oven will not start
These symptoms usually point to a control setting, not a failed part.
| What you see | What it usually means | What to do |
|---|---|---|
| “START?” appears | A function was selected but Start was not pressed in time | Press START to begin cooking |
| Keys do not respond | Control Lock is enabled | Hold START about 3 seconds to unlock |
| Fan keeps running after Cancel | Normal cooling behavior | Let the fan run until the oven cools |
Why it matters
A reset restores normal operation after a brief power interruption or a control “freeze.” It also helps you confirm whether the issue is a setting (Control Lock, timer, Start prompt) versus a problem that needs deeper troubleshooting.
Last updated: February 2026
Why does my KitchenAid wall oven smell like burning plastic?
A burning-plastic smell from your KitchenAid KOCE500EBL01 wall oven/microwave combo is most often caused by first-use burn-off (protective coatings, packaging residue, or dust heating up). If the smell is new on an older unit or happens with melting, smoke, or sparking, stop using the oven and inspect for overheated wiring or a failing electrical part.
Quick safety steps (do these first)
- Turn the oven off and keep the door closed if you see active smoke.
- If the smell is strong or you see melting, shut off power at the breaker.
- Keep oven vent ducts unobstructed so heat can escape normally.
- Let the unit cool completely before checking anything inside or behind the control area.
- Do not use commercial oven cleaners or oven-liner coatings inside the oven.
Common causes and what to check
- First-use burn-off: Run the oven empty at a high temperature with good ventilation; light smoke or odor can be normal during initial heating.
- Food or grease residue: Spills on the oven floor, racks, or hidden ledges can smell like plastic when they carbonize.
- Overheating during a cycle: A stuck cooling/venting issue can concentrate heat near trim and wiring.
- Electrical odor from the control area: Heat-damaged wiring, connectors, or a control component can create a sharp “hot plastic” smell.
Parts that can be involved (when the smell is electrical)
If the odor seems to come from the control area or the microwave section, these model-compatible parts are commonly involved in overheating or no-heat events:
| Symptom you notice | What it often points to | Example part for KOCE500EBL01 |
|---|---|---|
| Odor after heavy use, unit shuts down | Over-temperature protection opening | Range high-limit thermostat WP4449751 |
| Sudden loss of power/heat, burnt smell | Safety device opened from heat | Thermal fuse WPW10545291 |
| Microwave performance issues plus odor | High-voltage power components | Inverter W10217711 |
Why it matters
A “new oven” odor is usually harmless and temporary, but a true burning-plastic smell on a previously normal KOCE500EBL01 can signal overheating near wiring or safety devices. Catching it early helps prevent repeat shutdowns and protects nearby components.
For model-specific operating guidance and safety warnings, follow the KOCE500EBL01 owner's manual.
Last updated: February 2026
How to know if the KitchenAid wall oven thermostat is bad?
If your KitchenAid KOCE500EBL01 wall oven consistently overcooks or undercooks even after you adjust the oven temperature settings, the temperature control system is not regulating heat correctly. We use the troubleshooting and temperature adjustment steps in the KOCE500EBL01 owner's manual to confirm whether the issue is calibration, airflow, or a failed control component.
Signs the temperature control is failing
Look for patterns that repeat across multiple bakes (not just one recipe):
- Food browns too fast on the outside while staying underdone inside
- Oven temperature swings widely during a single bake cycle
- Preheat takes much longer than normal (most ovens reach 350°F in about 12 to 17 minutes)
- You smell excessive heat or see frequent cycling that seems abnormal
- Results are still off after you apply a temperature adjustment
Quick checks before blaming a thermostat
On this model, temperature accuracy problems are often caused by setup or airflow issues first.
- Do not block the oven vents; blocked vents reduce cooling airflow and can affect cooking results
- Confirm you are fully preheating before loading food
- Use a standalone oven thermometer to compare set temperature vs. actual temperature
- Try the oven temperature adjustment feature (see table below)
- If the oven will not heat at all, check the home breaker or fuse first
Oven temperature adjustment guide
Use this as a practical way to “prove” the oven is consistently off in one direction.
| If your oven cooks… | Try adjusting by… |
|---|---|
| A little too hot | -10°F (-6°C) |
| Moderately too hot | -20°F (-12°C) |
| Much too hot | -30°F (-18°C) |
| A little too cool | +10°F (+6°C) |
| Moderately too cool | +20°F (+12°C) |
| Much too cool | +30°F (+18°C) |
When a part is more likely than calibration
If the oven temperature is still wrong after adjustment, a failed sensor or control can be the cause. For KOCE500EBL01, a common temperature-feedback part to check is the oven sensor W11233913.
Why it matters
An oven that runs hot or cold wastes energy, ruins baking results, and can cause the appliance to run longer than designed. Verifying vents, preheat behavior, and temperature adjustment helps you avoid replacing parts that are still good.
Last updated: February 2026
What is the life expectancy of a KitchenAid oven?
KitchenAid ovens typically last 10 to 15 years with normal household use and basic care. For your KitchenAid KOCE500EBL01 wall oven and microwave combo, lifespan is driven most by heat exposure, cleaning habits, and the condition of key electrical parts like fuses, thermostats, and control components; see the KOCE500EBL01 owner's manual for model-specific care guidance.
Typical lifespan and what affects it
Most built-in electric ovens reach the 10 to 15 year range when they are installed correctly, kept clean, and not routinely overheated.
- Heavy daily use shortens life faster than occasional baking
- Frequent self-clean cycles accelerate wear on wiring, thermal fuses, and door latches
- Power surges and loose connections stress control boards and inverter electronics
- Blocked vents trap heat and raise internal temperatures
- Slamming or leaning on the door wears hinges and can affect door alignment
Parts that commonly limit lifespan (and what they do)
If your KOCE500EBL01 starts shutting down, overheating, or heating inconsistently, these are common “life-limiting” components to check.
| Symptom | Common part area | Example part on this model | Why it matters |
|---|---|---|---|
| Oven overheats or trips off | High-limit protection | Range high-limit thermostat WP4449751 | Prevents unsafe temperatures; nuisance trips can stop cooking mid-cycle |
| Unit dead or intermittent power | Fuse/thermal protection | Thermal fuse WPW10545291 | Opens when temperatures or current are abnormal; restores safety but stops operation |
| Microwave heats poorly or not at all | High-voltage power section | Inverter W10217711 | Drives microwave power output; failure reduces or eliminates heating |
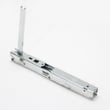
| Door won’t close or feels loose | Door hardware | Door hinge W10874474 | Proper sealing and alignment protect performance and reduce heat loss |
Care steps that extend oven life
These habits reduce heat stress and electrical failures.
- Use self-clean only when truly needed; wipe spills after the oven cools
- Keep vents clear and avoid covering trim or airflow openings
- Let the oven cool between high-heat cycles (pizza, broil, convection roast)
- Use cookware that fits; oversized pans can block airflow and create hot spots
- If you smell burning insulation or see flickering display, stop using the unit and inspect wiring and fuses
Why it matters
A wall oven/microwave combo like the KOCE500EBL01 packs more electronics into a tight cabinet space. Managing heat and keeping safety devices (thermal fuse, high-limit thermostat) healthy is the biggest factor in reaching the full 10 to 15 year life expectancy.
Last updated: February 2026