Owner’s manual
 Error Codes




Can you replace an LG water filter without turning off water?
Yes. On the LG LFXC22526D refrigerator, you can replace the water filter with the water supply left on; the filter housing is designed for a quick change. Plan for a small spill (about 1 oz.) and flush the dispenser afterward to clear air and carbon fines; follow the steps in the owner's manual.
We recommend doing these quick prep steps to prevent leaks and make removal easier:
- Dispense a few cups of water first to relieve pressure.
- Have a towel ready under the filter door; a small amount of water drains during removal.
- Lower or remove the top left shelf so the filter can rotate down fully.
- Keep the old filter upright after removal to avoid drips.
- If the control panel is locked, hold the Lock button until the lock icon turns off.
Use this sequence for a clean swap and a correct reset:
- Open the filter cover.
- Pull the filter down, turn it counterclockwise, then pull it out.
- Install the new filter: push in with tabs horizontal, then turn clockwise until it stops.
- Close the cover (it should click).
- Flush 2.5 gallons (about 5 minutes) using 30 seconds ON, 60 seconds OFF cycles.
- Press and hold Water Filter for 3 seconds to reset the Replace Filter indicator.
These are the most common causes right after a filter replacement:
| Symptom | Most likely cause | What we do next |
|---|---|---|
| Water spurts, then slows | Air in the line | Keep flushing in short cycles until steady |
| Drips at the filter door | Filter not fully seated | Remove and reinstall; turn fully clockwise |
| Very low dispenser output | Filter not rotated down fully during install | Reinstall after lowering/removing the shelf |
| Replace Filter light stays on | Indicator not reset | Hold Water Filter for 3 seconds |
Changing the filter on schedule (about every 6 months, or when the Replace Filter icon turns on) helps protect water taste, dispenser flow, and ice maker performance. For step-by-step visuals and filter types, use how to replace the water filter in an LG refrigerator.
Last updated: February 2026
What is the life expectancy of an LG fridge?
Most LG refrigerators, including the LG LFXC22526D, typically last 12 to 15 years with normal household use and basic maintenance. Your actual lifespan depends most on how well the sealed system stays healthy (compressor, condenser, evaporator) and how clean and well-sealed the unit is over time.
A refrigerator’s life is mainly driven by run time, heat removal, and door sealing. These factors have the biggest impact:
- Condenser cleanliness: Dust buildup makes the compressor work harder.
- Door seal condition: Air leaks force longer run times and can cause frost and temperature swings.
- Room temperature and ventilation: Tight cabinets and hot garages shorten life.
- Ice maker and dispenser use: Heavy use increases wear on water and ice components.
- Power quality: Frequent outages or surges stress electronics and the compressor.
We recommend these habits for LG bottom-mount refrigerators:
- Vacuum and brush the condenser area regularly (every 6 to 12 months).
- Keep doors closing squarely; correct alignment issues early.
- Clean and condition door gaskets; replace torn or permanently deformed seals.
- Keep vents inside the fresh food section and freezer clear of packages.
- Replace water filters on schedule and purge air after filter changes.
If you need model-specific care and cleaning intervals, use the owner's manual.
Use this as a practical rule of thumb when deciding what to do as the unit ages:
| Refrigerator age | What we typically recommend | Why |
|---|---|---|
| 0 to 5 years | Repair most issues | Highest remaining service life |
| 6 to 10 years | Repair if cooling is strong and parts are reasonable | Good value if sealed system is healthy |
| 11 to 15 years | Case-by-case | More wear; efficiency and reliability drop |
| 16+ years | Replace more often than repair | Major repairs rarely pay off |
Knowing the expected lifespan helps you plan for maintenance and avoid food-loss events. Simple items like door gaskets can reduce compressor run time, which is one of the biggest drivers of long-term reliability.
If you’re troubleshooting cooling performance, checking the condenser area and airflow is a strong first step; parts like the refrigerator condenser fan motor EAU63923602 and refrigerator condenser coil ACG73749403 are directly tied to heat removal.
Last updated: February 2026
Why is my LG refrigerator leaking from the bottom?
A leak from the bottom of our LG LFXC22526D refrigerator is most often caused by a clogged or frozen defrost drain that overflows, or a water supply or ice maker leak that runs down the cabinet and pools underneath. Start by locating where the water first appears.
- Look for water under the crisper drawers (common with a defrost drain backup).
- Check the ice maker area for dripping, splashing, or an overfill.
- Inspect the water line and filter area for slow drips.
- Make sure the refrigerator is level so water flows into the drain pan.
- Dry the area, then recheck after a few hours to confirm the source.
During defrost, water should flow through the drain and into the drain pan. If the drain is blocked, water backs up and leaks out.
- Melt ice in the drain trough with warm air (no sharp tools)
- Flush the drain with hot water using a baster or squeeze bottle
- If the drain tube stays restricted, replace it
A common related part is the refrigerator drain tube 5251JA3003D.
A small leak near the ice maker can travel down and show up as a bottom puddle.
- Check the fill tube and fill cup alignment
- Look for cracks in the ice maker mold
- Inspect fittings for mineral buildup or loose connections
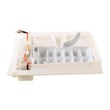
If the ice maker itself is leaking or not cycling correctly, the LG refrigerator ice maker AEQ72909604 is a common replacement.
| What you notice | Most likely cause | Best next step |
|---|---|---|
| Water under crispers | Defrost drain clogged/frozen | Thaw and flush drain, check drain tube |
| Puddle near ice maker side | Ice maker or supply leak | Inspect fill area and fittings |
| Water after dispensing | Dispenser line leak | Inspect tubing and connections |
Bottom leaks can cause floor damage and ice buildup that restricts airflow and hurts cooling. Fixing the drain path or water leak early prevents repeat puddles.
For model-specific panel access and drain locations, use the owner's manual.
Last updated: February 2026
What is the most common problem with an LG refrigerator?
For the LG LFXC22526D refrigerator, the most common problem we see is a cooling complaint (refrigerator or freezer too warm, or food freezing near vents). The most frequent causes are door sealing and airflow issues, heavy door opening, or normal temperature recovery after installation, defrost, or power loss.
- Refrigerator or freezer too warm
- Food freezing near an air vent
- Temperature swings after a defrost cycle
- Compressor seems to run “too much”
- Doors not closing fully or hard to open
- After installation or power restoration, allow up to 24 hours for temperatures to stabilize.
- Keep door openings brief; loading warm food makes the compressor run longer.
- Confirm doors close completely and nothing is blocking them.
- Move high water content foods away from air vents.
- Clean sticky or dirty door gaskets; a poor seal lets warm air in.
If the basics check out and temperatures still drift, these model-matched parts are common suspects:
| Symptom | What to check | Example part for this model |
|---|---|---|
| Warm temps, long run time | Condenser airflow | Refrigerator condenser fan motor EAU63923602 |
| Poor cooling efficiency | Condenser condition | Refrigerator condenser coil ACG73749403 |
| Inaccurate temps | Temperature sensing | Refrigerator temperature sensor 6500JB2002X |
| Moisture, frost, warm temps | Door sealing | Refrigerator door gasket, left ADX73550628 |
Cooling problems often look like a major failure, but door sealing, airflow, and normal recovery time are the most common root causes. Fixing those first protects food temperatures and prevents unnecessary parts replacement.
For model-specific operating and troubleshooting steps, use the owner's manual.
Last updated: February 2026