


How much does it cost to repair a GE dryer?
For a GE electric dryer like model GTD33EASK1WW, repair cost usually depends on whether you’re fixing a simple wear item (like a belt) or a heat or motor problem. Most customers spend more on labor and diagnostics than the part itself, so identifying the failure first keeps the total cost down.
Typical repair cost ranges (parts + labor)
These ranges are common for in-home service on a standard electric dryer; your total changes with local labor rates and whether the venting or electrical supply needs correction.
- Service call/diagnostic: typically $80 to $150
- Minor mechanical repair (belt, glides, switch): typically $150 to $350
- No-heat repair (element, thermostats): typically $200 to $450
- Motor or major rebuild: typically $350 to $700+
- Control/timer issues: typically $200 to $500
Common GTD33EASK1WW repairs and the parts that drive cost
If your dryer tumbles but won’t heat, parts in the heating circuit are the usual suspects. If it won’t start or won’t tumble, the start circuit or drive system is more likely.
| Symptom | Common cause | Example part for this model |
|---|---|---|
| Drum won’t turn, motor runs | Broken belt or seized idler | Dryer drum belt WE03X29897 |
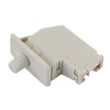
| Won’t start | Failed start switch or door switch | Dryer push-to-start switch WE4M416 |
| Runs but no heat | Failed heater or thermostat | Dryer heating element WE11M10001 |
| Overheats or shuts off | High-limit or safety thermostat opening | Dryer high-limit thermostat WE04X26139 |
Ways to keep the repair cost down
- Clean the lint screen every load and keep airflow strong.
- Check the vent for kinks, crushing, or heavy lint buildup.
- Confirm the dryer is getting full 240V power (a tripped breaker can cause “runs but no heat”).
- Match the symptom to the most likely system (heat, start, drive) before buying parts.
- If the dryer is taking too long to dry, address airflow first; it prevents repeat failures.
Why it matters
Dryer repairs often look like “bad heat” or “bad motor,” but restricted venting and overheating can trigger thermostat failures and longer dry times. Fixing airflow first can reduce repeat service calls and protect parts like the heating element and thermostats.
Related help: electric dryer wont heat troubleshooting video
Last updated: February 2026
How to tell if a dryer thermal fuse is blown?
On a GE GTD33EASK1WW electric dryer, a blown thermal fuse typically causes a no-heat or no-run condition and will test “open” (no continuity) with a multimeter. We confirm it by safely accessing the fuse near the blower housing or heater duct and checking continuity after disconnecting at least one wire.
Quick test steps (multimeter continuity)
- Unplug the dryer (or switch off the breaker) before removing any panels.
- Access the blower housing or heater duct area where the thermal fuse is commonly mounted.
- Pull off at least one wire from the fuse terminal (so you do not read through the circuit).
- Set the meter to continuity (or lowest ohms).
- Touch probes to the fuse terminals:
- Good fuse: continuity (beep or near 0 ohms)
- Blown fuse: no beep, OL, or very high resistance
What usually causes the fuse to blow
A thermal fuse opens because the dryer overheated. Fix the overheating cause before replacing parts.
Common causes to check first:
- Crushed, kinked, or excessively long vent hose
- Lint buildup in the lint chute or blower housing
- Blocked exterior vent hood (stuck flap, bird screen clogged)
- Restricted airflow from a clogged lint screen (even if it “looks” clean)
- Failed cycling thermostat or heater issue that drives temps too high
Symptoms guide
| Symptom on GTD33EASK1WW | What it often points to | What to check next |
|---|---|---|
| Dryer will not start | Safety circuit open | Door switch, thermal fuse, start switch |
| Runs but no heat | Heat circuit open | Thermal fuse, heater, thermostats |
| Long dry times, very hot cabinet | Airflow restriction | Venting, lint chute, blower housing |
Parts that are commonly involved on this model
If testing confirms a failed component, these are common related parts for GTD33EASK1WW:
- Dryer high-limit thermostat WE04X26139
- Dryer safety thermostat WE04X25194
- GE dryer heater assembly WE11X21156
Why it matters
A blown thermal fuse is a safety device; replacing it without correcting airflow or overheating can lead to repeat failures, poor drying performance, and additional damage to the heating system.
Last updated: February 2026
What brand of dryer has the least problems?
No dryer brand is problem-free, but for the fewest service issues over time, we typically see the best results from brands known for simpler designs and strong parts support. For shoppers comparing against your GE GTD33EASK1WW electric dryer, Speed Queen is widely regarded for durability, and Whirlpool-family brands (Whirlpool, Maytag) plus LG often rate well for reliability.
What to prioritize when “least problems” matters
- A simpler control style (fewer electronic boards and sensors)
- Easy-to-clean lint path and straightforward venting
- Common, readily available wear parts (belt, glides, idler pulley)
- Strong service network and parts availability
- A model with a long production run (more proven design)
Reliability comparison (practical, real-world view)
| Brand | Typical reliability reputation | Typical tradeoff |
|---|---|---|
| Speed Queen | Very durable, fewer breakdowns | Higher upfront cost, fewer feature options |
| Whirlpool / Maytag | Strong overall reliability, widely serviceable | Model-to-model variation |
| LG | Often strong performance and efficiency | Repairs can be pricier in some areas |
| GE | Solid mainstream reliability | Some models are more feature-heavy |
Why parts support matters (even with a “reliable” brand)
Most dryer problems are wear-and-tear, not brand defects. On GE dryers like GTD33EASK1WW, common maintenance and repair items include the belt, drum support, and airflow components. If your dryer starts squealing, thumping, or stops tumbling, checking wear parts such as the dryer drum belt WE03X29897 is a practical first step.
How to reduce problems with any dryer brand
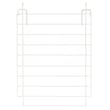
- Clean the lint screen every load; replace a damaged screen like the GE dryer lint screen WE03X23881
- Keep the vent run short and clear; restricted airflow causes overheating and longer dry times
- Avoid overloading; it accelerates belt and drum support wear
- If drying slows, inspect the lint chute and internal lint buildup
- Address heat issues early; repeated overheating can damage thermostats and the heater
Helpful reading
Last updated: February 2026
What's the life expectancy of a GE dryer?
A GE electric dryer like model GTD33EASK1WW typically lasts about 10 years with normal household use. Consistent airflow (clean lint path and venting), avoiding overloads, and replacing wear items early are the biggest factors that keep drying performance strong over time.
Typical lifespan and what changes over time
Most electric dryers run reliably for years, but a few components wear faster than the cabinet or drum.
| Item | Typical wear timing | Common symptom |
|---|---|---|
| Drum belt | 5 to 10 years | Drum will not tumble, squealing, burning rubber smell |
| Drum glides/bearings | 5 to 12 years | Thumping, scraping, metal-on-metal noise |
| Heating circuit parts | 5 to 12 years | No heat, weak heat, long dry times |
| Timer/controls | 7 to 15 years | Will not advance, inconsistent cycle behavior |
What we recommend to reach (or beat) 10 years
- Clean the lint screen every load; replace a damaged screen such as the GE dryer lint screen WE03X23881.
- Keep the vent run short and clear; long dry times usually trace back to restricted airflow.
- Do not overload; heavy loads strain the motor, drum support, and belt.
- Address new noises early; worn supports can damage the drum if ignored.
- Replace common wear parts proactively when symptoms start, such as the dryer drum belt WE03X29897 or the dryer drum glide bearing, upper WE03X37320.
Why it matters
A dryer can still “run” while drying poorly. Restricted airflow and worn drum support parts increase heat stress, raise cycle times, and accelerate failures in the heating element, thermostats, and motor. Keeping airflow and drum support in good shape is the simplest way to extend the service life of a GE dryer.
Helpful DIY reading
- Use how to clean and maintain your clothes dryer to build a simple maintenance routine.
- If drying time is creeping up, follow dryer takes a long time to dry for airflow-focused troubleshooting.
Last updated: February 2026
Where to find part number on GE dryer?
On a GE electric dryer like model GTD33EASK1WW, we typically find the model and serial tag (the information you need to look up the correct parts) on the door opening area, most often on the inside of the door or on the door frame when you open the dryer.
What to look for on the tag
The tag usually includes several identifiers. Any of these can help us match parts correctly:
- Model number (example: GTD33EASK1WW)
- Serial number
- Electrical ratings (volts/amps)
- Sometimes a manufacturing date code
Common GE dryer tag locations
Check these spots in order (they are the most common on GE dryers):
- Inside the door on the cabinet front
- Door frame around the opening
- Behind the lint screen housing area (less common)
- Rear panel label (occasionally)
How the number helps you get the right part
Once you have the model number, match parts by model first, then by the specific component you are replacing.
| If you are replacing | Example part for GTD33EASK1WW | Why it matters |
|---|---|---|
| A broken belt or drum not turning | Dryer drum belt WE03X29897 | Correct length and rib profile prevents slipping and noise |
| Dryer will not start when you press start | Dryer push-to-start switch WE4M416 | A failed switch can stop the motor circuit from engaging |
| Dryer runs but has heat problems | Dryer heating element WE11M10001 | Correct wattage and fit restores proper heating |
Why it matters
GE often uses similar-looking parts across multiple dryer series, so using the exact model number from the tag is the fastest way to avoid ordering a timer, door switch, thermostat, or belt that does not fit your dryer.
Last updated: February 2026