



Where to find part number on GE dryer?
On a GE dryer like model PTD60EBPR1DG, the part number you need is usually on the appliance’s model/serial tag, which is most often located just inside the dryer door opening on the door frame or on the inside edge of the door.
Where to look first (fast checks)
- Open the dryer door and inspect the door frame (all four sides)
- Check the inside edge of the door itself
- Look for a sticker or metal tag labeled Model and Serial
- Wipe dust off the tag; use a flashlight to read small print
- Take a photo so you can zoom in and avoid misreading characters
What you are actually looking for
The model/serial tag helps us match the correct parts diagram and the exact replacement part for your dryer.
| Label item | What it’s used for | Example for this dryer |
|---|---|---|
| Model number | Identifies the exact dryer design | PTD60EBPR1DG |
| Serial number | Production info; helps confirm revisions | Varies by unit |
| Part number | Identifies a specific replacement part | Example: WE03X29897 |
If you meant “part number” for a replacement part
Once you confirm the model number, you can match the specific component you need. Common examples for PTD60EBPR1DG include:
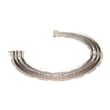
- GE dryer drum belt WE03X29897 (drum won’t turn, squealing, belt broken)
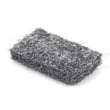
- GE dryer lint screen WE03X23881 (torn screen, poor airflow, lint bypass)
- Dryer door switch WE04X28977 (dryer won’t start when door is closed)
Why it matters
GE dryers can look similar across series, but small design changes affect fit and wiring. Using the model/serial tag prevents ordering the wrong drum belt, heater, thermistor, or control.
Last updated: February 2026
How to remove front panel of GE front load dryer?
To remove the front panel on a GE PTD60EBPR1DG front-load dryer, we unplug power first, then lift the top, remove the screws securing the front panel, and disconnect any wiring (such as the door switch) while supporting the panel so it does not drop.
Safety first
- Unplug the dryer (or switch off the breaker) before opening any panels
- Wear cut-resistant gloves; cabinet edges can be sharp
- If the dryer was running, let the heater area cool completely
- Take a quick photo of wire connections before disconnecting anything
Steps to remove the front panel (typical GE front-load design)
- Disconnect power.
- Remove the top panel. On many GE dryers, screws at the back secure the top; remove them and slide the top back slightly, then lift it.
- Locate and remove front-panel mounting screws. These are commonly along the inside top edge (under the lifted top) and sometimes at the lower corners.
- Support the front panel and tilt it forward. Keep one hand on the panel as the last screw comes out.
- Disconnect wiring harnesses. Commonly the door switch connector; on this model, the related part is the dryer door switch WE04X28977.
- Lift the panel off the lower retaining tabs/clips (if present) and set it aside.
What you may need to remove or move first
| Item | Why it matters | Common symptom if left in place |
|---|---|---|
| Lint screen | Can block access on some designs | Panel will not clear the opening |
| Screws under the top | Primary fasteners for the front panel | Panel feels stuck at the top |
| Door switch wiring | Prevents pulling the panel away | Panel only opens a few inches |
Why it matters
Removing the front panel is the starting point for many repairs on the PTD60EBPR1DG, such as accessing the drum, belt, idler, and blower area. If you are chasing a squeal or thump, the GE dryer drum belt WE03X29897 and idler components are common inspection points once the front is off.
Last updated: February 2026
How to replace GE dryer sensor?
On the GE PTD60EBPR1DG dryer, “sensor” usually means the moisture sensor bars inside the drum area; replacement is a simple access-and-swap job once you unplug the dryer and open the front to reach the sensor wiring. If your symptom is “won’t start,” the door switch is a different part.
Before you replace anything
We recommend confirming which “sensor” you mean, because the fix and part are different.
- Moisture sensor issue: auto cycles end too soon, clothes still damp, or cycle time acts erratic
- Door sensing issue: dryer won’t run when you press Start, or stops when the door is bumped
- Heating control sensing issue: poor drying with normal airflow, heat cycling oddly
- Error code present: use the code to narrow the failure first
A quick first step for moisture-sensor complaints is to clean the sensor bars with rubbing alcohol and a soft cloth; residue from dryer sheets can insulate the bars.
Parts that are commonly confused
| What you call it | What it does | Example part for PTD60EBPR1DG |
|---|---|---|
| Moisture sensor | Detects dampness for Auto/Sensor Dry cycles | Dryer moisture sensor WE1M575 |
| Door “sensor” (switch) | Proves the door is closed so the dryer can run | Dryer door switch WE04X28977 |
| Thermistor | Reports temperature to the control | Dryer thermistor WE4M448 |
Basic replacement overview (most GE dryers)
- Unplug the dryer (and shut off gas if you have a gas model)
- Remove the front access needed to reach the sensor or switch (varies by design)
- Take a photo of wire locations before disconnecting anything
- Swap the part, reconnect wires firmly, and reassemble
- Run a timed dry test to confirm operation before relying on Auto cycles
Why it matters
Replacing the correct component prevents repeat failures and wasted time. A dirty moisture sensor can mimic a bad sensor, and a failed door switch can look like a “dead” dryer.
For code-based troubleshooting, use GE cleanspeak dryer error codes.
Last updated: February 2026
Where is the GE dryer thermal fuse located?
On the GE PTD60EBPR1DG dryer, the thermal fuse is typically mounted on the blower housing or exhaust duct area inside the cabinet (not on the control panel). You usually access it by unplugging the dryer and removing the rear panel, then tracing the vent path from the lint area to the blower.
What to look for (common locations)
The thermal fuse is a small, flat safety device with 2 wires on it. In most GE electric dryers, you’ll find it in one of these spots:
- On the blower housing near where the exhaust duct connects
- On the exhaust duct inside the cabinet
- Close to the lint duct/trap assembly (airflow path from drum to blower)
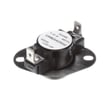
- Near other safety devices such as a hi-limit thermostat
A clogged lint path is the most common reason a thermal fuse opens, so check airflow before replacing parts.
Quick access steps (safe DIY)
- Unplug the dryer (or switch off the breaker) before opening panels
- Pull the dryer away from the wall and disconnect the vent hose
- Remove the rear panel screws and set the panel aside
- Follow the metal ducting from the lint area toward the blower housing
- Look for a small 2-wire fuse mounted with 1 or 2 screws
What to check while you’re in there
Good airflow prevents repeat failures. We recommend checking these items at the same time:
| Item to check | Why it matters | What to do |
|---|---|---|
| Lint screen | Restriction causes overheating | Clean and wash off residue if needed |
| Lint duct/trap | Lint buildup blocks airflow | Vacuum out lint and debris |
| Vent hose and wall vent | Long dry times and overheating | Clear lint, kinks, and crushed sections |
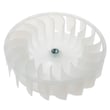
| Blower wheel | Weak airflow even with clean vent | Inspect for damage or looseness |
If your lint screen is torn, warped, or won’t seat correctly, replace it with the correct part for this model: GE dryer lint screen WE03X23881.
Why it matters
The thermal fuse is a one-time safety cutoff. If it opens, the dryer may not run or may run with no heat depending on the design. Restoring proper airflow helps prevent the new fuse from opening again.
Last updated: February 2026