Installation guide
 Owner’s manual


What's the life expectancy of a GE dryer?
A GE dryer like model GTD84ECSN2WS typically lasts 10 years with normal household use. Consistent airflow (clean lint screen and venting), avoiding overloads, and basic annual maintenance are the biggest factors that keep the motor, heater, and drum support parts running longer.
- Vent restriction (long ducts, crushed flex duct, clogged vent hood) increases heat and run time
- Lint buildup inside the cabinet or exhaust duct raises operating temperature
- Overloading strains the drive system and drum support components
- Moisture sensor and thermistor issues can cause overheating or long dry times
- Skipping routine cleaning shortens the life of the heater and thermostats
Use your GTD84ECSN2WS owner's manual for model-specific care steps and settings.
| Task | How often | Why it helps |
|---|---|---|
| Clean lint screen | Every load | Keeps airflow strong and drying times normal |
| Check vent airflow at outside hood | Monthly | Prevents long dry times and overheating |
| Clean the exhaust ducting | At least yearly | Reduces clogs that lengthen cycles |
| Wipe drum and door seal area | Monthly | Prevents residue transfer and odors |
These are normal wear items; replacing them on time often extends the usable life of the dryer.
- Heating system components (element, thermostats, thermistors)
- Drum support parts (glides, felt seals, bearings)
- Drive components (idler pulley, belt, motor pulley)
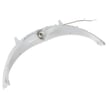
If you are troubleshooting heat problems on this model, the GE dryer heater assembly WE11X21156 is one of the key heating-system assemblies used on GTD84ECSN2WS.
A dryer that is forced to run hotter and longer (usually from poor venting) wears out the heater circuit, thermostats, and motor faster. Keeping airflow strong is the simplest way to hit the full 10-year lifespan.
Last updated: February 2026
What is the most common problem with a GE electric dryer?
For the GE GTD84ECSN2WS electric dryer, the most common issue we see is no heat or long dry times, usually caused by an airflow restriction (lint buildup or a blocked vent) or a failed heating component (heater, thermistor, or hi-limit thermostat). Use the GTD84ECSN2WS owner's manual troubleshooting tips to narrow it down safely.
- Drum tumbles but no heat: often a tripped breaker (electric dryers can run on one leg of power) or a heating circuit problem.
- Takes too long to dry: commonly a partially blocked exhaust duct or lint restriction.
- Stops mid-cycle or overheats: airflow problem that triggers temperature safety controls.
- Lint on clothes: lint screen not cleaned each load, overloading, or poor sorting.
- Inconsistent drying: venting issues, load size, or sensor cycle conditions.
- Clean the lint screen before every load (the manual warns not to run without the filter in place).
- Check the home electrical supply: reset both breakers (or replace both fuses) feeding the dryer.
- Inspect venting: confirm strong airflow outside; clean the exhaust duct at least yearly.
- Run a timed dry test: if timed dry heats but sensor cycles struggle, focus on airflow and loading.
If power and venting check out, these model-matched parts are common suspects:
| Symptom | Likely part area | Example model-matched part |
|---|---|---|
| No heat, tumbles normally | Heater circuit | GE dryer heater assembly WE11X21156 |
| Overheating, shuts off | Temperature limit control | Thermostat hi limit WE04X30381 or thermostat hi limit WE04X31037 |
| Poor temperature control | Temperature sensing | Dryer heating element control thermistor WE4M398 or dryer thermistor WE4M448 |
Airflow problems do more than slow drying; they can cause overheating that trips safety components and shortens the life of the heating system. Keeping the lint screen and exhaust duct clean is the best prevention step for GE electric dryer heating complaints.
Last updated: February 2026
How much does it cost to replace drum bearings on a dryer?
For a GE GTD84ECSN2WS dryer, replacing worn drum bearings and glides typically costs $150 to $450 total (parts plus labor). If you do the repair yourself, parts commonly run $20 to $150, depending on what’s worn and what you replace at the same time.
- What’s actually worn: upper drum glide bearing, bearing and slide assembly, rear bearing components, or drum felt seal
- How far you go: many repairs include related wear items (glides, felt, idler) to prevent repeat teardown
- Labor time: drum support work requires cabinet disassembly and careful reassembly
- Service call minimums: some shops charge a diagnostic fee plus labor
| Repair scope | What’s included | Typical total cost |
|---|---|---|
| Basic support refresh | Glides/slides only | $150 to $300 |
| Full drum support service | Glides + bearing/slide assembly + seal checks | $250 to $450 |
| “While you’re in there” | Adds idler or other wear parts | $300 to $550 |
On GTD84ECSN2WS, drum support noise or scraping often points to the upper support components. These are common candidates:
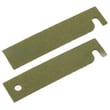
- Dryer drum glide bearing, upper WE03X37320
- Dryer drum bearing and slide assembly, upper WE03X23875
- Dryer drum felt seal WE09X27634
- Dryer idler assembly WE03X27417
- Squealing or scraping that changes as the drum turns: glides/slides or felt seal
- Thumping that comes and goes: drum support wear or something caught at the seal
- Metal-on-metal sound: stop using the dryer until inspected to avoid drum damage
- Long dry times: often venting, not bearings; confirm venting per the installation guide
Drum bearing and glide wear can quickly turn into drum damage, belt wear, and overheating risk if friction increases. Addressing the support system early usually keeps the repair smaller and less expensive.
Last updated: February 2026
What if I can't find my part on Sears PartsDirect?
If you can’t find a part for your GE dryer model GTD84ECSN2WS, we recommend confirming the exact model and serial information first, then searching by the part name or part number from your diagrams or documentation. If it still doesn’t show up, contact our parts specialists for help matching the correct replacement.
- Recheck the full model number (GTD84ECSN2WS) and include every letter and number.
- Use the part number from your documentation when possible (it’s the fastest match).
- Try a broader search term (example: “door switch” instead of “switch”).
- Look for alternate names (example: “heater assembly” vs. “heating element”).
- Confirm you are shopping the correct appliance type (dryer vs. washer).
- Compare your dryer’s features (steam vs. non-steam) because accessory and hose kits can differ.
| What you searched | What to try instead | Why it helps |
|---|---|---|
| A partial model number | Full model number + part name | Prevents mismatches across similar GE models |
| A generic term like “belt” | “Idler pulley” or “idler assembly” | Some wear items are listed under related drive parts |
| A symptom like “no heat” | “Heater assembly” or “thermistor” | Parts are organized by component, not symptom |
Use the parts list and diagrams in the GTD84ECSN2WS installation guide to identify the correct component names and any installation-specific items (such as ducting, clamps, or cord type). For operating features and accessory references, the GTD84ECSN2WS owner’s manual is also helpful.
If your issue is heat-related, a common component customers look up first is the GE dryer heater assembly WE11X21156. We use that part name and ID format to ensure you land on the exact match.
Dryer parts can look similar across GE models, but small differences (electrical connection type, steam options, mounting points) can cause a wrong-part order. Using the model-specific documentation and exact part identifiers helps you get the right fit the first time.
Last updated: February 2026