



How much does it cost to replace a GE dryer motor?
For a GE dryer like model 5TX62E9ST0WS, replacing the motor typically costs about $200 to $500 total: roughly $200 to $300 for the motor assembly plus $150 to $250 in labor (more if additional worn drive parts are replaced at the same time).
Typical cost breakdown
- Motor part: commonly $200 to $300 for a complete motor assembly
- Labor: commonly $150 to $250 (about 1 to 2 hours)
- Service call/diagnostic (if charged separately): commonly $75 to $125
- Optional related parts (if worn): belt, idler pulley, drum glides
| Scenario | What you pay for | Typical total |
|---|---|---|
| DIY motor replacement | Motor only (plus any extras) | $200 to $350 |
| Pro replacement (motor only) | Motor + labor | $350 to $550 |
| Pro replacement with drive wear items | Motor + belt/idler/glides + labor | $425 to $650 |
Parts that are often replaced with the motor
If the motor failed after squealing, thumping, or a burning smell, we often see wear in the drive system. Replacing these at the same time helps prevent repeat teardown.
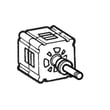
- Dryer drive motor and pulley WE49X28295 (motor and pulley assembly)
- GE dryer drum belt WE03X29897 (drives the drum)
- Dryer idler pulley WE03X31620 (keeps belt tension)
- Dryer drum glide bearing, upper WE03X37320 (supports drum at the front)
Why it matters
A dryer motor replacement is a bigger labor job because the cabinet and drum usually need to come out. If the belt, idler, or glides are worn, replacing them during the same repair reduces noise, improves drum support, and helps the new motor last.
Last updated: February 2026
What is the most common problem with a GE electric dryer?
The most common problem we see with a GE electric dryer like model 5TX62E9ST0WS is no heat or long dry times, usually caused by restricted airflow (lint buildup or venting issues) or a failed heating circuit part (thermostat or heating element). Drum not tumbling is the next most common.
Most common symptoms and what they usually point to
- Runs but no heat: failed heater circuit component, or poor airflow causing overheating protection to open
- Takes too long to dry: clogged lint screen, crushed/long vent run, blocked outside vent hood
- Drum will not tumble: broken belt or a seized pulley/bearing
- Stops mid-cycle: overheating from restricted airflow, or a thermostat opening
- Won’t start: door switch, start switch, or timer/control issue
Quick checks we recommend first (fast, no parts)
- Clean the lint screen and confirm it is not coated with fabric softener residue
- Check airflow at the outside vent hood; it should be strong and steady
- Inspect the vent path for kinks, crushing, or heavy lint buildup
- Run a timed dry cycle to rule out moisture-sensing confusion
- If the drum does not turn, stop using the dryer to prevent further damage
Common parts involved on this model
| Symptom | Common suspect | Example model-matched part |
|---|---|---|
| Drum won’t tumble | Belt failure | GE dryer drum belt WE03X29897 |
| No heat | Heater circuit failure | GE dryer heater assembly WE11X21156 or dryer heating element WE11M10001 |
| Overheats or shuts off | Safety temperature control | Dryer high-limit thermostat WE04X26139 or dryer safety thermostat WE04X25194 |
Why it matters
Airflow problems do more than slow drying; they raise internal temperatures and can repeatedly trip safety thermostats, which leads to “no heat,” shutdowns, and premature wear on the heater circuit.
Related help
If your dryer is showing a code or beeping pattern, use our GE gfd model series error codes reference to match the symptom to the most likely circuit or component.
Last updated: February 2026
What's the life expectancy of a GE dryer?
A GE dryer typically lasts about 10 to 13 years with normal household use. For your GE 5TX62E9ST0WS, consistent airflow (clean lint path and venting) and reducing friction on moving parts are the biggest factors that keep the motor, belt, and drum support system running longer.
Typical lifespan and what affects it most
Most dryers fail early for a few predictable reasons:
- Restricted venting (long dry times, overheating, blown thermostats)
- Lint buildup inside the cabinet or blower housing
- Wear in drum support parts (glides, felt seals, bearings)
- Drive system wear (belt, idler pulley)
- Heat system stress from poor airflow (element and thermostats)
Quick maintenance checklist (best ROI)
We recommend these habits to extend life and improve drying performance:
- Clean the lint screen every load; replace a damaged screen such as GE dryer lint screen WE03X23881.
- Vacuum lint from the lint chute and around the blower area periodically.
- Inspect and clean the vent duct to the outside; keep it short and not crushed.
- Avoid overloading; heavy loads strain the belt, idler, and motor.
- If you hear squealing or scraping, address it early (glides, felt seal, idler).
Common “wear-out” parts and what they usually mean
| Symptom | Most common wear area | Example part for this model |
|---|---|---|
| Drum not turning, motor runs | Belt or idler system | GE dryer drum belt WE03X29897, dryer idler pulley WE03X31620 |
| Squeal, thump, scraping | Drum support surfaces | Dryer drum glide bearing, upper WE03X37320, dryer drum felt seal WE09X27634 |
| No heat or overheating shutdown | Heat circuit and safety controls | Dryer high-limit thermostat WE04X26139, dryer heating element WE11M10001 |
Why it matters
A dryer that is venting well runs cooler and finishes cycles faster; that reduces stress on the heating element, thermostats, motor, and belt. Good airflow and early replacement of friction parts often adds years of reliable service.
Last updated: February 2026
Where is the part number on a GE dryer?
On a GE dryer like model 5TX62E9ST0WS, the identifying number you need is usually on the model and serial tag (not stamped on individual parts). You’ll typically find that tag inside the door opening on the cabinet frame, or on the back of the dryer near the top.
Most common label locations
Check these spots in order:
- Inside the dryer door opening on the cabinet frame (often the easiest to see)
- On the back panel near the top edge
- Along the door opening lip (left or right side)
- Behind the control panel area (less common)
If you need the number for a replacement part
The tag gives the model number and serial number; we use the model number to match the correct parts list for your dryer.
If you’re trying to identify a specific component, match the symptom to the part category. For example:
| Symptom | Common part to check | Example part for this model |
|---|---|---|
| Drum won’t turn, motor runs | Drum belt, idler pulley | GE dryer drum belt WE03X29897 |
| Dryer won’t start | Door switch, push-to-start switch | Dryer push-to-start switch WE4M416 |
| No heat (electric) | Heating element, thermostats | Dryer heating element WE11M10001 |
Why it matters
Using the correct model tag information prevents ordering a look-alike part that does not fit your GE dryer’s drum, heater circuit, or control panel layout.
Last updated: February 2026