 Installation guide
 Owner’s manual
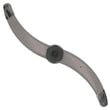


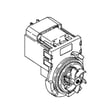
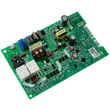


Can I replace dishwasher parts myself?
Yes. For the GE GDF550PSR1SS dishwasher, we recommend DIY replacement only for basic, low-risk items (filters, spray arms, rack hardware, door gasket). Electrical wiring, grounding, and water-supply repairs require the same skills used for installation, so use the installation guide and follow all shutoff steps.
What you can usually replace yourself
These repairs are typically straightforward with basic hand tools and careful reassembly:
- Filter and sump screen cleaning or replacement
- Spray arm removal and cleaning (clogs, debris)
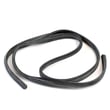
- Door gasket inspection and replacement
- Dishrack rollers, rack stops, and tine row clips
- Detergent/rinse aid dispenser cleaning (not wiring)
- Air gap cleaning (if your setup uses one)
Repairs that should be handled like a pro-level job
The owner documentation warns against repairing or replacing parts unless specifically recommended; anything involving wiring, grounding, or live voltage should be treated as advanced service.
- Hard-wiring, cord kit connections, or grounding corrections
- Control board, user interface, or harness troubleshooting
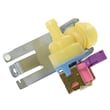
- Water inlet valve replacement if it requires electrical diagnosis
- Leak troubleshooting that involves removing the unit from the cabinet
Safety checklist before any DIY work
Follow these steps every time to reduce shock and flood risk:
- Turn off power at the breaker (not just the control panel)
- Shut off the dishwasher water supply valve
- Protect the floor; keep towels and a shallow pan ready
- Take photos of wire routing and hose connections before removal
- Confirm the unit can be removed for service (do not trap it in the opening)
Quick decision guide
| Task type | DIY-friendly? | What you need |
|---|---|---|
| Cleaning (filter, spray arms, air gap) | Yes | Basic tools, brush, time |
| Mechanical parts (gasket, rack hardware) | Usually | Screwdriver, careful fit |
| Electrical or grounding work | No | Qualified electrical skill |
| Plumbing diagnosis beyond a simple clamp/hose | Usually no | Leak testing, removal access |
Why it matters
Improper electrical connection or grounding can create a shock risk, and improper installation or reinstallation can lead to leaks and service access problems. Using the correct procedures protects your home and helps the dishwasher run reliably.
For troubleshooting that points to a fault or code, use the GE electronic dishwasher error codes reference to narrow the problem before replacing anything.
Last updated: February 2026
How to remove dishwasher control panel GE?
To remove the control panel on a GE dishwasher like model GDF550PSR1SS, we open the door and remove the inner-door fasteners first; then we release the control assembly from its retaining tabs and lift it away carefully to avoid scratching or cracking the panel.
Before you start (safety and damage prevention)
- Turn off power at the breaker (dishwashers can be hardwired).
- Open the door fully and support it so it does not drop or twist.
- Use the correct driver so screw heads stay straight and flush.
- Protect the stainless and painted surfaces with a towel.
- Avoid letting the control panel contact adjacent cabinets or the countertop (misalignment can cause damage).
Steps to remove the control panel (typical GE top-control door)
- Shut off power to the dishwasher.
- Open the door and locate the screws around the inner door liner (the screws that clamp the inner liner to the outer door).
- Remove the inner-door screws (leave any screws that clearly mount hinges or door springs alone).
- Separate the inner door liner from the outer door enough to access the control assembly.
- Release the control assembly tabs: use a small pick or flat-blade screwdriver to gently pry the control assembly off its retaining tabs.
- Lift the control panel/control assembly away and disconnect any wire connectors only after noting their positions.
What you will usually need
| Item | Why we use it |
|---|---|
| Phillips screwdriver or bit | Removes inner-door screws |
| Small pick or flat-blade screwdriver | Releases control tabs without breaking them |
| Towel or painter’s tape | Protects the door and control panel finish |
Reinstall tips (to prevent repeat problems)
- Make sure the door panel and control panel do not rub cabinets or the countertop.
- Drive mounting screws straight and flush; protruding heads can scratch the panel and interfere with door operation.
- If the dishwasher was recently installed or moved, confirm it is centered and secured correctly using the installation guide.
Why it matters
The control panel is easy to crack if it is pried from the wrong spot or if the door is misaligned. Correct screw handling and alignment prevents cosmetic damage and helps the door close and latch properly.
Last updated: February 2026
What is the most common problem with GE dishwashers?
The most common problems we see with GE dishwashers like model GDF550PSR1SS are not draining, not starting, and not cleaning well. In many cases, the fix is basic maintenance (cleaning, loading, detergent use) before any parts replacement is needed.
Most common issues (and what they usually point to)
- Won’t drain: clogged filter area, blocked drain hose/air gap, or a drain pump issue
- Won’t start or stops mid-cycle: door not fully latched, control lock or cycle selection issue, or an electronic control problem
- Not cleaning: spray arms blocked by loading, low water fill, or detergent not dispensing properly
- Suds/foam in tub: wrong detergent (hand soap) or rinse aid spill (can cause poor wash performance)
- Detergent left in the cup: dishes blocking the dispenser door (a very common loading-related cause)
Quick checks we recommend first
- Confirm detergent is correct: Use only automatic dishwasher detergent; hand dish soap creates suds and poor washing.
- Check loading around the dispenser: Keep large/tall items from blocking the detergent cup so it can open.
- Clean and deodorize the tub: Periodic cleaning helps remove mineral film and odors; follow the steps in the GDF550PSR1SS owner’s manual.
- If it won’t start: Verify the door closes firmly and the cycle is properly selected.
- If you see an error code: Use the GE electronic dishwasher error codes reference to match the code to the most likely cause.
Symptom-to-cause cheat sheet
| Symptom | Most common cause | Best first action |
|---|---|---|
| Standing water after cycle | Drain path restriction | Check filter area and drain hose routing |
| Detergent still in dispenser | Dishes blocking dispenser | Reload so the dispenser door is clear |
| Suds in tub | Wrong detergent or rinse aid spill | Stop cycle, let suds dissipate, then drain |
| Cloudy glassware | Too much detergent (often with soft water) | Reduce detergent; use a shorter cycle |
Why it matters
Drain, start, and cleaning complaints often come from preventable causes like loading, detergent choice, and routine cleaning. Fixing those first saves time and helps you avoid replacing the wrong dishwasher parts.
Last updated: February 2026





