Get free shipping on your order, with any water filter subscription. Find my filter

Open Hamburger Menu
Sears Parts Direct
Tips to find your model number

KitchenAid KEMS308SSS03 oven Parts

Here are the diagrams and repair parts for KitchenAid KEMS308SSS03 oven, as well as links to manuals and error code tables, if available.

KitchenAid KEMS308SSS03 oven
By Schematic
By Part
SELECT DIAGRAM
?

This is the number corresponding to the part on the diagram / schematic

Browse Parts for KEMS308SSS03 Oven

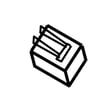
  • Microwave Low-voltage Transformer for KitchenAid KEMS308SSS03 - Part W11238401

    Cabinet & stirrer diagram

    Transformer

    Part #8205692

    Replaced by #W11238401

    Info Icon
    Manufacturer substitution
    This part replaces 8205692. Substitute parts can look different from the original.
    In Stock
    $122.70
    9% OFF Phone Price : $134.70Info Icon
    Minus Item
    Qty
    Plus Item
  • Slewing Brac for KitchenAid KEMS308SSS03 - Part W11700292

    Cabinet & stirrer diagram

    Microwave Door Arm Support Spring

    Part #8205704

    Replaced by #W11700292

    Info Icon
    Manufacturer substitution
    This part replaces 8205704. Substitute parts can look different from the original.
    In Stock
    $77.88
    Minus Item
    Qty
    Plus Item
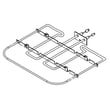
  • Microwave Grill Element for KitchenAid KEMS308SSS03 - Part W10776940

    Internal microwave diagram

    Oven Element

    Part #W10120226

    Replaced by #W10776940

    Info Icon
    Manufacturer substitution
    This part replaces W10120226. Substitute parts can look different from the original.
    In Stock
    $217.20
    5% OFF Phone Price : $229.20Info Icon
    Minus Item
    Qty
    Plus Item
  • Nut for KitchenAid KEMS308SSS03 - Part WPW10116349

    Internal oven diagram

    Nut

    Part #W10116349

    Replaced by #WPW10116349

    Info Icon
    Manufacturer substitution
    This part replaces W10116349. Substitute parts can look different from the original.
    In Stock
    $38.25
    Minus Item
    Qty
    Plus Item
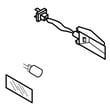
  • Wall Oven Light Assembly for KitchenAid KEMS308SSS03 - Part WPW10307114

    Oven diagram

    Oven Light

    Part #W10009940

    Replaced by #WPW10307114

    Info Icon
    Manufacturer substitution
    This part replaces W10009940. Substitute parts can look different from the original.
    In Stock
    $65.21
    8% OFF Phone Price : $71.21Info Icon
    Minus Item
    Qty
    Plus Item
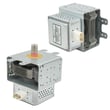
  • Magnetron for KitchenAid KEMS308SSS03 - Part W10120113

    Cabinet & stirrer diagram

    Magnetron

    Part #W10120113

    The manufacturer no longer makes this part, and there's no substitute part

  • Screw for KitchenAid KEMS308SSS03 - Part 461967825321

    Cabinet & stirrer diagram

    Screw

    Part #W10131249

    Replaced by #461967825321

    Info Icon
    Manufacturer substitution
    This part replaces W10131249. Substitute parts can look different from the original.
    In Stock
    $35.21
    Minus Item
    Qty
    Plus Item
  • Wall Oven Door Hinge Receiver, Left for KitchenAid KEMS308SSS03 - Part WP4455605

    Oven diagram

    Hinge Receiver

    Part #4455605

    Replaced by #WP4455605

    Info Icon
    Manufacturer substitution
    This part replaces 4455605. Substitute parts can look different from the original.
    In Stock
    $70.08
    8% OFF Phone Price : $76.08Info Icon
    Minus Item
    Qty
    Plus Item
  • Screw for KitchenAid KEMS308SSS03 - Part WP4448950

    #NI19

    All parts diagram

    Screw

    Part #4448950

    Replaced by #WP4448950

    Info Icon
    Manufacturer substitution
    This part replaces 4448950. Substitute parts can look different from the original.
    This item is not returnable
    In Stock
    $4.82
    17% OFF Phone Price : $5.82Info Icon
    Minus Item
    Qty
    Plus Item
  • Wall Oven Thermal Fuse for KitchenAid KEMS308SSS03 - Part WP8304452

    Oven diagram

    Wall Oven Thermal Fuse

    Part #8304452

    Replaced by #WP8304452

    Info Icon
    Manufacturer substitution
    This part replaces 8304452. Substitute parts can look different from the original.
    In Stock
    $101.97
    11% OFF Phone Price : $113.97Info Icon
    Minus Item
    Qty
    Plus Item

KitchenAid Oven KEMS308SSS03 FAQs

To reset your KitchenAid wall oven/microwave combo model KEMS308SSS03, turn the oven off, then reset power at the home breaker for about 1 minute and restore power. This clears many control glitches and returns the display to normal operation; then re-set the clock if needed (see the KEMS308SSS03 owner's manual).

Quick reset steps (most common)
  • Touch OFF/CANCEL to stop any active cooking cycle.
  • If the control is unresponsive, turn OFF the circuit breaker (or remove the fuse) that powers the wall oven.
  • Wait 60 seconds.
  • Turn the breaker ON.
  • Confirm the display is back on; then set the clock and test BAKE.
If the control panel seems “locked”

This model has a Control Lock feature that can make the keypad seem dead even though power is on.

  • Touch and hold START for about 5 seconds.
  • Watch for “control locked” to appear or disappear on the display.
  • Try BAKE or BROIL again.
Symptom Likely cause What to do
Display works but most keys do nothing Control Lock is on Hold START 5 seconds
Display is blank Power interruption Reset breaker; check house breaker/fuse
Oven stops and shows messages/tones Cycle ended or needs clearing Touch OFF/CANCEL or open/close door
Why it matters

A power reset clears temporary electronic control errors, while unlocking the controls restores normal keypad operation. If the oven still will not operate after a reset, the manual troubleshooting points you to basic power checks (house breaker/fuse) before moving on to component testing.

Last updated: January 2026

Yes. KitchenAid wall ovens, including the KitchenAid KEMS308SSS03 wall oven/microwave combo, are built for strong everyday cooking performance and a premium look. Owners commonly value even baking and convenient features; the most common downsides are longer preheat times and occasional temperature accuracy complaints (often correctable).

What “good” usually means for a wall oven

A good wall oven typically delivers consistent temperatures, reliable controls, and durable heating components. For the KEMS308SSS03, the KEMS308SSS03 owner’s manual also emphasizes using factory specified parts for proper fit and performance.

Common strengths people notice:

  • Even baking results once fully preheated
  • Smooth, easy-to-use touch controls
  • Premium fit and finish (especially stainless models)
  • Useful cooking modes (bake, broil, convection depending on configuration)
  • Strong parts support for long-term ownership
If you’re worried about temperature accuracy or slow preheat

Before assuming the oven is “bad,” we recommend checking a few common causes that affect any electric wall oven.

Quick checks:

  • Fully preheat before loading food (many recipes assume a stabilized cavity)
  • Avoid blocking airflow with oversized pans
  • Verify the door closes and seals evenly
  • Run a basic temperature check with an oven thermometer
  • If temps swing widely, consider the sensor and heating circuit
Parts that often relate to these symptoms (when diagnosis points there)
Symptom Commonly involved part Example part for this model
Oven too hot or too cool Temperature sensor Wall oven temperature sensor WPW10131825
Slow heat, uneven bake Bake element Bake element WPW10207398
Oven shuts down or won’t heat Thermal fuse Wall oven thermal fuse WP8304452
Why it matters

A wall oven is a long-term appliance; consistent temperature control affects baking results, cooking times, and energy use. When performance is off, it is usually a correctable issue (calibration, airflow habits, or a specific part) rather than the entire oven being low quality.

Last updated: January 2026

A KitchenAid oven typically lasts 10 to 15 years. For a built-in wall oven/microwave combo like KitchenAid KEMS308SSS03, we see many units reach the upper end of that range when the cooling system stays clear, the door seals well, and heating components are replaced as needed.

Typical lifespan and what affects it

Most life expectancy differences come down to heat stress, ventilation, and how often the oven runs at high temperatures.

  • Usage frequency: daily baking and broiling shortens lifespan compared to occasional use
  • Heat management: blocked vents or a weak cooling fan can overheat controls
  • Cleaning habits: heavy buildup can cause odor, smoke, and longer heat cycles
  • Electrical health: loose wiring or failing fuses can create intermittent shutdowns
  • Part replacement: replacing wear parts early often extends overall appliance life

For model-specific care and cleaning guidance, follow the KEMS308SSS03 owner's manual.

Parts that commonly influence longevity

On wall ovens, the parts below are frequent contributors to “it still powers on, but doesn’t cook right” or “it shuts down when hot.”

Symptom Commonly involved part Example part for KEMS308SSS03
Oven not heating or heats unevenly Bake element Bake element WPW10207398
Oven temperature seems inaccurate Temperature sensor Wall oven temperature sensor WPW10131825
Oven shuts off, dead display after overheating Thermal fuse Wall oven thermal fuse WP8304452
Fan runs loud, oven area gets unusually hot Cooling fan assembly Wall oven cooling fan assembly WP8303972
Why it matters

A wall oven/microwave combo is built into cabinetry, so excess heat and poor airflow can stress the touch controls and safety devices. Keeping airflow clear and addressing heating or temperature issues early helps the oven cook correctly and reach its full service life.

Practical tips to help your oven reach 15 years
  • Keep vents and surrounding trim areas clear of grease and dust
  • Avoid slamming the door; it protects hinges, latches, and seals
  • Use self-clean only as recommended; high heat cycles add stress to components
  • If baking is inconsistent, test and replace the sensor or element promptly
  • If the oven goes dead after a hot cycle, check the thermal fuse and cooling fan

Last updated: January 2026

Symptoms for top-mount refrigerators

Main causes: frozen or clogged defrost drain tube, cracked water system tubing…

Repair guides for top-mount refrigerators

How to replace the light switch in a top-freezer refrigerator

How to replace the light switch in a top-freezer refrigerator

The light switch turns the refrigerator light on and off and monitors door position. Replace the light switch if it does…

Repair time and Difficulty

 15 minutes or less
How to replace the water inlet valve in a top-freezer refrigerator

How to replace the water inlet valve in a top-freezer refrigerator

The water inlet valve controls water flow to the ice maker. Replace the water valve if it doesn't open or shut properly.…

Repair time and Difficulty

 15 minutes or less
How to replace the compressor run capacitor in a top-freezer refrigerator

How to replace the compressor run capacitor in a top-freezer refrigerator

The run capacitor sends electric current to the compressor motor to help the motor run efficiently. Replace the run capa…

Repair time and Difficulty

 15 minutes or less

Articles and videos for top-mount refrigerators

Can I fix my own fridge?

Can I fix my own fridge?

Find DIY repair tips to fix your refrigerator when it breaks down.…

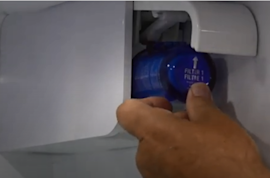
How to replace Whirlpool refrigerator water filter EDR1RXD1 (EveryDrop Type 1)

How to replace Whirlpool refrigerator water filter EDR1RXD1 (EveryDrop Type 1)

Learn how to replace the Whirlpool EveryDrop 1 refrigerator water filter.…

How to replace open-tray-and-twist-out refrigerator water filters

How to replace open-tray-and-twist-out refrigerator water filters

Watch our video to see how to replace a refrigerator water filter located in a tray you open and then twist out the filt…

Parts & More

Bottom-Mount Refrigerator
Dishwasher
Dryer
Electric Line Trimmer
Electric Range
Evaporative Cooler
Garbage Disposal
Gas Grill
Gas Walk-Behind Mower
Laundry Center
Power Saw
Refrigerator
Riding Mowers & Tractors
Top-Mount Refrigerator
Upright Freezer