


How to reset GE dryer heating element?
On the GE GTX52EASP1WB electric dryer, there is no button to “reset” the heating element itself. The practical reset is to fully power-cycle the dryer at the breaker (OFF for 1 minute, then ON) and then run a timed heat cycle to see if heat returns.
- Turn the dryer OFF and open the door.
- Switch the dryer circuit breaker OFF (both poles for a 240V dryer).
- Wait 60 seconds.
- Switch the breaker ON.
- Start a Timed Dry / High Heat cycle and check for warm air.
Most “no heat” complaints are caused by power supply or airflow issues, not a failed element.
- Confirm the outlet has 240V (a dryer can run on 120V but not heat).
- Clean the lint screen and inspect the vent for restrictions.
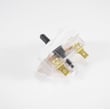
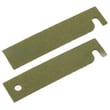
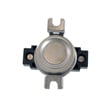
- Check for a failed safety device such as the dryer safety thermostat WE04X25194 or thermostat hi limit WE04X30381.
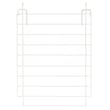
- If the drum tumbles but there is still no heat, the dryer heating element WE11M10001 or GE dryer heater assembly WE11X21156 are common heat-system suspects.
| Symptom on GTX52EASP1WB | Most common area to check | Typical next step |
|---|---|---|
| Runs, no heat | Power supply, thermostats, heater | Verify 240V; inspect thermostats and heater circuit |
| Heats then stops mid-cycle | Airflow restriction, hi-limit trip | Clean venting; re-test on Timed Dry |
| Long dry times | Venting, lint buildup | Clean lint path and vent duct |
A restricted vent or a weak power leg can make the dryer appear “resettable,” but the underlying issue can keep overheating protection tripping or prevent the heater from energizing at all.
Last updated: February 2026
What brand of dryer has the least problems?
No dryer brand is problem-free; overall reliability depends on build quality, maintenance, and venting. In general industry reliability reports often rank Whirlpool and LG near the top, with GE and Maytag also performing well, but your best results come from choosing a solid model and keeping airflow and heat systems clean.
Most reliability rankings are based on service-call rates in the first year or two of ownership. That can be useful, but it does not guarantee long-term performance for every home.
Common drivers of “problems” across brands:
- Restricted venting (long runs, crushed flex duct, clogged hood)
- Overheating from lint buildup in the blower housing or lint chute
- Wear items (belt, glides, idler pulley) aging over time
- Electrical supply issues (especially on electric dryers)
Instead of chasing a single “best” brand, we recommend comparing these factors:
- Parts availability for your area and model family
- Simple mechanical design (fewer electronics typically means fewer failure points)
- Vent path design that is easy to clean
- Warranty and service network convenience
- Real-world maintenance needs (lint screen access, easy vent cleaning)
| Brand | Typical strengths | Typical watch-outs |
|---|---|---|
| Whirlpool | Straightforward designs, widely available parts | Venting and wear items still matter |
| LG | Efficient drying, strong feature sets | More electronics can mean pricier repairs |
| GE | Common parts support, solid mainstream models | Airflow restrictions cause many “no heat/long dry” complaints |
| Maytag | Heavy-duty positioning on some models | Similar wear items and vent sensitivity |
Even a reliable GE electric dryer like model GTX52EASP1WB can seem “problematic” if airflow is restricted or wear parts are failing. If your dryer is noisy or not tumbling, checking common wear items like the dryer drum belt WE03X29897 is often a smart first step.
For performance and fewer breakdowns, we also recommend following a regular cleaning routine from how to clean and maintain your clothes dryer.
- Clean the lint screen every load; wash it with mild soap monthly to remove residue
- Inspect and clean the vent duct and outside hood regularly
- Avoid overloading; it strains the belt, glides, and motor
- If drying times increase, address airflow before replacing heat parts
- If the dryer overheats or shuts down, check thermostats and lint buildup promptly
Last updated: February 2026
What is the life expectancy of a GE washing machine?
Most GE washing machines last about 10 to 14 years with normal household use and basic maintenance. If you are comparing it to your GE GTX52EASP1WB electric dryer, dryers often reach a similar lifespan when airflow and lint control are kept in good shape.
| Appliance type | Typical life expectancy | What shortens it fastest |
|---|---|---|
| Top-load washer | 10 to 14 years | Overloading, unbalanced loads, poor drain care |
| Front-load washer | 10 to 14 years | Detergent buildup, door seal/mold issues, bearing wear |
| Electric dryer (like GTX52EASP1WB) | 10 to 13 years | Restricted venting, overheating, worn drum support parts |
- Do not overload; heavy loads strain the drive system and suspension.
- Use the right detergent amount; excess soap accelerates residue and odor problems.
- Level the washer; chronic vibration wears bearings and shocks.
- Check pockets; coins and screws can damage the pump and tub.
- Clean the drain pump filter (if your model has one) and keep the drain hose clear.
A washer that leaves clothes too wet can make it seem like the dryer is failing. On the GE GTX52EASP1WB dryer side, airflow restrictions and lint buildup are common causes. Start with the lint system and venting, and inspect wear items that affect tumbling.
- Clean or replace the lint screen if it is torn or clogged: GE dryer lint screen WE03X23881
- If the drum is not turning smoothly, check belt and support parts: dryer drum belt WE03X29897
- If drying times are long, use our guide: dryer takes a long time to dry
Knowing the typical 10 to 14 year washer lifespan helps you decide whether to repair, maintain, or plan a replacement. Small habits (load size, leveling, cleaning) often add years and reduce costly breakdowns.
Last updated: February 2026
What is the most common problem with a GE electric dryer?
For the GE GTX52EASP1WB electric dryer, the most common issues we see are no heat/poor drying (airflow restriction or a failed heating component) and the drum not tumbling (a worn belt or support parts). Lint buildup and venting problems often trigger or worsen both symptoms.
- Runs but won’t heat or dries slowly: restricted venting, failed heater, or a safety thermostat opening
- Drum won’t turn but motor runs/hums: broken belt or a seized idler/support
- Stops mid-cycle or overheats: clogged lint path, restricted exhaust, or high-limit thermostat cycling
- Won’t start at all: door switch or start switch issue
| Symptom | Common suspect | Example model-matched part |
|---|---|---|
| No heat / weak heat | Heating circuit problem | GE dryer heater assembly WE11X21156 |
| Drum not tumbling | Belt failure | Dryer drum belt WE03X29897 |
| Won’t start | Start circuit problem | Dryer push-to-start switch WE4M416 |
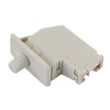
| Runs only with door held | Door switch issue | Dryer door switch WE04X28977 |
- Clean the lint screen and lint chute area; a blocked lint path can mimic “no heat” and cause overheating.
- Confirm strong airflow at the outside vent hood; weak airflow points to a crushed hose, long run, or blockage.
- Verify power supply; many electric dryers can run on 120V but need full 240V to heat.
- Listen for drum movement; if the motor runs but the drum does not, inspect the belt and idler system.
Poor airflow is the root cause behind many GE electric dryer complaints because it increases dry time, raises operating temperatures, and can lead to repeated shutdowns or heating failures. Fixing venting and lint buildup first often restores normal drying and protects the heater and thermostats.
Last updated: February 2026
Where to find part number on GE dryer?
On a GE electric dryer like model GTX52EASP1WB, the model and serial tag (often called the rating plate) is typically located around the door opening; check the inside of the dryer door and the door frame first. Once you have the model number, we can match the correct replacement parts.
Check these common GE dryer locations in order:
- Inside the door opening on the front panel (door frame area)
- On the inside face of the dryer door
- Along the front rim of the cabinet near the lint screen opening
- On the back panel (upper area)
- Behind the control panel area (less common)
The sticker usually shows model number and serial number. Individual part numbers are found in parts diagrams and listings, not on the dryer tag.
| You’re looking for | What it’s used for | Example for this dryer |
|---|---|---|
| Model number | Ensures parts fit your exact dryer | GTX52EASP1WB |
| Serial number | Helps confirm production details | Varies by unit |
| Part number / part ID | Orders a specific replacement part | Dryer door switch WE04X28977 |
- Write the model number exactly as shown (letters and numbers)
- Take a clear photo before ordering parts
- If the tag is worn, use a flashlight and view from an angle to see embossed print
- Match parts by model first, then confirm the part ID and description
GE dryers can look similar across model series, but parts like a door switch, timer, belt, or heater assembly can differ by model and revision. Using GTX52EASP1WB prevents ordering the wrong component and saves time on returns.
Last updated: February 2026