Installation guide
 Owner’s manual





How do I reset my microwave?
To reset your GE LVM1750DM1WW microwave/hood combo, unplug it (or turn the breaker off) for about 1 to 5 minutes, then restore power. For many “stuck key” or control issues, pressing CLEAR/OFF also clears the display and stops a cooking cycle; see the LVM1750DM1WW owner's manual for model-specific control steps.
Reset options for LVM1750DM1WW
- Soft reset (most common): Unplug the microwave for 1 to 5 minutes, then plug it back in.
- Breaker reset: Turn the circuit breaker off, wait 1 to 5 minutes, then turn it back on.
- Stop and clear: Press CLEAR/OFF to cancel a cycle and clear many simple control errors.
- Unlock the controls: Press and hold CLEAR/OFF for about 3 seconds to lock or unlock the control panel.
- Restore basic setup: After power is restored, set the clock before normal use.
What to do if the “reset” does not fix it
If the display comes back but the microwave will not start, focus on door and control safety circuits first.
- Open and close the door firmly; a door that is not fully latched can prevent operation.
- If the control panel shows it is locked, unlock it using CLEAR/OFF (hold about 3 seconds).
- If the door feels loose, does not “click,” or you have intermittent starting, inspect the latch and interlock parts.
Common parts involved (when symptoms point to the door)
| Symptom | Likely area to check | Example part for this model |
|---|---|---|
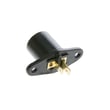
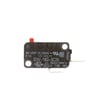
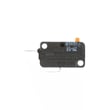
| Won’t start, acts like door is open | Door interlock switch circuit | Micro-switch WB24X830 |
| Door won’t latch smoothly | Latch mechanism | Microwave latch body WB06X10676 |
| Starts only if you lift/push the door | Interlock lever alignment | Microwave door interlock switch lever WB06X10128 |
Why it matters
A proper reset clears control glitches, but a microwave that will not run after a reset often points to the door interlock system. That system is designed to prevent operation unless the door is fully closed and latched.
Last updated: January 2026
What are common problems with microwave vents?
On the GE LVM1750DM1WW microwave/hood combo, the most common vent problems are blocked airflow, a failing vent fan motor, or the vent fan running when you think it should be off. This model can also turn the vent on automatically at low speed if it senses excess heat from the cooktop.
Common microwave vent problems (and what they look like)
- Weak airflow: grease buildup on filters, blocked ducting, or a stuck damper.
- Vent fan won’t turn on: control issue, wiring issue, or a failed motor/capacitor.
- Vent fan is loud or rattles: loose blower wheel, worn motor bearings, or debris in the blower area.
- Vent fan won’t turn off: normal “auto fan” behavior when the unit is cooling down after sensing heat.
- Air blows the wrong direction: venting configuration mismatch (outside top, outside back, or recirculating).
Quick checks we recommend first
- Confirm the fan mode: Press the vent fan button to cycle HI, LO, OFF.
- Wait out the auto fan: If the cooktop was hot, the fan can stay on until internal parts cool (sometimes 30 minutes or more).
- Check for blocked airflow: Make sure cabinetry or stored items are not blocking the top vent grille.
- Verify your venting type: This microwave supports outside top exhaust, outside back exhaust, or recirculating.
- Listen for motor symptoms: Humming with little airflow often points to a blower issue.
Venting types and the most common “problem” for each
| Venting setup | What’s common | What to check |
|---|---|---|
| Outside top exhaust (vertical duct) | Weak airflow | Duct restrictions, damper movement |
| Outside back exhaust (horizontal duct) | Noise, poor draw | Duct alignment, obstructions |
| Recirculating (ductless) | Odors linger | Charcoal filter kit installed and maintained |
Parts that commonly relate to vent symptoms
If the vent runs but airflow is poor or the fan is noisy, the blower assembly is a frequent suspect on over-the-range units like this model. For this model, the vent motor is sold as an assembly.
Why it matters
A microwave vent that cannot move air effectively lets heat, steam, and grease build up around the cooktop and inside the microwave/hood combo. That can increase noise, reduce ventilation performance, and trigger the automatic fan feature more often.
Where to confirm model-specific operation and installation details
Last updated: January 2026
What's the average lifespan of a GE microwave?
A GE microwave typically lasts 8 to 10 years. For an over-the-range model like GE LVM1750DM1WW, lifespan depends most on daily run time, ventilation and heat exposure from the range, and avoiding misuse such as running the microwave empty (which can shorten magnetron life). See the LVM1750DM1WW owner’s manual for model-specific care and operating guidance.
What affects lifespan the most
- Heavy daily use (multiple long cook cycles per day) shortens life faster than light reheating.
- Heat and grease from the cooktop can stress internal components in a microwave/hood combo.
- Running it empty can overheat the magnetron and shorten the oven’s life.
- Blocked airflow (dirty filters, restricted venting) raises internal temperatures.
- Door wear (slamming, misalignment) can lead to interlock issues that stop operation.
Quick habits that help a GE microwave last longer
- Use a microwave-safe cup of water when testing; do not “test run” empty.
- Keep the cavity clean to reduce arcing risk and prevent residue buildup.
- Use appropriate power levels for reheating to reduce overheating and splatter.
- Make sure the door closes smoothly and fully every time.
- Keep ventilation paths clear and follow mounting and venting guidance in the LVM1750DM1WW installation guide.
Common “end-of-life” symptoms and what they usually point to
| Symptom | Most common cause area | Typical next step |
|---|---|---|
| Runs but does not heat | High-voltage system (magnetron, diode, capacitor) | Diagnose heating circuit; service recommended |
| Dead display, no response | Power supply/control | Check power source; inspect control board |
| Stops when door moves | Door interlock system | Inspect latch and switches |
| Loud hum, burning smell | High-voltage component failing | Stop using; service recommended |
Why it matters
Knowing the typical 8 to 10 year lifespan helps you decide whether to repair or replace. If your LVM1750DM1WW is near that age and has heating problems, the repair often involves high-voltage components and is best handled carefully.
Last updated: January 2026