Error Codes


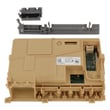

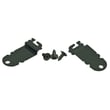
How to install Whirlpool dishwasher mounting brackets?
For Whirlpool model WDF341PAPW2, install the mounting brackets with the correct orientation, lock them into the dishwasher frame tabs, then slide the unit fully into the cabinet and fasten it to the countertop or side cabinets so it cannot tip forward.
Before you start (safe, clean install)
- Turn off power at the breaker; do not rely on the door switch.
- Shut off the water supply valve.
- Pull the dishwasher out far enough to access the top and side frame.
- Confirm the dishwasher is level front-to-back and side-to-side before final tightening.
- Choose the mounting method that matches your opening: top mount (countertop) or side mount (cabinet walls).
Side-mount bracket install (common method)
- Position each bracket so the tab faces downward on the right side (mirror the orientation on the left).
- Insert the bracket into the frame slot.
- Use pliers to bend the locking tabs so the bracket is secured tightly to the frame.
- Slide the dishwasher back into the cabinet carefully, keeping the drain hose and water line from kinking.
- Drive the mounting screws through the brackets into the cabinet sides.
Quick checks after fastening
- Door opens and closes smoothly; no rubbing on the cabinet.
- Tub is centered in the opening.
- Dishwasher does not rock when you pull the racks out.
- No pinched wires, drain hose, or water line.
| What you see | What it usually means | What to do |
|---|---|---|
| Dishwasher tips forward when door opens | Not anchored or screws stripped | Re-anchor using brackets and fresh pilot holes |
| Door rubs cabinet | Unit not level or not centered | Re-level feet, re-center, then re-tighten |
| Gaps at top/sides | Brackets installed but unit not fully seated | Push unit back evenly, then fasten |
Why it matters
Correctly installed mounting brackets keep the WDF341PAPW2 stable, prevent tipping when racks are loaded, and help maintain a proper door seal so you avoid leaks and vibration noise.
For related troubleshooting after install, use how to reset a Whirlpool dishwasher.
Last updated: February 2026
What is the average lifespan of a Whirlpool dishwasher?
A Whirlpool dishwasher like model WDF341PAPW2 typically lasts 10 to 12 years. Consistent cleaning, correct detergent use, and fixing small problems early (draining, heating, or wash performance) are what most often push a dishwasher toward the high end of that range.
What affects lifespan the most
- Water quality: hard water speeds up mineral buildup on the heater and inside the sump
- Filter care: a clogged filter makes the pump work harder and reduces cleaning
- Drain performance: slow draining strains the drain pump and can leave dirty water behind
- Heating and drying: weak heating leads to poor drying and can extend cycle stress
- Loading habits: overloading blocks spray and increases rewash frequency
Quick maintenance plan (high impact)
- Clean the filter regularly; replace it if it is damaged or won’t come clean (see dishwasher filter WPW10463906).
- Rinse heavy food off dishes and avoid packing items tightly.
- Run a dishwasher cleaner monthly if you have hard water.
- Check that the spray arm holes are clear; replace a cracked or warped arm (see dishwasher spray arm WPW10491331).
- If the unit won’t reset or acts “stuck,” follow the steps in how to reset a Whirlpool dishwasher.
Common “end-of-life” symptoms and what they usually point to
| Symptom | Most common cause | Typical fix path |
|---|---|---|
| Not draining | Clog, kinked hose, failing pump | Clear blockage; inspect hose; consider dishwasher drain pump W10876537 |
| Poor cleaning | Clogged filter, spray issue, low water heat | Clean filter; check spray arm; verify hot water |
| Not drying | Heater issue, rinse aid, cycle selection | Use rinse aid; check heater circuit; consider element assembly W10518394 |
| Door won’t latch | Worn latch | Replace dishwasher door latch WPW10653840 |
Why it matters
Dishwashers usually fail gradually. Catching early signs (slow drain, gritty dishes, weak drying) helps you avoid repeat cycles, reduces wear on the motor and pump, and often extends the service life of your WDF341PAPW2.
Last updated: February 2026
What's the most common problem with a Whirlpool dishwasher?
The most common problem we see on Whirlpool dishwashers like model WDF341PAPW2 is drainage trouble: water left in the tub because the filter area, drain hose, or drain pump gets restricted. The good news is many “won’t drain” complaints are fixed with cleaning and a quick hose check.
What to check first (fast, no parts)
- Cancel the cycle and let it try to drain; listen for the drain pump running.
- Remove and clean the filter area; rinse off grease and debris.
- Check the sink drain and garbage disposal inlet (a blocked inlet stops dishwasher draining).
- Inspect the drain hose for kinks, crushing, or a low loop that is missing.
- Make sure the spray arms spin freely and are not blocked by tall items.
Common causes and the parts that usually solve them
If cleaning and hose checks do not restore draining, these are the most frequent repair paths on WDF341PAPW2:
| Symptom | Most likely cause | What we typically replace/inspect |
|---|---|---|
| Standing water after cycle | Weak or jammed drain pump | Dishwasher drain pump W10876537 |
| Slow drain or intermittent drain | Restricted or kinked drain hose | Dishwasher drain hose 8269144A or dishwasher drain hose WPW10545278 |
| Poor cleaning plus food debris left behind | Clogged filter system | Dishwasher filter WPW10463906 |
| Dishes not drying well | Heater not heating water properly | Element assembly W10518394 |
Why it matters
Drain restrictions do more than leave water behind; they also reduce wash performance and can cause odors because dirty water and food soil stay in the sump area. Keeping the filter and drain path clear helps the wash motor and heater do their jobs.
Helpful DIY guides
Last updated: February 2026