 Installation guide
 Owner’s manual
 Error Codes
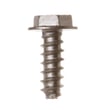


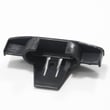
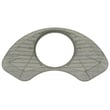
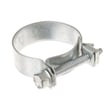



Can I replace dishwasher parts myself?
Yes, for the GE GDF550PMR0ES dishwasher we see many DIY repairs succeed when you shut off power and water first and stick to service steps recommended in the documentation. We handle simple mechanical items most often; electrical wiring and grounding related work is best left to a qualified technician.
What we recommend you do first
- Disconnect power before any maintenance (breaker off or unplug if applicable).
- Shut off the dishwasher water supply valve.
- Pull the unit out only as far as needed; protect the floor and hoses.
- Keep track of screws and panels; take photos as you disassemble.
- Follow the model-specific steps in the GDF550PMR0ES owner’s manual.
Repairs that are usually DIY-friendly vs. technician-level
Common DIY-friendly tasks on most GE dishwashers include cleaning and maintenance, correcting installation issues, and replacing accessible non-wiring components.
| Repair type | Typical DIY difficulty | Why |
|---|---|---|
| Cleaning filter, spray arms, tub care | Easy | No wiring; mostly access and cleaning |
| Leveling and door fit adjustments | Easy to moderate | Uses leveling legs; prevents door/rack issues |
| Drain path checks (air gap/high loop) | Moderate | Requires inspecting hose routing and clogs |
| Electrical wiring, grounding, control faults | Advanced | Shock/fire risk; requires correct grounding and diagnostics |
Model-specific tips that prevent repeat problems
Your installation instructions emphasize proper leveling: racks should stay put when pulled halfway out, and the door should close without hitting the tub sides. If racks roll or the door rubs, re-level by turning the four leveling legs until all legs contact the floor and the unit is level front-to-back and side-to-side. Use the GDF550PMR0ES installation guide for the exact checks.
Why it matters
DIY replacement can save time and money, but dishwashers combine water, heat, and electricity. Correct leveling, door alignment, and safe electrical disconnection reduce leaks, door damage, and shock risk.
Quick safety checklist
- Power disconnected before removing panels
- Water supply off before disconnecting hoses
- Door closes freely and racks do not roll
- No wiring changes unless you are qualified
Last updated: February 2026
Can a clogged drain cause an FTD error?
Yes. On the GE GDF550PMR0ES dishwasher, an FTD (fail to drain) error commonly happens when the drain path is restricted, so the drain pump cannot push water out of the tub. Clearing the clog usually restores normal draining (see the owner's manual).
What to check first (most common clogs)
- Clean the air gap (if your installation has one); a clogged air gap can stop draining.
- Clean the ultra-fine filter assembly in the bottom of the tub.
- Run the garbage disposer (if the dishwasher drains through it) and make sure the sink drains normally.
- Inspect the drain hose for kinks, pinches, or a blockage.
- Confirm the drain hose routing is correct (high drain loop or air gap installed correctly).
Quick symptom-to-cause guide
| What you notice | Likely cause | What we recommend |
|---|---|---|
| Water standing in the bottom after a cycle | Air gap clogged or drain routing issue | Clean air gap; verify high drain loop per the installation guide |
| Humming but no drain-out | Drain restriction or debris at pump inlet | Clean filter; check hose and disposer connection |
| Sink backs up when dishwasher drains | House drain/disposer restriction | Clear disposer; address sink drain issue |
Why it matters
A clogged drain forces the drain pump to work against a blockage. That leaves water in the tub, can trigger an FTD-style drain fault, and often leads to poor cleaning and odors because dirty water is not being evacuated.
Safety and reset basics
- Turn off power at the breaker before checking the filter area or wiring.
- Turn off the water supply if you plan to disconnect any hoses.
- After clearing the restriction, run a short cycle to confirm the dishwasher drains normally.
For code-specific troubleshooting steps, use GE electronic dishwasher error codes.
Last updated: February 2026
How to do a hard reset on a GE dishwasher?
For the GE GDF550PMR0ES dishwasher, the most reliable hard reset is a power reset: turn the dishwasher’s circuit breaker OFF for 1 minute, then turn it back ON. After power is restored, press and hold Start/Reset for 3 seconds to cancel and reinitialize the control.
Hard reset steps (power reset)
- Turn OFF the dishwasher breaker (or unplug the power cord if your installation uses a cord).
- Wait 60 seconds.
- Turn ON the breaker (or plug back in).
- Close the door fully (make sure it latches).
- Press and hold Start/Reset for 3 seconds.
- If the dishwasher was mid-cycle, it should cancel and begin draining after the 3-second hold.
- If it does not respond, repeat the power reset once and confirm the door is fully latched.
- If you see an error code after reset, use the code to guide the next step.
What “Start/Reset for 3 seconds” does on this model
The control uses the Start/Reset pad as the primary cancel/reset action.
| Action | What you do | What you should see |
|---|---|---|
| Cancel/reset a running cycle | Hold Start/Reset 3 seconds | Unit begins to drain |
| Reboot the control | Breaker OFF 1 minute, then ON | Control wakes up, cycle can be selected |
| Confirm operation | Select a cycle, press Start/Reset | Dishwasher starts if door is latched |
Quick checks if it still will not start after a reset
- Confirm the door is latched (a partially closed door prevents starting).
- Verify power and water are turned on.
- Try selecting a different cycle, then press Start/Reset.
- If the unit drains but will not wash, check for a displayed error code.
- If the tub has suds, cancel and drain, then repeat the cancel procedure as needed.
Why it matters
A hard reset clears a “stuck” control state after a power glitch, an interrupted cycle, or a keypad input issue. On the GDF550PMR0ES, combining a breaker reset with the 3-second Start/Reset cancel is the fastest way to get the dishwasher back to a known starting point.
Helpful references: GDF550PMR0ES owner’s manual, GDF550PMR0ES installation guide, GE electronic dishwasher error codes.
Last updated: February 2026
What is the life expectancy of a GE dishwasher?
A GE dishwasher like model GDF550PMR0ES typically lasts 10 to 12 years. With consistent cleaning, correct detergent use, and quick attention to draining or filling problems, it can reach the higher end of the normal dishwasher lifespan range.
What affects lifespan the most
- Water quality: hard water speeds up mineral buildup on the pump, heater, and spray system.
- Maintenance habits: cleaning the interior and keeping odors and film under control reduces wear.
- Detergent and rinse aid choices: using dishwasher-approved products helps prevent residue and poor washing.
- Installation quality: a stable, correctly installed dishwasher is less likely to develop leaks or vibration damage.
- How often you run it: heavy daily use generally shortens service life compared to lighter use.
Maintenance that helps you get the full 10 to 12 years
The GDF550PMR0ES owner documentation recommends cleaning and deodorizing the dishwasher interior using citric acid or a dishwasher cleaner to break up mineral deposits and hard water film. See the cleaning and care section in the GDF550PMR0ES owner’s manual.
- Run a dishwasher cleaner or citric acid cleaning cycle periodically
- Wipe the control panel with a lightly damp cloth, then dry
- Use quality detergent and rinse aid to reduce film buildup
- Keep the door seals clean so they seal evenly
- Address slow drain, no-fill, or poor cleaning symptoms early
Typical lifespan range (what to expect)
| Dishwasher condition | Typical outcome | What you’ll notice |
|---|---|---|
| Well maintained, normal use | 10 to 12 years | Consistent cleaning and drying, fewer service calls |
| Heavy use or hard water, limited maintenance | 8 to 10 years | Film buildup, odors, more frequent performance issues |
| Light use, good water, strong maintenance | 12 to 15 years | Fewer clogs, better wash performance over time |
Why it matters
Knowing the expected lifespan helps us decide whether to repair issues like draining, filling, or poor cleaning versus planning a replacement. It also helps us prioritize maintenance that protects high-wear components such as the circulation pump, drain pump, and heating system.
Last updated: February 2026
What is the most common problem with a GE dishwasher?
The most common GE dishwasher problems are draining issues (water left in the tub), wash performance problems (not cleaning well), and “won’t start” symptoms caused by a door latch or control-related interruption. On GE model GDF550PMR0ES, many of these are resolved with basic cleaning, correct detergent use, and a reset per the GDF550PMR0ES owner’s manual.
Most common issues we see (and what to check first)
- Not draining: food debris in the filter area, a kinked drain hose, or a blocked sink/disposer connection.
- Not cleaning well: spray arms blocked by tall dishes, overloaded racks, or mineral buildup.
- Won’t start or stops mid-cycle: door not fully latched, control panel needs a reset, or cycle selection not confirmed.
- Suds/foam in the tub: wrong detergent (hand dish soap) or rinse aid spill.
- Detergent left in the cup: large/tall dishware blocking the dispenser door.
Quick troubleshooting steps (safe, high-impact)
- Confirm detergent is correct: use only automatic dishwasher detergent (tablets, packets, powder, gel). Hand soap causes suds and poor washing.
- Check the detergent dispenser area: make sure no large plates or utensils block the dispenser door.
- Reset the cycle: cancel and restart the cycle using the control instructions in the GDF550PMR0ES owner’s manual.
- Clear suds if present: let suds dissipate with the door open, then pump out water using the Start/cancel procedure described in the manual.
- Improve loading: keep spray paths open; ensure racks are fully pushed in before closing the door.
Symptom-to-cause guide
| Symptom | Most likely cause | Best first fix |
|---|---|---|
| Water left in bottom | Drain path restriction | Clean filter area; check drain hose routing |
| Dishes still dirty | Blocked spray or poor loading | Re-load to avoid blocking spray arms |
| Suds/foam | Wrong detergent or rinse aid spill | Switch detergent; wipe spills; run drain procedure |
| Detergent still in cup | Dishes blocking dispenser | Reposition tall items away from dispenser |
Why it matters
Drain and wash issues usually start with airflow and waterflow restrictions (loading, debris, mineral film) and detergent mistakes. Fixing those first prevents repeat clogs, poor results, and cycle interruptions.
For display codes or beeping patterns, we use the GE electronic dishwasher error codes reference to match the code to the most likely failure.
Last updated: February 2026





