





How do I know if my GE dryer heating element is bad?
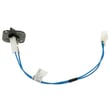
If your GE electric dryer model GFD65ESPV0DS runs but does not heat (or heats only briefly), the heating element is a top suspect. We confirm a bad element by safely accessing the heater circuit and checking the heater for continuity and for a short to the metal heater housing.
What you’ll notice when the element is failing
- Dryer tumbles normally but clothes stay cold and damp
- Heat starts, then stops early in the cycle
- Breaker trips during a heated cycle (possible short)
- Dry times suddenly get much longer
- A burning smell (stop using the dryer and inspect)
How we test the heating element (basic meter checks)
- Unplug the dryer (and turn off the breaker if it’s hardwired).
- Access the heater terminals (location varies by design).
- Remove at least one wire from the heater terminal so you’re not reading through the rest of the circuit.
- Set your meter to continuity (or the lowest ohms range if available).
- Test across the two heater terminals:
- Good: continuity (typically a low resistance reading)
- Bad: no continuity (open circuit)
- Test for a short to ground:
- Put one probe on a heater terminal and the other on bare metal of the heater housing.
- Good: no continuity
- Bad: continuity (element is shorted)
Don’t miss these common “no-heat” causes
A good element can still mean no heat if a safety device opened or airflow is restricted.
| Symptom | More likely cause | Example part for GFD65ESPV0DS |
|---|---|---|
| No heat at all | Open safety thermostat | Dryer outlet backup thermostat WE04X10190 |
| Heats then shuts off | Overheating from poor venting | Dryer blower thermostat WE04X29714 |
| Long dry times | Lint buildup or crushed vent | Dryer lint screen WE16X32537 |
Why it matters
A weak or shorted heater can cause repeated shutdowns, tripped breakers, and overheating. Confirming the element and the thermostats helps you fix the real cause and restore normal drying performance.
For code-related symptoms on this GE GFD series, use GE gfd model series error codes.
Last updated: February 2026
How to replace GE dryer sensor?
For the GE GFD65ESPV0DS electric dryer, “sensor” usually means the moisture sensor bars (inside the drum area) or a related harness. Replacement is straightforward: unplug power, access the sensor location, move wires one at a time, and reassemble so the dryer can accurately stop the cycle when clothes are dry.
Before you start (safety and prep)
- Unplug the dryer (electric shock risk).
- If it is hardwired, switch the breaker OFF and confirm the dryer will not power on.
- Let the dryer cool completely.
- Take a quick photo of wire routing and connector positions.
- Use a container for screws so nothing gets lost.
Identify which “sensor” you mean
On this GE dryer, customers commonly call these parts “the sensor”:
| What you are replacing | What it affects | Common symptom |
|---|---|---|
| Moisture sensor bars (inside drum/front bulkhead area) | Auto-dry accuracy | Stops too soon or runs too long |
| Sensor wiring/harness | Sensor signal to control | Erratic drying, intermittent behavior |
| Door switch (often mistaken for a sensor) | Starts and runs only with door closed | Will not start, light behavior changes |
If your issue is “dryer will not start when door is closed,” the part is typically the door switch WE04X34281.
Typical moisture sensor replacement steps
- Disconnect power.
- Open the door and locate the moisture sensor area (usually near the lint screen housing or front drum opening).
- Remove the front access panel or front panel as needed to reach the sensor terminals.
- Label and disconnect the wire connectors (pull on the connector, not the wire).
- Remove the mounting screws, swap the sensor component, and reinstall screws.
- Reconnect wires firmly and route them away from moving parts.
- Reassemble panels, restore power, and run a timed dry test.
Why it matters
A working moisture sensor helps the GFD65ESPV0DS dry efficiently, prevents overdrying (extra wear and shrinkage), and reduces cycle time when using automatic cycles.
If you are seeing an error code
Use GE gfd model series error codes to match the code to the most likely sensor circuit or control issue before replacing parts.
Last updated: February 2026
What is the most common problem with a GE dryer?
The most common GE dryer problem (including the GE GFD65ESPV0DS electric dryer) is poor drying performance: no heat, weak heat, or cycles that take too long. In most homes, the root cause is restricted airflow from lint buildup or a vent restriction, followed by a failed heater or thermostat.
Quick checks we recommend first (fast, no parts)
- Clean the lint screen every load; replace it if the mesh is damaged or coated (see dryer lint screen WE16X32537).
- Check airflow at the outside vent hood; it should be strong and steady.
- Inspect the vent path for kinks, crushed flex duct, or long runs with many elbows.
- Run a timed dry cycle; if heat is present but drying is slow, airflow is the issue.
- If the drum turns but there is no heat, move to the heating and thermostat checks below.
Most common causes and what they look like
| Symptom | Most likely cause | Common fix path |
|---|---|---|
| Takes too long to dry | Clogged lint screen or vent restriction | Clean lint screen, clear venting, confirm strong exhaust |
| Runs but no heat | Failed heater or safety thermostat opened | Test heater and thermostats; replace failed part |
| Stops mid-cycle or overheats | Airflow restriction or thermostat issue | Correct venting; test/replace thermostat |
| Won’t start (or starts only with door held) | Door switch/door latch issue | Check door closure; test/replace switch |
Parts that commonly solve “no heat” or overheating complaints
On the GFD65ESPV0DS, these are frequent suspects when airflow is good but heat is not:
- Dryer heater assembly WE11X29790 (open heating element)
- Dryer blower thermostat WE04X29714 (temperature control issue)
- Dryer outlet backup thermostat WE04X10190 (safety thermostat opened)
- Inlet backup thermostat WE04X29792 (safety thermostat opened)
- Door switch WE04X34281 (dryer won’t run when door switch fails)
Why it matters
Restricted airflow makes an electric dryer run hotter and longer, which can trip safety thermostats and shorten the life of key components like the heater and controls. Keeping the lint screen and venting clear is the simplest way to prevent repeat failures.
For code-related symptoms, use GE gfd model series error codes to match the display code to the most likely failure.
Last updated: February 2026
Where to find part number on GE dryer?
On your GE electric dryer model GFD65ESPV0DS, the model and serial tag (often used to look up the correct replacement part number) is typically located just inside the dryer door opening on the door frame or on the inside of the door.
Where to look on the dryer
Check these common label locations first:
- Inside the door opening on the front frame (most common)
- On the inside edge of the dryer door
- Along the door opening near the lint screen housing
- On the rear panel (less common)
What to write down (and why)
For accurate parts matching, record the information exactly as printed.
| What you see on the tag | Why it matters for parts |
|---|---|
| Model number (example: GFD65ESPV0DS) | Identifies the exact dryer design and parts list |
| Serial number | Helps confirm production run and compatible revisions |
| Electrical ratings (volts/amps) | Useful when diagnosing heat or power issues |
Quick tips to avoid ordering the wrong part
- Copy letters and numbers exactly; GE tags are case-sensitive in practice
- Take a clear photo of the tag before shopping
- If you are replacing a wear item (belt, idler, drum support), match by model first, then by symptom
- For drying performance issues, check airflow items like the lint screen before replacing electrical parts
Why it matters
GE dryers can use different components across close model variations. Using the model number from the tag helps us match the correct parts for GFD65ESPV0DS, such as the dryer lint screen WE16X32537 or the door switch WE04X34281.
Last updated: February 2026





