
What is the standard size of a countertop microwave?
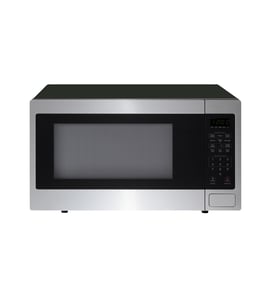
There is no single “standard” countertop microwave size, but most countertop units (including Sharp models like R-3A86) fall into a common range: about 21 to 25 inches wide, 12 to 15 inches tall, and 16 to 20 inches deep, with 1.0 to 2.2 cubic feet of capacity.
Typical countertop microwave size ranges
Most countertop microwaves are designed to fit on standard kitchen counters and under many upper cabinets.
- Width: 21 to 25 inches
- Height: 12 to 15 inches
- Depth: 16 to 20 inches (deeper if you include the handle)
- Capacity: 1.0 to 2.2 cu. ft.
- Weight: commonly 30 to 60 lb.
How we recommend measuring your microwave (so it fits)
Use a tape measure and record the outside dimensions of the cabinet.
- Measure width (left to right across the front).
- Measure height (countertop to top of the unit).
- Measure depth (front to back), then measure again including the door handle.
- Measure your available counter space and leave room for airflow.
Quick fit checklist
- Leave at least 1 to 2 inches of clearance on the sides.
- Leave at least 3 inches behind the microwave for ventilation.
- Confirm the door can open fully without hitting a wall or backsplash.
Common sizes at a glance
| Size class | Typical capacity | Typical width |
|---|---|---|
| Compact | 0.7 to 1.0 cu. ft. | 17 to 20 in. |
| Mid-size | 1.1 to 1.6 cu. ft. | 20 to 24 in. |
| Full-size | 1.7 to 2.2 cu. ft. | 23 to 25 in. |
Why it matters
Getting the right size prevents overheating from poor ventilation, avoids door clearance problems, and ensures your microwave sits securely on the counter. If your Sharp R-3A86 is not heating or seems weak after a move or replacement, sizing and airflow are also worth checking alongside troubleshooting steps in why is my microwave not heating.
Last updated: February 2026
What size is the Sharp R-3A86 microwave?
The Sharp R-3A86 is a countertop microwave; its exact exterior dimensions (width, height, depth) vary by production version and are best confirmed from the model’s rating label and your cabinet opening. Most countertop microwaves in this class are roughly 20 to 22 inches wide, 11 to 13 inches tall, and 15 to 18 inches deep.
How to measure your R-3A86 correctly
Use a tape measure and record the largest outside dimensions.
- Measure width: left side to right side at the widest point
- Measure height: countertop to the top of the cabinet
- Measure depth: front face to the back (include the rear bump-out if present)
- Measure door swing clearance: space needed to open the door fully
- Check the feet spacing: helps if you are fitting it on a shelf or cart
Typical size ranges (what most customers see)
These ranges help when you are planning space, replacing a unit, or checking fit on a shelf.
| Measurement | Typical range for countertop microwaves | Why it matters |
|---|---|---|
| Width | 20 to 22 in. | Fit between cabinets or on a cart |
| Height | 11 to 13 in. | Clearance under upper cabinets |
| Depth | 15 to 18 in. | Counter depth and cord clearance |
Why it matters
Microwaves need breathing room for airflow and safe operation. Planning for the correct footprint also prevents pinched power cords, blocked vents, and door interference.
Quick fit and clearance checklist
- Leave a few inches of open space around the sides and top for ventilation
- Keep the rear vent area clear of walls, backsplash ledges, and cords
- Avoid placing the microwave inside a tight cubby unless it is designed for that use
- If you are replacing the unit, measure the old footprint and compare before you buy
For more safety and placement tips, use our guide: never do these things with a microwave.
Last updated: February 2026
Can I use an over the range microwave on a countertop?
No. An over-the-range (OTR) microwave is designed to be mounted to a wall cabinet and wall framing above a range, with specific clearances and venting; it is not intended for countertop use and can be unsafe if it is not properly supported and ventilated.
Why OTR microwaves should not sit on a countertop
OTR units rely on their mounting bracket and upper cabinet bolts to carry the weight and keep the microwave stable. They also need airflow paths that can be blocked when the unit is placed on a counter.
- The chassis is built for hanging support, not for resting on its base
- Venting and cooling airflow can be restricted on a countertop
- The power cord length and routing are designed for an upper-cabinet outlet
- The door and control panel angle assumes an above-range installation height
- Stability can be poor without the wall bracket and cabinet fasteners
What to use instead (and what fits your model page)
Your Sharp R-3A86 is a countertop microwave model, so it is the right style for counter installation. If you are replacing an existing microwave, match the installation type first, then match size and electrical requirements.
| Microwave type | Intended installation | Best choice when you have |
|---|---|---|
| Countertop microwave | Sits on a counter or shelf | Open counter space and a standard outlet |
| Over-the-range microwave | Mounted above a range | Upper cabinet, wall space, and a range below |
If you are trying to reuse an OTR microwave anyway
We recommend switching to the correct installation type rather than improvising. If you must proceed with any non-standard setup, use a qualified technician to evaluate support, clearances, and ventilation.
- Confirm the unit has adequate rear and side clearance for airflow
- Keep the vents unobstructed and away from walls or tall items
- Use a dedicated, properly grounded outlet (no extension cords)
- Make sure the microwave cannot tip forward when the door opens
Why it matters
Microwaves generate heat and need consistent cooling airflow. Using the wrong installation type can lead to overheating, nuisance shutdowns, or damage to internal components like the thermal cutout, fan, or control board.
For more troubleshooting help if your microwave is acting up, see never do these things with a microwave.
Last updated: February 2026
What are the parts of a microwave?
A Sharp countertop microwave like model R-3A86 is built from a heating system (high-voltage components and magnetron), a cooking cavity, airflow cooling parts, and user-interface and safety parts (door switches and controls). These assemblies work together to create, contain, and control microwave energy safely.
Main microwave parts (what they do)
- Magnetron: generates microwave energy that heats food.
- High-voltage system (transformer/inverter, capacitor, diode): powers the magnetron.
- Waveguide and stirrer (or mode stirrer): directs and distributes energy into the cavity.
- Cooking cavity: the metal chamber that contains energy and supports cooking.
- Turntable system (tray, roller ring, coupler): rotates food for more even heating.
- Cooling fan and air ducts: move air to prevent overheating.
- Control panel and control board: runs cook programs, timing, and power levels.
- Door assembly and interlock switches: safety system that prevents operation with the door open.
Quick map: internal vs. external parts
| Area | Common parts you will see | Why it matters |
|---|---|---|
| Internal (behind the cover) | Magnetron, capacitor, diode, transformer/inverter, fan, interlocks | Drives heating and safety; failures can stop heating or blow fuses |
| Inside the cavity | Turntable parts, waveguide cover, light | Affects even cooking and prevents arcing |
| External/user-facing | Door, handle, keypad/display, power cord | Daily use and basic operation |
Why it matters for troubleshooting
Knowing which “system” is involved helps narrow symptoms:
- Runs but does not heat: magnetron or high-voltage system is often involved.
- Dead/no display: fuse, door switch, or control board is often involved.
- Sparking/arcing: waveguide cover or cavity damage is often involved.
For symptom-based help, use our DIY guide: why is my microwave not heating.
Last updated: February 2026
How many watts is the old Sharp R-3A86 microwave?
The Sharp R-3A86 microwave’s exact cooking wattage is listed on the unit’s rating label; that label is the definitive source for your specific microwave. Many older countertop microwaves in this class are commonly in the 800 to 1100 watt output range, but you should confirm the number on your R-3A86.
Where to find the wattage on an R-3A86
Look for the rating label in one of these common spots:
- Inside the door opening on the frame (most common)
- On the back panel
- On a side panel
- Near where the power cord enters the cabinet
Output watts vs input watts (what the label may show)
Microwaves often list both; output is what affects cooking speed.
| Label term | What it means | Why it matters |
|---|---|---|
| Output power (W) | Cooking power delivered to food | Best number to compare microwaves |
| Input power (W) | Electrical power the microwave draws | Used for circuit/load planning |
| Voltage/Hz | Electrical supply requirement | Confirms typical 120 V, 60 Hz setups |
Quick way to sanity-check performance
If your R-3A86 seems weak, a simple heating test helps you judge whether it is performing normally:
- Heat 1 cup of room-temperature water for 2 minutes
- Water should be noticeably hot; slow heating points to a heating-system issue
- If you see sparks or burn marks, stop using it and inspect the waveguide cover area
Why it matters
Knowing the correct wattage helps you set cook times accurately, compare replacement models, and troubleshoot “runs but doesn’t heat” symptoms.
For troubleshooting steps if it runs but won’t heat, use why is my microwave not heating.
Last updated: February 2026