


Where to find part number on GE dryer?
On a GE electric dryer like model GTX22EASK1WW, the model and serial tag (often used to look up the correct replacement parts) is typically located inside the dryer door opening, on the door frame or just inside the front panel area. Once you have that tag info, we can match parts correctly.
Where to look first (fastest checks)
- Open the dryer door and inspect the door frame on the cabinet
- Check the inside edge of the door itself
- Look just inside the opening near the lint screen housing area
- If the label is worn, use a flashlight and look for etched or faint printing
- Write down the full model number and serial number exactly as shown
What “part number” usually means
Most customers mean one of these:
| You need | Where it’s found | Example for this dryer |
|---|---|---|
| Model number | Rating label on the dryer | GTX22EASK1WW |
| Serial number | Same rating label | Varies |
| Replacement part ID | On the part listing/diagram | WE03X29897 |
| Manufacturer part number | On the part packaging or part label | WE12M29 |
If you are trying to identify a specific replacement part
For common wear items, it is often easier to match by symptom and model number, then confirm the part ID:
- Squealing or thumping: check drum support parts such as the dryer drum glide bearing, upper WE03X37320
- Drum not turning: check the dryer drum belt WE03X29897
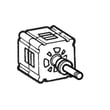
- Dryer will not start: check the dryer push-to-start switch WE4M416
- No heat (electric): check the dryer heating element WE11M10001
Why it matters
GE can use different components across similar-looking dryers. Using the exact GTX22EASK1WW model number from the rating label helps us avoid ordering the wrong belt, heater, timer, door switch, or thermostat.
Last updated: February 2026
What is the most common problem with a GE electric dryer?
The most common problems we see with a GE electric dryer like model GTX22EASK1WW are no heat/poor drying (airflow restriction, failed heating circuit parts) and the drum not tumbling (a worn or broken drive system part). Both issues often start with lint buildup or normal wear.
Most common symptoms and what usually causes them
- Runs but no heat: failed heating element, safety thermostat opening, or a heater assembly issue
- Takes too long to dry: clogged lint screen, blocked venting, restricted lint chute, weak airflow
- Drum will not spin: broken belt, seized idler pulley, worn drum support parts
- Starts then stops: overheating from poor airflow, safety thermostat opening
- Won’t start at all: door switch or start switch problem
Quick checks we recommend first (fast, high-impact)
- Clean the lint screen and confirm it is not coated with fabric softener residue.
- Check the vent path (dryer outlet to outside hood) for crushing, kinks, or heavy lint.
- Run a timed dry cycle and confirm strong airflow at the outside vent.
- If the drum will not turn, stop using the dryer and inspect the belt and idler system.
Common parts tied to these problems on GTX22EASK1WW
| Symptom | Likely part to inspect | Example model-matched part |
|---|---|---|
| Drum not turning | Belt | Dryer drum belt WE03X29897 |
| No heat | Heating element | Dryer heating element WE11M10001 |
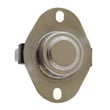
| Overheats or shuts off | Safety thermostat | Dryer safety thermostat WE04X25194 |
| Won’t start | Door switch | Dryer door switch WE04X28977 |
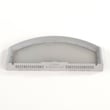
| Poor drying | Lint screen | GE dryer lint screen WE03X23881 |
Why it matters
Poor airflow makes an electric dryer run hotter and longer, which can trip safety components and shorten the life of the heating system. Fixing venting and lint buildup first often restores normal drying and prevents repeat failures.
Helpful DIY guidance
Last updated: February 2026
What's the life expectancy of a GE dryer?
A GE electric dryer like model GTX22EASK1WW typically lasts about 10 years with normal household use. Regular vent cleaning, not overloading the drum, and replacing wear items early (belt, glides, thermostats) are the biggest factors that keep drying performance strong over time.
Typical lifespan and what changes as it ages
Most dryers run for years with only routine maintenance, but you may notice longer dry times, more noise, or intermittent heat as parts wear.
- 0 to 5 years: mostly maintenance (lint, venting, leveling)
- 5 to 10 years: common wear parts (belt, drum support, door switch)
- 10+ years: higher chance of major repairs (motor, heater circuit)
| What you notice | Common cause | What we check first |
|---|---|---|
| Squealing or thumping | Drum support wear | Drum glides, felt seal, bearing kit |
| Drum not turning | Drive system issue | Belt, idler pulley, motor |
| No heat or weak heat | Heating circuit or airflow | Heater, safety thermostat, venting |
Parts that most often affect longevity
Catching wear early prevents secondary damage (for example, a slipping belt can overwork the motor).
- Dryer drum belt WE03X29897 (drum won’t tumble, burning rubber smell)
- Dryer drum glide bearing, upper WE03X37320 (scraping, squeal, drum drag)
- Dryer safety thermostat WE04X25194 (overheating protection trips, no heat)
- Dryer door switch WE04X28977 (won’t start when door is closed)
- Dryer heating element WE11M10001 (runs but doesn’t heat)
Maintenance that adds years
- Clean the lint screen every load; wash it occasionally to remove residue.
- Keep the vent run short and clear; restricted airflow is the top cause of long dry times and overheating.
- Avoid overloading; heavy loads strain the belt, idler pulley, and drum supports.
- Listen for new noises and address them early.
Why it matters
A dryer that is venting well and tumbling smoothly dries faster, runs cooler, and puts less stress on the heater assembly, motor, and drum support system, which directly extends service life.
Last updated: February 2026
How to replace GE dryer sensor?
On the GE GTX22EASK1WW electric dryer, the part most people mean by “sensor” is either the door switch (dryer will not run with the door open) or the cycling thermostat/thermal safety device (dryer heat control). Replacement is straightforward once you confirm which component is failing and disconnect power.
Step 1: Identify which “sensor” you need
Use this quick check before ordering parts:
- Dryer will not start when you press Start: often the door switch or push-to-start switch
- Starts only if you hold the button: often the push-to-start switch
- Runs but no heat or overheats: often a thermostat or heating circuit issue
- Door won’t stay closed: door catch, not a sensor
If the symptom is “won’t run unless the door is shut,” start with the dryer door switch WE04X28977.
How to replace the door switch (common “sensor” repair)
- Unplug the dryer (or switch off the breaker).
- Open the door and locate the switch area near the door opening.
- Remove the mounting screw(s) or release the retaining tab(s) (varies by console/front design).
- Pull the switch out enough to access the wires.
- Move wires one at a time from the old switch to the new switch (match terminals).
- Reinstall the switch, close the door, restore power, and test.
What you should see when it’s fixed
- Dryer starts normally with the door closed
- Dryer stops immediately when the door opens
If you meant a heat “sensor” instead
For heat-related problems on an electric dryer, we typically check these in order:
- Lint screen and venting for airflow restrictions
- Heating element for continuity
- Safety thermostat for an open circuit
- Heater assembly wiring connections
Helpful parts for this model include the dryer safety thermostat WE04X25194 and the dryer heating element WE11M10001.
Quick symptom-to-part guide
| Symptom | Most likely area | Example part for GTX22EASK1WW |
|---|---|---|
| Won’t start, door must be slammed | Door circuit | WE04X28977 |
| No heat, drum turns | Heating circuit | WE11M10001 |
| Overheats or shuts off | Safety thermostat/airflow | WE04X25194 |
Why it matters
A failed switch or thermostat can stop the dryer from running or heating, and restricted airflow can cause repeat failures. Fixing the correct “sensor” the first time saves time and prevents unnecessary part returns.
Last updated: February 2026