Installation guide
 Owner’s manual
 Error Codes



How to remove the top of a Kenmore gas range?
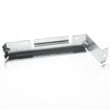
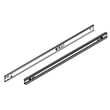
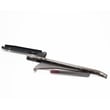
On Kenmore gas range model 79070403012, the cooktop is a lift-up top. We remove the burner grates, lift the front of the cooktop, and let the support rods lock in place; for full removal or burner access, we also remove the shipping screws and slide the burner tubes off the front gas valves (as outlined in the 79070403012 owner's manual).
Before you start (safety first)
- Turn all surface burners OFF and let everything cool completely.
- If you smell gas: do not light anything or touch switches; call your gas supplier from a neighbor’s phone.
- Unplug the range (or switch off the breaker) before working around wiring or igniters.
- Protect the cooktop finish; do not drop or bend the top.
- Use fingertip grip on the sides to avoid pinching when lowering.
Lift the cooktop (most common “remove the top” step)
- Remove the burner grates.
- Grasp the cooktop by the sides and lift up from the front.
- Raise it until the lift-up support rods snap into place.
- To lower: hold the front corners, push back on each support rod to release, then gently lower the top level.
Remove surface burners (for deeper access under the top)
With the cooktop raised:
- Remove the shipping screws (Phillips head).
- Tilt the burner to release the locator tab (front burners tilt right; rear burners tilt left).
- Slide the burner toward the back to separate it from the gas valve at the front.
Quick reference: lift-up vs. burner removal
| Task | What comes off | What stays in place |
|---|---|---|
| Lift cooktop for cleaning | Grates | Cooktop stays attached on hinges/rods |
| Remove a surface burner | Shipping screws, burner tube | Gas valves and support bar |
Why it matters
Raising the cooktop correctly prevents bent metal, pinched fingers, and misaligned burner tubes that can cause poor flame, delayed ignition, or uneven heating.
Last updated: February 2026
Where to find Kenmore gas range model number?
On Kenmore gas range model 79070403012, the model and serial number are printed on an identification plate; you’ll typically find it by opening the broiler drawer or the storage drawer and looking on the frame area. Confirm the exact label location in the 79070403012 owner’s manual.
Where to look on the range
Check these common spots first (in order):
- Open the broiler drawer (some models) and look for the identification plate on the frame.
- Open the storage drawer (some models) and look along the frame or side rail.
- Check the oven door jamb area (around the front frame) if you do not see it at the drawer opening.
- Look on the back of the range near the vent area if the range is accessible.
What the label looks like (and what to write down)
The identification plate usually includes both numbers you need for parts and service.
| Item on label | Example format | Why it matters |
|---|---|---|
| Model number | 790.7040xxxx | Ensures parts match your exact Kenmore range configuration |
| Serial number | Letters and numbers | Helps confirm production details when ordering certain parts |
Tips to make it easier
- Use a flashlight; the plate is often in a shaded area behind the drawer front.
- Wipe grease or dust lightly with a damp cloth so the characters are readable.
- Write the model number exactly as shown (including dots or leading digits).
Why it matters
Kenmore ranges often have multiple versions that look similar. Using the exact model number (like 79070403012) helps us match the correct igniter, oven temperature sensor, control overlay, and other range parts the first time.
Last updated: February 2026
What is the average lifespan of 79070403012?
The average lifespan of the Kenmore 79070403012 gas range is 13 to 15 years with normal household use. Regular cleaning, correct burner flame, and replacing wear items like igniters and light bulbs on time helps you reach that service life.
What affects lifespan most
- Keeping burner ports and caps clean so ignition is quick and consistent
- Avoiding repeated “clicking” ignition cycles (they wear igniters and switches)
- Preventing overheating by keeping the oven vent area clear
- Fixing temperature problems early (helps protect the control and wiring)
- Using the correct gas type and setup per the installation guide
Common wear items (and what they do)
These parts often need replacement during the life of a gas range:
| Part | What you notice when it’s failing | Example from this model’s parts list |
|---|---|---|
| Oven igniter | Oven takes a long time to light, weak heat, gas smell before ignition | Range oven burner igniter 5304509706 |
| Oven temperature sensor | Oven bakes too hot or too cool, inconsistent temps | Range oven temperature sensor 316233903 |
| Oven light bulb | Light out, flickers, or burns out | Appliance light bulb, 40-watt (316538904) |
Why it matters
A range that lights quickly and holds temperature accurately runs fewer long heat cycles. That reduces stress on the gas valve, control components, and wiring, which is a big reason many Kenmore ranges reach the 13 to 15 year mark.
Last updated: March 2026