Get free shipping on your order, with any water filter subscription. Find my filter

Open Hamburger Menu
Sears Parts Direct
Tips to find your model number

GE GDF550PGR3BB dishwasher Parts

Here are the diagrams and repair parts for GE GDF550PGR3BB dishwasher, as well as links to manuals and error code tables, if available.

GE GDF550PGR3BB dishwasher
By Schematic
By Part
SELECT DIAGRAM
?

This is the number corresponding to the part on the diagram / schematic

Browse Parts for GDF550PGR3BB Dishwasher

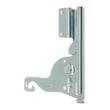
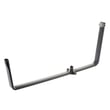
  • Door Hinge Assembly Right for GE GDF550PGR3BB - Part WD01X27720

    Escutcheon & door assembly diagram

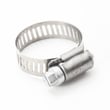
  • Dishwasher Hose Clamp for GE GDF550PGR3BB - Part WD01X24246

    Dishwasher Hose Clamp

    In Stock
    $10.69
    16% OFF Phone Price : $12.69Info Icon
    Minus Item
    Qty
    Plus Item
  • Heater Nut for GE GDF550PGR3BB - Part WD02X33462

    Body parts diagram

    Dishwasher Heating Element Nut

    Part #WD01X10070

    Replaced by #WD02X33462

    Info Icon
    Manufacturer substitution
    This part replaces WD01X10070. Substitute parts can look different from the original.
    In Stock
    $31.68
    Minus Item
    Qty
    Plus Item
  • Dishwasher Leveling Leg for GE GDF550PGR3BB - Part WD02X31882

    Body parts diagram

    Dishwasher Leveling Leg

    Part #WD12X23057

    Replaced by #WD02X31882

    Info Icon
    Manufacturer substitution
    This part replaces WD12X23057. Substitute parts can look different from the original.
    In Stock
    $31.92
    Minus Item
    Qty
    Plus Item
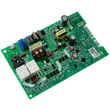
  • Cntrl Board for GE GDF550PGR3BB - Part WD21X32938

    Body parts diagram

    Configured Machine Control Board

    Part #WD21X31220

    Replaced by #WD21X32938

    Info Icon
    Manufacturer substitution
    This part replaces WD21X31220. Substitute parts can look different from the original.
    This item is not returnable
    In Stock
    $123.60
    9% OFF Phone Price : $135.60Info Icon
    Minus Item
    Qty
    Plus Item
  • Conduit for GE GDF550PGR3BB - Part WD12X32041

    Body parts diagram

    Main Conduit Asm

    Part #WD12X26438

    Replaced by #WD12X32041

    Info Icon
    Manufacturer substitution
    This part replaces WD12X26438. Substitute parts can look different from the original.
    In Stock
    $53.77
    Minus Item
    Qty
    Plus Item
  • Ac Harness for GE GDF550PGR3BB - Part WD21X32680

    Body parts diagram

    Ac Harness Asm

    Part #WD21X26440

    Replaced by #WD21X32680

    Info Icon
    Manufacturer substitution
    This part replaces WD21X26440. Substitute parts can look different from the original.
    In Stock
    $75.04
    Minus Item
    Qty
    Plus Item
  • Black Outer Door Panel for GE GDF550PGR3BB - Part WD27X30599

    Escutcheon & door assembly diagram

    Black Outer Door Panel

    Part #WD27X30580

    Replaced by #WD27X30599

    Info Icon
    Manufacturer substitution
    This part replaces WD27X30580. Substitute parts can look different from the original.
    In Stock
    $152.74
    Minus Item
    Qty
    Plus Item
  • Configured Ui Control Board for GE GDF550PGR3BB - Part WD21X33546

    Escutcheon & door assembly diagram

    Configured Ui Control Board

    Part #WD21X30184

    Replaced by #WD21X33546

    Info Icon
    Manufacturer substitution
    This part replaces WD21X30184. Substitute parts can look different from the original.
    In Stock
    $120.98
    Minus Item
    Qty
    Plus Item
  • Main Conduit for GE GDF550PGR3BB - Part WD12X35639

    Body parts diagram

    Dishwasher Water Feed Tube

    Part #WD12X25680

    Replaced by #WD12X35639

    Info Icon
    Manufacturer substitution
    This part replaces WD12X25680. Substitute parts can look different from the original.
    In Stock
    $98.33
    Minus Item
    Qty
    Plus Item

GE Dishwasher GDF550PGR3BB FAQs

A leaking corner baffle on the GE GDF550PGR3BB is fixed by removing the damaged tub corner baffle, cleaning the mounting channel thoroughly, then pressing the new baffle fully into place so it seals evenly. After replacement, run a short cycle and confirm the leak is gone.

Before you replace the corner baffle
  • Turn off power at the breaker before working around the door and tub edge.
  • Wipe the tub corner and baffle channel dry so you can see cracks, gaps, or warping.
  • Remove soap residue, grease, and grit from the corner; buildup prevents the baffle from sealing.
  • Check that racks are not striking the door area or tub corner during operation.
  • Confirm the dishwasher is level and secured; shifting can change door and tub alignment.
Corner baffle replacement steps (typical GE tub corner baffle)
  1. Open the door and locate the leaking tub corner area (often lower right or lower left).
  2. Pull the old baffle straight out of its channel; use steady pressure so you do not gouge the tub.
  3. Clean the channel with a damp cloth, then dry it; remove any detergent film or debris.
  4. Align the new baffle with the channel and slide it into position.
  5. Press firmly along the full length until it seats evenly with no curled edges.
  6. Close the door and check that it latches smoothly without rubbing.
How we confirm the leak is fixed

Use the installation wet test procedure to verify water fill and check for leaks under and around the door: GDF550PGR3BB installation guide.

Where you see water Most common cause What to do next
Bottom front corners Corner baffle not fully seated, debris in channel Reseat baffle; clean channel again
Along door edge Door rubbing adjacent cabinet, door not aligned Reposition dishwasher; recheck fit
Under unit Loose fill or drain connection Tighten connections; re-test
Why it matters

A properly seated corner baffle helps direct spray and splash back into the tub. If it is loose or the channel is dirty, water can escape at the door corner and cause recurring leaks during fill and wash.

Last updated: February 2026

A GE dishwasher typically lasts 10 to 12 years with normal household use. For your GE GDF550PGR3BB, regular cleaning, correct detergent use, and keeping the filter and spray areas clear are the biggest factors that help you reach (or beat) that average; see the GDF550PGR3BB owner's manual for the model’s care and cleaning guidance.

Typical lifespan range (what we see most often)

Most GE dishwashers fall into this range depending on usage and maintenance:

Usage pattern Typical life expectancy
Light use (few loads/week) 12 to 15 years
Average use (1 load/day) 10 to 12 years
Heavy use (2+ loads/day) 8 to 10 years
What shortens or extends dishwasher life

These are the most common real-world factors that change lifespan:

  • Hard water buildup (scale on internal parts)
  • Skipping routine cleaning (interior, filter area, door seals)
  • Overloading or blocking spray arms (poor wash performance, extra strain)
  • Using the wrong detergent type or too much detergent
  • Running with drainage issues (standing water, slow drain)
Maintenance habits that pay off

We recommend these simple habits to keep the GDF550PGR3BB running efficiently:

  • Clean and de-odorize the interior periodically using a dishwasher cleaner or citric acid
  • Wipe the control panel with a lightly damp cloth, then dry
  • Use dishwasher detergents and rinse aids intended for automatic dishwashers
  • Adjust detergent amount to your water hardness to avoid poor cleaning or etching
  • Address “not draining” or “not cleaning” symptoms early instead of repeatedly re-running cycles
Why it matters

A dishwasher near the end of its expected life often shows up as longer cycles, weaker cleaning, poor drying, or intermittent draining. Staying ahead of mineral deposits and soil buildup helps protect key systems like the wash pump, drain path, and heating performance.

Related help for GE models: GE dishwasher error codes.

Last updated: February 2026

The most common GE dishwasher problems, including on model GDF550PGR3BB, are not draining, leaking, and not starting or stopping mid-cycle. In many cases, the fix is basic maintenance (filter and drain path cleaning), correct detergent use, or a simple reset described in the GDF550PGR3BB owner's manual.

Most common issues and what we check first
  • Not draining: food debris in the filter area, drain hose restriction, or a blocked sink/disposer connection.
  • Leaking: door not closing squarely, debris on the door seal, or over-sudsing from the wrong detergent.
  • Won’t start: door not fully latched, control lock settings, or a cycle not properly started.
  • Poor cleaning: spray arms blocked by tall items, overloaded racks, or detergent dispenser blocked.
  • Suds and wash problems: using hand dish soap or the wrong detergent type.
Quick triage: symptoms vs. likely cause
Symptom Most likely cause First action
Water left in tub Clog in filter/drain path Clean filter area; check drain hose routing
Suds in tub Wrong detergent or rinse aid spill Stop cycle, let suds dissipate; use automatic dishwasher detergent only
Detergent left in cup Dishes blocking dispenser Reload so nothing blocks the dispenser door
Cloudy glassware Too much detergent with soft water Reduce detergent; use a shorter cycle
Fixes that solve a lot of “common problems”
  1. Use the right detergent: We recommend automatic dishwasher detergent only; hand dish soap causes sudsing and poor wash performance.
  2. Load to avoid blockages: Don’t let large items block the detergent dispenser; keep spray paths clear.
  3. Clean and deodorize the tub: Use citric acid or a dishwasher cleaner periodically to break up mineral deposits and film.
  4. Confirm safe, correct installation basics: A proper install helps prevent leaks and makes future service easier; follow the GDF550PGR3BB installation guide.
Why it matters

Drain clogs, over-sudsing, and loading mistakes can look like “major failures,” but they often cause the same symptoms as a bad drain pump, door latch, or control issue. Ruling out the basics first saves time and prevents repeat problems.

For code-related start or run issues, we use the GE electronic dishwasher error codes reference to match symptoms to the control’s fault indications.

Last updated: February 2026

Most common symptoms to help you fix your dishwashers

Choose a symptom to see related dishwasher repairs.

Main causes: light switch beside the sink turned off, lack of power, bad dishwasher door switch, control system failure,…

Main causes: damaged or stuck spray arm, leaking door seal, damaged door hinge, leaky heating element water seal, cracke…

Main causes: improper loading, low water temperature, improper detergent dosage, detergent dispenser failure, spray arm …

Main causes: glass or popcorn kernel stuck in the chopper blade, drain line vibrating against the cabinet, debris in was…

Main causes: broken door latch, tripped circuit breaker, broken heating element, faulty vent fan, sensor failure, contro…

Main causes: not using rinse aid, rinse aid dispenser failure, broken heating element, malfunctioning vent, drying fan f…

Main cause: damaged rack height adjuster…

Main causes: clogged kitchen sink drain, clogged drain hose, drain check valve damaged, drain pump failure, control syst…

Main causes: water supply problem, stuck overfill float, clogged water inlet valve screen, water inlet valve failure…

Most common repair guides to help fix your dishwashers

These step-by-step repair guides will help you safely fix what’s broken on your dishwasher.

How to replace a dishwasher door latch assembly

How to replace a dishwasher door latch assembly

If the dishwasher door doesn't click shut, a broken door latch is a likely cause. Follow these instructions to replace i…

Repair time and Difficulty

 30 minutes or less
How to replace a dishwasher thermal fuse

How to replace a dishwasher thermal fuse

A completely dead control panel often indicates that the thermal fuse on the electronic control board is blown; follow t…

Repair time and Difficulty

 15 minutes or less
How to replace a dishwasher control panel

How to replace a dishwasher control panel

Learn how to replace a dishwasher control panel. Learn which tools and parts you need and get step-by-step instructions.…

Repair time and Difficulty

 15 minutes or less

Effective articles & videos to help repair your dishwashers

Use the advice and tips in these articles and videos to get the most out of your dishwasher.

What's a turbidity sensor, and how does it affect wash quality?

What's a turbidity sensor, and how does it affect wash quality?

Your dishwasher’s secret weapon? A turbidity sensor. Find out what it does, how it boosts wash quality, and what to do i…

Dishwasher not drying dishes video

Dishwasher not drying dishes video

Find out why your dishes are still wet even after the dishwasher cycle has finished.…

Replacing dishrack rollers on Kenmore 587-series and Frigidaire dishwashers video

Replacing dishrack rollers on Kenmore 587-series and Frigidaire dishwashers video

It only takes a few minutes to get your dishrack sliding easily again.…