Get free shipping on your order, with any water filter subscription. Find my filter

Open Hamburger Menu
Sears Parts Direct
Tips to find your model number

GE WHDSR209DAWW washer Parts

Here are the diagrams and repair parts for GE WHDSR209DAWW washer, as well as links to manuals and error code tables, if available.

GE WHDSR209DAWW washer
By Schematic
By Part
SELECT DIAGRAM
?

This is the number corresponding to the part on the diagram / schematic

Browse Parts for WHDSR209DAWW Washer

  • Washer Outer Tub for GE WHDSR209DAWW - Part WH45X20473

    Tub, basket & agitator diagram

    Extra Large Tub Assembly

    Part #WH45X10024

    Replaced by #WH45X20473

    Info Icon
    Manufacturer substitution
    This part replaces WH45X10024. Substitute parts can look different from the original.
    This item is not returnable
    In Stock
    $217.26
    5% OFF Phone Price : $229.26Info Icon
    Minus Item
    Qty
    Plus Item
  • Washer Suspension Rod Socket for GE WHDSR209DAWW - Part WH01X10001

    Suspension, pump & drive components diagram

    Washer Suspension Rod Socket

    Part #WH01X10001
    This item is not returnable
    In Stock
    $8.93
    10% OFF Phone Price : $9.93Info Icon
    Minus Item
    Qty
    Plus Item
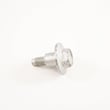
  • Washer Screw for GE WHDSR209DAWW - Part WH02X10237

    Tub, basket & agitator diagram

    Washer Screw

    Part #WH02X10237
    This item is not returnable
    In Stock
    $5.56
    15% OFF Phone Price : $6.56Info Icon
    Minus Item
    Qty
    Plus Item
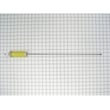
  • Washer Suspension Rod for GE WHDSR209DAWW - Part WH16X544

    Suspension, pump & drive components diagram

    Rod/sprg Blk

    Part #WH16X0544

    Replaced by #WH16X544

    Info Icon
    Manufacturer substitution
    This part replaces WH16X0544. Substitute parts can look different from the original.
    In Stock
    $44.45
    12% OFF Phone Price : $50.45Info Icon
    Minus Item
    Qty
    Plus Item
  • Washer Suspension Rod Kit for GE WHDSR209DAWW - Part WH16X543

    Suspension, pump & drive components diagram

    Rod/spr Yllw

    Part #WH16X0543

    Replaced by #WH16X543

    Info Icon
    Manufacturer substitution
    This part replaces WH16X0543. Substitute parts can look different from the original.
    In Stock
    $39.92
    13% OFF Phone Price : $45.92Info Icon
    Minus Item
    Qty
    Plus Item
  • Baffle Screw And Washer for GE WHDSR209DAWW - Part WE02X30757

    Tub, basket & agitator diagram

    Scr 10-18 Pl

    Part #WH02X1194

    Replaced by #WE02X30757

    Info Icon
    Manufacturer substitution
    This part replaces WH02X1194. Substitute parts can look different from the original.
    In Stock
    $36.67
    Minus Item
    Qty
    Plus Item
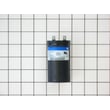
  • Washer Start Capacitor for GE WHDSR209DAWW - Part WH12X10462

    Controls & backsplash diagram

    Motor Capacitor

    Part #WH12X10212

    Replaced by #WH12X10462

    Info Icon
    Manufacturer substitution
    This part replaces WH12X10212. Substitute parts can look different from the original.
    In Stock
    $39.63
    13% OFF Phone Price : $45.63Info Icon
    Minus Item
    Qty
    Plus Item
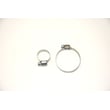
  • Washer Hose Clamp for GE WHDSR209DAWW - Part WH02X10093

    Controls & backsplash diagram

    Washer Hose Clamp

    Part #WH02X10093
    This item is not returnable
    In Stock
    $20.16
    23% OFF Phone Price : $26.16Info Icon
    Minus Item
    Qty
    Plus Item
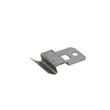
  • Washer Top Panel Clip for GE WHDSR209DAWW - Part WH02X10279

    Cabinet, cover & front panel diagram

    Clip Locking

    Part #WH02X10058

    Replaced by #WH02X10279

    Info Icon
    Manufacturer substitution
    This part replaces WH02X10058. Substitute parts can look different from the original.
    This item is not returnable
    In Stock
    $9.01
    10% OFF Phone Price : $10.01Info Icon
    Minus Item
    Qty
    Plus Item
  • Washer Drain Hose Support Clip for GE WHDSR209DAWW - Part WH1X2725

    Cabinet, cover & front panel diagram

    Clip Ant-sip

    Part #WH01X2725

    Replaced by #WH1X2725

    Info Icon
    Manufacturer substitution
    This part replaces WH01X2725. Substitute parts can look different from the original.
    This item is not returnable
    In Stock
    $8.38
    11% OFF Phone Price : $9.38Info Icon
    Minus Item
    Qty
    Plus Item

GE Washer WHDSR209DAWW FAQs

The most common GE washer problem is a no-spin or weak-spin condition, which customers often notice as clothes coming out wetter than normal. On the GE WHDSR209DAWW, the most frequent causes are load and lid-related (agitation will not start with the lid up) or a worn drive system such as the belt WH1X2026.

Quick checks first (fastest fixes)
  • Make sure the lid is fully closed; agitation and spin can stop with the lid up.
  • Reduce the load size; bulky loads can prevent proper spin.
  • Rebalance the load (especially towels, jeans, and sheets).
  • Confirm the water level is appropriate; water should just cover the clothes for good movement.
  • Start the washer with detergent first, then add clothes (helps prevent performance issues).
Other common GE washer issues and what they usually point to
Symptom What it often means Common next step
Won’t spin or agitate Drive belt worn, lid not closed, drive motor issue Inspect belt and drive components
Won’t fill or fills wrong Water-level sensing issue Check the hose pressure switch WH41X365 for kinks or leaks
Leaks Tub seal, hose clamp, or tub/bearing wear Inspect for drips under the tub and at hoses
Loud roaring during spin Bearing wear Check for play/noise at the tub and basket
Why it matters

A washer that cannot spin correctly leaves excess water in clothing, increases dry time, and can strain the motor and tub bearings. Catching a slipping belt, unbalanced load, or water-level sensing problem early helps prevent bigger repairs.

When to use documentation

For model-specific operating steps, loading guidance, and safety notes (including hot-water system precautions), follow the WHDSR209DAWW owner’s manual.

Last updated: January 2026

On the GE WHDSR209DAWW washer, there is no user-accessible “filter” like you’ll see on many front-load washers. For this model, routine maintenance focuses on the wash basket and hoses, plus checking for drain or fill restrictions if you have slow draining or filling (details in the WHDSR209DAWW owner’s manual).

What you can check on this model (common “filter” confusion)
  • Wash basket: Wipe residue and leave the lid open after washing to help moisture evaporate.
  • Fill hoses and inlet screens: Sediment can clog the small screens where the hot and cold hoses connect to the washer.
  • Drain path restrictions: A kinked drain hose or a partially blocked standpipe can act like a “filter problem.”
  • Water level issues: A pressure-sensing problem can mimic a clog; inspect the hose pressure switch WH41X365 if the washer overfills, underfills, or behaves inconsistently.
  • Odor and buildup: Regular cleaning prevents musty smells and detergent film.
Quick steps: cleaning the inlet screens (most common “filter” task)
  1. Unplug the washer.
  2. Shut off both water supply valves.
  3. Remove the hot and cold fill hoses from the washer.
  4. Gently rinse debris from the small inlet screens (do not puncture them).
  5. Reconnect hoses, turn water back on, and check for leaks.
Symptoms and likely causes
Symptom Most likely cause What to check first
Won’t fill or fills slowly Clogged inlet screens, low water pressure Inlet screens, supply valves
Won’t drain or drains slowly Kinked drain hose, restricted standpipe Drain hose routing
Overfills or wrong water level Pressure sensing issue Hose pressure switch WH41X365 and its hose
Why it matters

When the “filter” is restricted (usually inlet screens or the drain path), the washer can fill slowly, rinse poorly, or leave detergent residue. Keeping the basket clean and the water connections clear helps wash performance and reduces odors.

Last updated: January 2026

For your GE WHDSR209DAWW washer, “size” means (1) the washer’s capacity (how much laundry it’s designed to handle) and (2) the cabinet dimensions (width, depth, height). The most accurate way to confirm both is to use the model tag and the specifications listed in the WHDSR209DAWW owner’s manual.

Step 1: Confirm the exact model first

GE places the model identification on the washer so you can match the correct spec information.

  • Look for the model/serial tag on the back of the washer.
  • Verify the model number reads WHDSR209DAWW.
  • Record the serial number as well (helpful for parts and service).
  • Use the model number to match the correct specifications section in the manual.
Step 2: Identify capacity (practical load size)

This washer uses a load size selector (small, medium, large, super). That selector is the best day to day way to “size” loads correctly.

  • Load clothes loosely, not packed down.
  • Keep the load no higher than the top row of holes in the basket.
  • Choose a water level so the water just covers the clothes.
  • If the washer struggles to agitate or the load rides above the waterline, reduce the load.
Capacity categories (typical for top-load washers)
Category Typical capacity range What it means for loads
Compact Under 3.5 cu. ft. Smaller everyday loads
Standard 3.5 to 4.5 cu. ft. Most mixed loads
Large Over 4.5 cu. ft. Bulky items, larger loads
Step 3: Measure the physical dimensions (fit and clearance)

Measure the cabinet with a tape measure so you know it will fit your laundry space.

  • Width: left to right across the front
  • Depth: front to back (include hoses if space is tight)
  • Height: floor to the top (include lid clearance for opening)

Most GE top-load washers are approximately 27 inches wide, 42 to 44 inches tall, and 25 to 29 inches deep. For the exact WHDSR209DAWW dimensions, use the specifications section in the WHDSR209DAWW owner’s manual.

Why it matters

Correct sizing prevents overloading (better cleaning and less vibration) and helps you plan clearance for the lid, water hoses, drain standpipe, and leveling.

Last updated: January 2026

Most common symptoms to help you fix your washers

Choose a symptom to see related washer repairs.

Main causes: clogged drain hose, house drain clogged, bad drain pump, water-level pressure switch failure, bad control b…

Main causes: broken lid switch or lid lock, bad pressure switch, broken shifter assembly, faulty control system…

Main causes: worn agitator dogs, bad clutch, broken motor coupler, shifter assembly failure, broken door lock, suspensio…

Main causes: water heater failure, bad water temperature switch, faulty control board, bad water valve, faulty water tem…

Main causes: lack of electrical power, wiring failure, bad power cord, electronic control board failure, bad user interf…

Main causes: no water supply, bad water valves, water-level pressure switch failure, control system failure, bad door lo…

Main causes: unbalanced load, loose spanner nut, worn drive block, broken shock absorber or suspension spring, debris in…

Main causes: leaky water inlet valve, faulty water-level pressure switch, bad electronic control board…

Main causes: bad lid switch or door lock, bad timer or electronic control board, wiring failure, bad water inlet valve a…

Repair guides for water softeners

These step-by-step repair guides will help you safely fix what’s broken on your water softener.

How to replace a water softener valve motor

How to replace a water softener valve motor

The valve motor rotates the valve rotor to operate the water softener. If the water softener valve motor fails, follow t…

Repair time and Difficulty

 30 minutes or less
How to replace a water softener timer

How to replace a water softener timer

The timer is the control board you use to program the water softener. If the timer isn’t accepting commands when you pus…

Repair time and Difficulty

 15 minutes or less
How to replace a water softener venturi

How to replace a water softener venturi

The venturi valve in your water softener draws brine water from the salt tank to the resin tank for regeneration. Follow…

Repair time and Difficulty

 15 minutes or less

Effective articles & videos to help repair your washers

Use the advice and tips in these articles and videos to get the most out of your washer.

How auto-load sensing washers work (and when they don't)

How auto-load sensing washers work (and when they don't)

Your washer barely fills or seems stuck in sensing mode? Find out how auto-load sensing and Precise Fill features work, …

How to remove the main control board and user interface from a Maytag Epic Z front-load washer

How to remove the main control board and user interface from a Maytag Epic Z front-load washer

Get step-by-step instructions for removing the main electronic control board and the control panel from a Maytage Epic Z…

Using a wiring schematic to trace a current video

Using a wiring schematic to trace a current video

Find out what’s wrong with your appliance by following a circuit.…

Parts & More

Chainsaw
Dishwasher
Furnace
Gas Line Trimmer
Gas Range
Gas Walk-Behind Mower
Gas Water Heater
Microwave
Painting Power Tool
Parts
Side-By-Side Refrigerator
Upright Freezer
Vacuum Cleaner
Washer