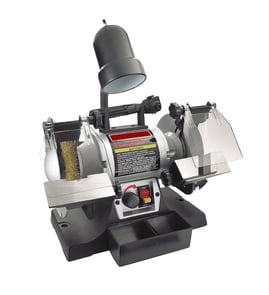

Is a 6 or 8 bench grinder better?
An 8-inch bench grinder is better for frequent sharpening and heavier grinding because the larger wheel runs cooler and leaves a shallower hollow grind; a 6-inch grinder (like the Pro-Tech 8102 6-inch bench grinder) is better when you want a compact, budget-friendly tool for general DIY use.
Quick comparison: 6-inch vs 8-inch
| Feature | 6-inch bench grinder | 8-inch bench grinder |
|---|---|---|
| Best for | General household sharpening, light grinding | Tool sharpening, heavier grinding, longer sessions |
| Wheel effect on edge | Deeper hollow grind | Shallower hollow grind (often preferred for chisels and plane irons) |
| Heat management | Heats faster | Runs cooler (more wheel mass and surface speed at the edge) |
| Footprint | Smaller, easier to store | Larger, heavier |
| Typical motor range | About 1/3 to 1/2 HP | About 1/2 to 1 HP |
How we recommend choosing
- Choose 6-inch if you mainly sharpen lawn and garden tools, do occasional deburring, or have limited bench space.
- Choose 8-inch if you sharpen woodworking or metalworking tools often and want better edge geometry with less heat buildup.
- If you grind hardened steel, prioritize cooler grinding (wheel size, wheel type, and technique) over raw speed.
- If you do precision sharpening, plan on adding a tool rest upgrade or a sharpening jig, regardless of wheel size.
- If you are sensitive to vibration, look for a grinder with a heavier base and plan to true and dress the wheels.
Why it matters (edge quality and overheating)
Wheel diameter changes the curve the wheel cuts into the tool. A larger 8-inch wheel makes a flatter hollow, which supports the cutting edge better for many sharpening tasks. It also tends to reduce overheating, which helps prevent bluing and loss of temper on tool edges.
Practical tips for either size
- Dress the wheel regularly so it cuts cleanly and runs true.
- Use light pressure and keep the tool moving to avoid hot spots.
- If the grinder has a work light or eye shields, keep them adjusted for visibility and safety.
- For electrical troubleshooting (switch, cord, motor), use a meter and safe test practices; see how to use a multimeter to test electrical parts video.
Last updated: February 2026
What are the 4 important rules for a bench grinder?
Four important rules for using a Pro-Tech 8102 bench grinder safely are: wear proper eye and face protection, keep the tool rest and guards correctly adjusted, grind only on the wheel’s face (not the side), and always let the wheel reach full speed before grinding and come to a complete stop before handling.
The 4 rules (quick checklist)
- Protect yourself: Wear safety glasses plus a face shield; tie back long hair and avoid loose sleeves, jewelry, and gloves that can catch.
- Set the clearances: Keep the work rest close to the wheel (commonly about 1/8 inch) and keep guards and spark deflectors in place.
- Use the wheel correctly: Never grind on the side of a standard bench grinding wheel; use the front face only.
- Control start and stop: Stand slightly to one side at startup, let the wheel reach full speed, and wait for a full stop before adjusting, measuring, or walking away.
What to check before you grind
- Wheel is rated for the grinder’s RPM and is not cracked or damaged.
- Wheel is securely mounted; flanges and blotters are in place.
- Tool rest is solid and not worn; gap is set close and even.
- Guards are installed; spark stream is directed away from you.
- Workpiece is held firmly; use light pressure and keep it moving to avoid overheating.
Common mistakes and the safer alternative
| Common mistake | Why it’s risky | Safer alternative |
|---|---|---|
| Grinding on the wheel side | Can break the wheel | Grind on the wheel face only |
| Large tool-rest gap | Work can jam and kick | Set rest close (about 1/8 inch) |
| Heavy pressure | Overheats metal, loads wheel | Use light pressure, frequent dips in water |
| Reaching for the wheel to stop it | Hand injury risk | Let it coast to a stop |
Why it matters
Bench grinders can throw sparks, metal fragments, and wheel debris at high speed. These four rules reduce the biggest risks: wheel breakage, kickback, and contact injuries.
For more general DIY safety guidance, review are diy appliance repairs safe.
Last updated: February 2026
What not to use on a bench grinder?
On a Pro-Tech 8102 6-inch bench grinder, do not grind materials that can load up the wheel, overheat, or require a different abrasive type; these situations can cause wheel damage, kickback, or the workpiece to shatter.
Materials and items to avoid
- Wet, oily, or greasy metal: moisture and oils can make the wheel slip, load up, and overheat.
- Wood, plastic, or rubber: these melt or smear and quickly clog the wheel.
- Soft metals on the wrong wheel (especially aluminum, brass, copper): they can load the wheel and increase the chance of grabbing.
- Masonry, stone, or concrete (unless you have a wheel rated for it): these need the correct bonded abrasive.
- Carbide tooling (unless using a suitable wheel such as diamond): standard wheels typically do not cut carbide correctly.
- Anything too small to hold safely: tiny parts can be pulled from your fingers and thrown.
Quick “OK vs not OK” guide
| Task/material | Use a bench grinder? | Better approach |
|---|---|---|
| Rust removal on steel | Yes | Light pressure, keep moving |
| Sharpening high-carbon steel tools | Yes | Dress wheel first, cool often |
| Aluminum shaping | No | File, belt sander, or correct wheel |
| Carbide sharpening | No | Diamond wheel on proper setup |
| Plastic trimming | No | Knife, file, or sanding |
Safe-use checks that prevent wheel problems
- Verify the wheel is rated for the grinder’s RPM.
- Inspect for cracks and do a simple “ring test” before mounting.
- Use the tool rest and keep the gap small (about 1/8 inch).
- Stand to the side at startup; let it reach full speed.
- Use light pressure; let the abrasive do the work.
Why it matters
Bench grinder wheels are designed for specific materials and speeds. Using the wrong material or a loaded wheel increases heat, reduces control, and raises the risk of wheel failure.
For electrical troubleshooting related to grinder switches, cords, or internal leads, we use the same safe test methods shown in how to use a multimeter to test electrical parts video.
Last updated: February 2026
What is the best bench grinder to buy?
The best bench grinder to buy depends on what you sharpen and how often: for most home shops, an 8-inch grinder with a sturdy base and good tool rests is the best all-around choice; for frequent tool sharpening, a slower-speed (about 1,750 RPM) model gives better control and reduces overheating.
Quick buying checklist (what matters most)
- Wheel size: 6-inch for light duty and tight spaces; 8-inch for better control and longer wheel life
- Speed:
3,450 RPM for fast stock removal; **1,750 RPM** for cooler, more precise sharpening - Motor: Look for a motor that starts smoothly and does not bog down under pressure
- Tool rests: Rigid, easy-to-adjust rests help you hold consistent angles
- Guards and shields: Solid wheel guards and adjustable eye shields improve safety and comfort
- Vibration control: A heavier base and good wheel balance reduce chatter and improve finish
Match the grinder to your job
| Your main use | Best setup to look for | Why it works |
|---|---|---|
| Lawn tools, bolts, rough shaping | 6-inch or 8-inch, higher speed | Removes material quickly |
| Chisels, plane irons, drill bits | 8-inch, slower speed | Better control; less heat at the edge |
| Wire wheel and buffing | Variable speed preferred | Lets you tune speed for accessories |
What to buy if you already own a Pro-Tech 8102
If you already have the Pro-Tech 8102 (a 6-inch bench grinder), the biggest performance upgrade usually comes from setup: dress the wheels, verify the flanges are seated correctly, and adjust the tool rests close to the wheel (without contact). That often delivers a smoother grind than replacing the whole tool.
Why it matters
Choosing the right wheel size and speed helps you sharpen faster with fewer burns, less vibration, and more consistent bevel angles. That means longer tool life and better results on everything from mower blades to woodworking chisels.
For help identifying the exact model number before you buy parts or accessories, use how to find your appliance model number (and what it means for parts).
Last updated: February 2026