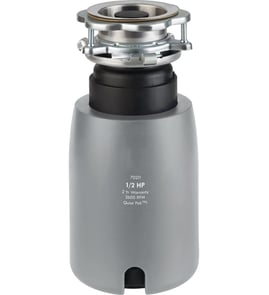


Which is better, 1/2 hp or 3/4 hp garbage disposal?
A 3/4 HP garbage disposal is the better choice for most households because it grinds faster, handles tougher food waste with fewer jams, and typically sounds smoother than a 1/2 HP unit. A 1/2 HP disposal is a solid, budget-friendly fit for light, everyday use.
Quick recommendation (what to buy for your kitchen)
- Choose 3/4 HP if you cook often, have a larger household, or want fewer clogs and resets.
- Choose 1/2 HP if you have a smaller household, scrape plates well, and mainly grind soft leftovers.
- If your current Kenmore model 17560501 is struggling, stepping up to 3/4 HP usually reduces stalling and frequent reset-button trips.
What changes between 1/2 HP and 3/4 HP
| Feature | 1/2 HP | 3/4 HP |
|---|---|---|
| Best for | Light daily scraps | Frequent use, heavier loads |
| Grinding ability | Good for softer foods | Better for fibrous/tough foods |
| Jams and stalls | More likely if overfed | Less likely under similar use |
| Noise and vibration | Often louder/rougher | Often smoother/quieter |
| Typical cost | Lower | Higher |
Food waste examples (real-world use)
- 1/2 HP handles well: small leftovers, cooked vegetables, soft fruit peels (in small amounts)
- 3/4 HP handles better: fibrous celery, onion skins, larger volumes of scraps, tougher peels
- Avoid in either one: grease, pasta/rice in bulk, large bones, stringy husks, non-food items
Why it matters
Horsepower affects how easily the motor keeps the grinding plate moving under load. More power usually means less stalling, fewer jams, and less need to stop and clear the chamber, especially when multiple people use the sink daily.
Tips that matter more than horsepower
- Run cold water before, during, and after grinding.
- Feed scraps gradually, not all at once.
- Let the disposal run a few seconds after grinding sounds stop.
- If it hums but will not spin, shut off power and clear the jam safely.
For general DIY safety and planning before any repair or replacement, use are diy appliance repairs safe.
Last updated: February 2026
What is the life expectancy of an insinkerator garbage disposal?
Most InSinkErator-style garbage disposals, including the Kenmore 17560501 in-sink-erator garbage disposal, typically last 8 to 15 years. Lifespan depends most on what you grind, how often you run water, and whether jams and overheating are avoided.
Typical lifespan by use level
- Light use (small household, careful use): 12 to 15 years
- Average use: 8 to 12 years
- Heavy use (frequent grinding, tough scraps): 5 to 8 years
| What affects life most | Shortens lifespan | Extends lifespan |
|---|---|---|
| What goes in | Bones, fibrous peels, grease | Small scraps, soft foods |
| Water use | Little or no water while grinding | Cold water during and after |
| Jams/overloads | Repeated stalls and resets | Quick jam clearing, smaller batches |
| Corrosion | Standing water, harsh chemicals | Regular flushing, mild cleaning |
Signs it is near end of life
- Frequent resets or humming without grinding (motor struggling)
- Persistent leaks from the disposal body (not just the sink flange)
- Grinding is noticeably slower or louder than normal
- Repeated clogs even with normal food loads
- Burning smell or tripped breaker during normal use
How to get the longest life from your disposal
- Run cold water before, during, and 10 to 20 seconds after grinding.
- Feed scraps slowly; avoid packing the chamber.
- Skip common disposal “killers”: grease, coffee grounds, eggshells, fibrous foods (celery, corn husks), and large bones.
- If it jams, shut off power and clear the jam before repeated restarts.
- Keep the underside wiring and connections in good shape; see how to repair broken or damaged wires video if you find damaged insulation or loose connections.
Why it matters
A disposal that is near the end of its service life can start leaking, tripping the breaker, or clogging the drain more often. Knowing the typical 8 to 15 year range helps you decide whether to troubleshoot a jam or plan a replacement.
Last updated: February 2026
How much should it cost to have a new garbage disposal installed?
For a Kenmore 17560501 in-sink-erator garbage disposal, professional installation typically runs $200 to $650 total (parts and labor), with a straightforward replacement usually landing around $200 to $350. Costs rise when the mounting, plumbing, or electrical setup needs changes.
Typical installed cost ranges
- Simple swap (same style, existing wiring and drain): $200 to $350
- Replacement plus minor plumbing adjustments: $300 to $500
- New install or electrical changes needed: $450 to $650+
- Disposal unit only (typical retail range): $100 to $400+
What drives the price up or down
- Mounting compatibility: Reusing the existing sink flange and mount vs. changing mount style
- Plumbing complexity: Dishwasher inlet connection, tight cabinet space, older drain piping
- Electrical needs: Hardwired vs. cord-and-plug, switch issues, junction box work
- Disposal size and power: Higher horsepower units and premium features cost more
- Extra work: Clearing a jam, replacing a worn drain trap, fixing leaks, or adding an air gap where required
Quick cost checklist (use this before you schedule)
| Situation | What it usually means | Typical impact |
|---|---|---|
| Same mount and same connections | Fast replacement | Lowest cost |
| Different brand or mount style | New flange/mount work | Medium cost |
| No existing disposal | New drain and electrical planning | Highest cost |
Why it matters
A garbage disposal install is priced mostly on compatibility and labor time, not just the unit. If the Kenmore 17560501 replacement matches your existing mount and plumbing, you avoid the most common add-on charges.
Helpful next step
If you are unsure you have the correct model number before ordering parts or a replacement unit, use our guide: how to find your appliance model number (and what it means for parts).
Last updated: February 2026
Is it cheaper to repair or replace a garbage disposal?
Repair is cheaper for most minor problems on a Kenmore 17560501 garbage disposal (jams, a tripped reset, a loose connection, or a simple clog). Replacement is the better value when the unit is about 10 years old or more, leaks from the housing, repeatedly trips the breaker, or has a failing motor.
Quick decision guide (repair vs. replace)
Use these checkpoints to decide fast:
- Repair when it is a jam, a reset issue, or a drain blockage and the disposal otherwise runs normally.
- Repair when the leak is from the sink flange, dishwasher inlet, or drain connections (often a seal or clamp issue).
- Replace when the disposal hums but will not spin after freeing a jam and resetting.
- Replace when it leaks from the body or bottom (internal seal failure).
- Replace when it smells burnt, stalls under light load, or frequently trips the breaker (motor or internal electrical failure).
- Replace when repair cost is more than about half the cost of a comparable new unit.
Typical cost comparison
Actual pricing varies by area and installer, but this framework helps you choose:
| Situation | Usually cheaper | Why |
|---|---|---|
| Jam, reset button popped, minor clog | Repair | Low labor, no major parts needed |
| Leak at connections (not the housing) | Repair | Often a gasket, putty, or clamp adjustment |
| Persistent leak from housing/bottom | Replace | Internal seals are not practical to rebuild |
| Motor failure, repeated breaker trips | Replace | Major repair approaches replacement cost |
What we recommend checking first (safe, common fixes)
Before you commit to replacement, we recommend these basic checks:
- Turn off power at the switch and breaker, then press the reset button on the bottom.
- Look for a jam (common with bones, fruit pits, utensils); free it, then reset.
- Clear the P-trap and drain line if the sink backs up.
- Inspect for leaks at the mounting ring, dishwasher inlet, and discharge tube connections.
- If it only hums, stop and address the jam or plan for replacement if it will not turn freely.
Why it matters
A disposal that is leaking internally or has a failing motor can lead to repeated clogs, electrical trips, and water damage under the sink. Fixing small issues early is inexpensive; replacing at the right time prevents ongoing problems.
For model-specific parts availability and diagrams for Kenmore 17560501, use Sears PartsDirect.
Last updated: February 2026
Why don't plumbers like garbage disposals?
Plumbers often dislike garbage disposals because they are a common source of kitchen drain clogs and leaks when they are overloaded or used like a trash can. On a Kenmore 17560501 in-sink-erator garbage disposal, most problems come from what goes in the unit and how the drain line is maintained.
The main reasons plumbers push back
- Clogs downstream: Ground food can still pack into the P-trap, disposer elbow, or wall drain.
- Grease buildup: Fats, oils, and grease coat pipes and trap other debris.
- Starchy foods swell: Rice, pasta, potato peels, and bread can expand and form paste.
- Fibrous foods wrap: Celery, corn husks, onion skins, and artichokes can tangle and jam.
- Hard items cause jams: Bones, fruit pits, and shells can stall the motor and trip the reset.
- Extra leak points: Disposals add seals, flanges, and connections that can drip over time.
What to put in the trash (not the disposal)
| Category | Examples | What it causes |
|---|---|---|
| Grease and fats | cooking oil, butter, meat drippings | pipe coating and recurring clogs |
| Starches | rice, pasta, potato peels | paste-like blockage |
| Fibers | celery, corn husks, onion skins | jams and slow drains |
| Hard waste | bones, pits, shells | grinding damage or motor stall |
Best practices that prevent most service calls
- Run cold water before, during, and after grinding (helps keep grease more solid so it flushes).
- Feed small amounts steadily; avoid dumping a full plate of scraps at once.
- If the unit hums but will not grind, shut off power and clear a jam safely (never put your hand inside).
- If the disposal runs but the sink backs up, clear the P-trap and branch drain first.
- If you suspect an electrical issue (no sound, no response), use safe testing steps from how to tell if a fuse is blown and how to use a multimeter to test electrical parts video.
Why it matters
A garbage disposal can be convenient, but it changes how your plumbing system is used. When the wrong foods go down the drain, the disposal may still “work” while the pipes slowly clog, leading to messy backups and higher repair costs.
Last updated: February 2026