 Owner’s manual
 Error Codes



How do you reset a Kenmore electric stove?
To reset your Kenmore electric range model 91193812301, disconnect power for about 5 minutes, then restore power and reset the clock and any cooking settings. This clears many control glitches after a power outage or when an error code appears.
Quick reset steps (most common)
- Turn the range OFF.
- Switch OFF the range circuit breaker (or unplug the cord if accessible).
- Wait 5 minutes.
- Restore power.
- If the time is flashing, reset the clock.
- Test Bake and Broil to confirm normal operation.
If the display shows an error code
Your manual notes that if “F-” plus a number/letter flashes, it indicates a function error code. Try this sequence:
- Press STOP/CLEAR.
- If the code happened during self-clean, check the door latch and make sure it is fully latched to the right.
- Let the oven cool for 1 hour (after self-clean issues).
- Disconnect power for 5 minutes, then restore power.
If the code returns right away after the reset, the problem is typically in a component such as the oven control or a sensor.
What the reset does (and does not do)
| Reset method | What it helps | What it won’t fix |
|---|---|---|
| Power reset (5 minutes) | Frozen keypad, minor control glitches, post-outage issues | Failed control board, bad sensor, wiring problems |
| STOP/CLEAR | Cancels an invalid setting (like “Err”) | Power-related faults or hardware failures |
Why it matters
A proper reset restores the control to a known state after a power interruption, which is important because timed cooking, the clock, and some special modes can require reprogramming before the oven heats normally.
For model-specific control features and clock setting steps, use the 91193812301 owner's manual.
Last updated: February 2026
What causes a Kenmore oven to stop working?
On a Kenmore 91193812301 electric range, an oven that stops working is usually caused by a power supply problem (tripped breaker, blown fuse, unplugged cord) or a failed heating or control component. Start with the basic power checks listed in the owner's manual.
Quick checks we recommend first
- Verify the range has power at the outlet; reset the household circuit breaker or replace the fuse.
- Confirm the range is fully plugged in.
- If the cooktop works but the oven does not, recheck oven settings and try Bake again.
- If the cooktop element is not heating, make sure the coil element is seated firmly in the receptacle.
- If the display shows an F code, press Stop/Clear and reset power to the range for 5 minutes.
- If the display flashes bAd linE with a loud tone, the house wiring is miswired and needs correction.
Common failed parts when the oven has power but will not heat
If power is good and settings are correct, these are the most common electric-range culprits:
| Symptom | Most likely area | Example part on this model page |
|---|---|---|
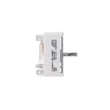
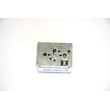
| Oven will not heat at all | Control or sensor circuit | Oven control WB27X45466, wall oven temperature sensor WB21X22134 |
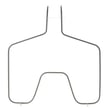
| Broil does not work | Broil heating circuit | Range broil element WB44T10009 |
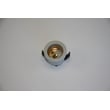
| Oven light does not work | Bulb or socket | Range oven light bulb 40A15, range light socket WB08T10026 |
Why it matters
An oven that is totally inoperative often points to a power supply issue, while an oven that has power but will not heat typically points to a control, sensor, or heating circuit problem. Checking the simple items first prevents unnecessary part replacement.
Last updated: February 2026
Where is the fuse on my Kenmore oven?
On Kenmore range model 91193812301, there is not a single, user-accessible “oven fuse” you can point to from the front. Power protection is handled at your home breaker or fuse box, and the range may also use internal safety devices (such as a thermal limiter) mounted on the back of the unit. Use the owner's manual to match your symptom to the correct check.
What to check first (fast, safe checks)
- Check the household circuit breaker or fuse box; a tripped breaker can make the range totally inoperative.
- Confirm the range is plugged in (if your installation uses a cord).
- If the cooktop works but the oven does not, verify the controls are set correctly and the oven is not in a timed or locked-out mode.
- If a surface element is not heating, make sure the element is fully seated in the receptacle.
- If the display shows “bAd linE”, the manual indicates a miswired power connection; have an electrician correct the wiring.
Where internal “fuses” or limiters are typically located
Many electric ranges place a thermal limiter or thermal fuse-style safety device:
- On the rear of the range, behind the back panel
- Near the oven cavity, wiring harness, or control area
- Sometimes near heating-circuit wiring (bake/broil circuits)
Because these parts are not meant for routine access, we recommend disconnecting power at the breaker before removing any panels.
Symptom guide (what location usually means)
| Symptom | Most likely place to check | Common next step |
|---|---|---|
| Range totally dead | House breaker/fuse box; power cord/terminal connection | Restore power; correct wiring |
| Cooktop works, oven dead | Oven control and oven temperature sensing circuit | Test sensor; inspect control |
| Oven heats poorly or erratic temps | Oven temperature sensor circuit | Consider replacing sensor |
If you’re troubleshooting oven temperature problems, the wall oven temperature sensor WB21X22134 is a common component in the temperature-control loop for this model.
Why it matters
A “blown fuse” symptom is often actually a power supply issue (tripped breaker, loose terminal connection) or a control/sensor problem. Checking the right location first prevents unnecessary part replacement and reduces the risk of electrical shock.
Last updated: February 2026
Where can I find my Kenmore electric range model number?
On Kenmore electric range model 91193812301, the model and serial number are on the rating label located on the front frame behind the storage drawer. Pull the storage drawer out and look on the metal frame around the drawer opening to read the tag.
How to find it (quick steps)
- Turn the range off and make sure all surfaces are cool.
- Pull the storage drawer straight out to expose the frame behind it.
- Look on the front frame (left, right, and center areas around the opening).
- Find the label that lists MODEL NUMBER and SERIAL NUMBER.
- Record both numbers exactly; use a phone photo to avoid transposing digits.
If the label is hard to see
- Use a flashlight and look along the vertical sides of the frame.
- Wipe grease or dust off the frame with a damp cloth, then dry it.
- Remove items from the drawer so it opens fully and does not block the view.
What to write down
| Item | Example format | What it’s used for |
|---|---|---|
| Model number | 91193812301 | Matching diagrams and parts to your exact range |
| Serial number | Letters and numbers | Identifying production details for service and compatibility |
Why it matters
The model number is the key to getting the correct Kenmore parts and instructions for your exact configuration. It helps us match items like an oven control, surface element control switch, or oven temperature sensor correctly.
For the exact location and handling notes, use the owner's manual.
Last updated: February 2026




