Get free shipping on your order, with any water filter subscription. Find my filter

Open Hamburger Menu
Sears Parts Direct
Tips to find your model number

GE GTX33EASK1WW electric dryer Parts

Here are the diagrams and repair parts for GE GTX33EASK1WW electric dryer, as well as links to manuals and error code tables, if available.

GE GTX33EASK1WW electric dryer
By Schematic
By Part
SELECT DIAGRAM
?

This is the number corresponding to the part on the diagram / schematic

Browse Parts for GTX33EASK1WW Electric Dryer

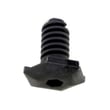
  • Dryer Leveling Leg for GE GTX33EASK1WW - Part WE01X29357

    Cabinet & top panel diagram

    Dryer Leveling Leg

    Part #WE1M1101

    Replaced by #WE01X29357

    Info Icon
    Manufacturer substitution
    This part replaces WE1M1101. Substitute parts can look different from the original.
    In Stock
    $18.41
    10% OFF Phone Price : $20.41Info Icon
    Minus Item
    Qty
    Plus Item
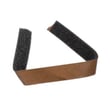
  • Dryer Door Strike for GE GTX33EASK1WW - Part WE1X1192

    Front panel & door diagram

    Door Strike

    Part #WE01X1192

    Replaced by #WE1X1192

    Info Icon
    Manufacturer substitution
    This part replaces WE01X1192. Substitute parts can look different from the original.
    This item is not returnable
    In Stock
    $9.32
    10% OFF Phone Price : $10.32Info Icon
    Minus Item
    Qty
    Plus Item
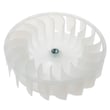
  • Blower Gasket (exhaust) for GE GTX33EASK1WW - Part WE09X27636

    Backsplash, blower & motor assembly diagram

    Dryer Blower Gasket

    Part #WE1M966

    Replaced by #WE09X27636

    Info Icon
    Manufacturer substitution
    This part replaces WE1M966. Substitute parts can look different from the original.
    In Stock
    $58.69
    Minus Item
    Qty
    Plus Item
  • Dryer Bearing Slide 2-pack for GE GTX33EASK1WW - Part WE03X37319

    Front panel & door diagram

    Dryer Drum Glide Bearing

    Part #WE3M51

    Replaced by #WE03X37319

    Info Icon
    Manufacturer substitution
    This part replaces WE3M51. Substitute parts can look different from the original.
    In Stock
    $11.82
    14% OFF Phone Price : $13.82Info Icon
    Minus Item
    Qty
    Plus Item
  • G.e. Dryer Drum Belt for GE GTX33EASK1WW - Part WE03X29897

    Backsplash, blower & motor assembly diagram

    Dryer Drum Belt

    Part #WE12M29

    Replaced by #WE03X29897

    Info Icon
    Manufacturer substitution
    This part replaces WE12M29. Substitute parts can look different from the original.
    In Stock
    $50.99
    11% OFF Phone Price : $56.99Info Icon
    Minus Item
    Qty
    Plus Item
  • Dryer Bearing Slide 2-pack for GE GTX33EASK1WW - Part WE03X37320

    Front panel & door diagram

    Dryer Drum Glide Bearing, Upper

    Part #WE3M52

    Replaced by #WE03X37320

    Info Icon
    Manufacturer substitution
    This part replaces WE3M52. Substitute parts can look different from the original.
    In Stock
    $10.86
    16% OFF Phone Price : $12.86Info Icon
    Minus Item
    Qty
    Plus Item
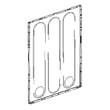
  • Dryer Side Panel for GE GTX33EASK1WW - Part WE10X29822

    Cabinet & top panel diagram

    Dryer Side Panel

    Part #WE20X25259

    Replaced by #WE10X29822

    Info Icon
    Manufacturer substitution
    This part replaces WE20X25259. Substitute parts can look different from the original.
    In Stock
    $99.02
    11% OFF Phone Price : $111.02Info Icon
    Minus Item
    Qty
    Plus Item
  • Dryer Idler Pulley for GE GTX33EASK1WW - Part WE03X31620

    Backsplash, blower & motor assembly diagram

    Dryer Idler Pulley

    Part #WE12X20395

    Replaced by #WE03X31620

    Info Icon
    Manufacturer substitution
    This part replaces WE12X20395. Substitute parts can look different from the original.
    In Stock
    $66.87
    8% OFF Phone Price : $72.87Info Icon
    Minus Item
    Qty
    Plus Item
  • Laundry Appliance Screw, #8-32 X 3/8-in, 12-pack for GE GTX33EASK1WW - Part WZ5X158D

    Screw

    Part #WZ05X0158

    Replaced by #WZ5X158D

    Info Icon
    Manufacturer substitution
    This part replaces WZ05X0158. Substitute parts can look different from the original.
    In Stock
    $19.57
    48% OFF Was : $37.28Info Icon
    Minus Item
    Qty
    Plus Item
  • Washer Screw for GE GTX33EASK1WW - Part WZ4X241D

    Cabinet & top panel diagram

    Screw

    Part #WH2M270

    Replaced by #WZ4X241D

    Info Icon
    Manufacturer substitution
    This part replaces WH2M270. Substitute parts can look different from the original.
    In Stock
    $24.52
    20% OFF Phone Price : $30.52Info Icon
    Minus Item
    Qty
    Plus Item

GE Electric Dryer GTX33EASK1WW FAQs

On a GE GTX33EASK1WW electric dryer, the reliable way to tell if the thermal fuse is blown is to unplug the dryer and test the fuse for continuity with a multimeter. A good fuse shows continuity (near 0 ohms); a blown fuse shows no continuity (OL/infinite).

Quick symptoms that often point to a blown thermal fuse

A thermal fuse is a one-time safety device; when it opens, it commonly stops the dryer from running or heating.

  • Dryer will not start at all (most common)
  • Motor hums briefly but drum does not turn (sometimes)
  • Dryer runs but has no heat (on some designs)
  • Problem appeared after long dry times or very hot cabinet/airflow issues
  • Lint buildup or a crushed/blocked vent was present

How we test it (safe, practical steps)

  1. Unplug the dryer (or switch off the breaker). Electric dryers use 240V.
  2. Access the thermal fuse (location varies by design; it is often on the blower housing or exhaust duct).
  3. Pull the wires off the fuse terminals (note their positions).
  4. Set the multimeter to continuity or lowest ohms.
  5. Touch one probe to each terminal.

What the meter reading means

Meter result What it means What to do next
Beep or ~0 to 1 ohm Fuse is good Keep troubleshooting (door switch, start switch, timer, motor, power)
OL / no beep / very high resistance Fuse is blown Replace the fuse and correct the airflow problem

Fix the root cause (so the new fuse does not blow)

A thermal fuse usually opens because the dryer overheated from restricted airflow.

  • Clean the lint screen and the lint screen housing
  • Inspect and clean the vent duct from dryer to outside
  • Replace crushed, kinked, or excessively long vent runs
  • Make sure the outside vent hood opens freely
  • Vacuum lint from the blower area while the dryer is opened

Why it matters

Replacing a blown thermal fuse without fixing venting and lint buildup often leads to repeat overheating, longer dry times, and additional failures such as a bad heating element or thermostats.

If your GTX33EASK1WW is also not heating, we often check the dryer heating element WE11M10001, dryer operating thermostat WE04X25201, and dryer safety thermostat WE04X25194 during diagnosis. You can order replacement parts from the parts list for this model, or search by model number on Sears PartsDirect.

Last updated: February 2026
A GE electric dryer like model GTX33EASK1WW typically lasts 10 to 13 years. With consistent vent cleaning, routine lint removal, and quick repairs when symptoms start, it commonly reaches the upper end of that range.

Typical lifespan and what changes it

Most dryers wear out from heat stress, restricted airflow, and normal drum support wear. These factors have the biggest impact:

  • Vent restriction (long dry times, overheating)
  • Heavy weekly loads (more run time equals more wear)
  • Lint buildup in the lint screen housing and blower area
  • Worn drum support parts (glides, bearings, idler)
  • Delayed repairs after squealing, thumping, or no-heat symptoms

Maintenance that adds years

These habits protect the heater, thermostats, motor, and drum supports:

Quick “repair or replace” guide

Use this as a practical decision check for a GTX33EASK1WW:

What you’re seeing Most common cause What it usually means
Long dry times Venting or lint restriction Maintenance issue first
No heat Heater or thermostat circuit Often repairable
Squeal/scrape Glides, idler, bearings Wear parts, usually repairable
Repeated shutdown/overheat Airflow restriction Fix venting immediately

Why it matters

A dryer that runs hot or runs too long uses more electricity and can shorten the life of key components like the heating element and safety thermostat. Keeping airflow strong is the simplest way to protect the dryer and your laundry.

If you decide to repair, you can order model GTX33EASK1WW replacement parts from the parts list for this dryer, or search by model on Sears PartsDirect.

Last updated: February 2026

The most common GE dryer problem we see is poor drying performance: no heat, weak heat, or long dry times. On your GE GTX33EASK1WW electric dryer, the top causes are restricted airflow (lint screen, lint chute, venting) and failed heating or safety parts such as the heating element or thermostats.

Most common symptoms and what they usually point to

  • Runs but no heat: heating circuit issue (element, thermostat, wiring) or a power supply problem (missing one leg of 240V)
  • Takes too long to dry: vent restriction, lint buildup in the lint chute, or weak airflow
  • Stops mid-cycle: overheating from restricted airflow, which can trip safety controls
  • Won’t start: start switch, timer, door switch, or motor-related issue
  • Squealing or thumping: drum support wear (glides, bearings, idler pulley)

Quick checks we recommend first (fast, high-impact)

  1. Clean the lint screen every load; replace it if the mesh is damaged or won’t pass air (see GE dryer lint screen WE03X23881).
  2. Check airflow at the outside vent hood; it should be strong and steady.
  3. Inspect and clean the lint chute area if lint is packing up (see dryer lint chute assembly WE01X24546).
  4. Confirm the dryer is getting full power; many electric dryers will run on 120V but will not heat without full 240V.
  5. If airflow is good but there’s still no heat, test the heating circuit components.

Common parts involved (GTX33EASK1WW)

Symptom Common part to check Example part on this model
No heat Heating element Dryer heating element WE11M10001
Overheats or shuts off Safety thermostat Dryer safety thermostat WE04X25194
Cycles heat incorrectly Operating thermostat Dryer operating thermostat WE04X25201
Won’t start or won’t advance Timer or start button GE dryer timer WE04X25280, dryer power and start button WE04X24719

Why it matters

Airflow problems do more than slow drying; they also raise internal temperatures. That can cause repeated shutdowns, damage heating components, and shorten the life of wear parts like drum glides and bearings.

You can order replacement parts for your GE GTX33EASK1WW from the parts list for this model, or search by model number on Sears PartsDirect.

Last updated: February 2026
Most common symptoms to help you fix your dryers

Choose a symptom to see related dryer repairs.

Main causes: bad gas valve coils, broken heating element, tripped safety thermostat or fuse, bad operating thermostat, c…

Main causes: clogged exhaust system, heating system failure, deposits on moisture sensor, control system failure…

Main causes: clogged exhaust vent, bad motor relay, loose dryer door catch, bad door switch, control system failure, fau…

Main causes: door switch failure, lack of power, broken belt, blown thermal fuse, bad drive motor, control system failur…

Main causes: damaged door strike, worn door catch…

Main causes: lack of electrical power, bad power cord, wiring failure, bad control board, blown thermal fuse, bad door s…

Main causes: bad timer or electronic control board, door switch failure…

Main causes: bad drum support roller, damaged idler pulley, broken blower fan blade, worn drum glide bearing, bad drive …

Most common repair guides to help fix your dryers

These step-by-step repair guides will help you safely fix what’s broken on your dryer.

How to replace an electronic control board in an electric dryer

How to replace an electronic control board in an electric dryer

The electronic control board manages the components and controls the cycle times in your electric dryer. Follow these st…

Repair time and Difficulty

 45 minutes or less
How to replace an igniter in a gas dryer

How to replace an igniter in a gas dryer

The igniter in a gas dryer glows white hot during the to light the gas that heats the air in the dryer. If the dryer air…

Repair time and Difficulty

 60 minutes or less
How to replace a dryer thermistor

How to replace a dryer thermistor

The thermistor senses the air temperature in the dryer. If your dryer overheats or doesn't heat at all, the thermistor …

Repair time and Difficulty

 30 minutes or less

Effective articles & videos to help repair your dryers

Use the advice and tips in these articles and videos to get the most out of your dryer.

How to use your clothes dryer efficiently

How to use your clothes dryer efficiently

Get expert tips on using your dryer efficiently to save energy.…

Are DIY appliance repairs safe?

Are DIY appliance repairs safe?

Find out how to stay safe when repairing your appliances.…

Keeping your smart appliances secure from hackers

Keeping your smart appliances secure from hackers

Find out how to protect your smart appliances from malevolent invasions by hackers.…