



Where is the part number on a GE dryer?
On a GE dryer, the model and serial label (which you will use to match the correct replacement part number) is typically located on the cabinet frame just inside the door opening; on some units it can also be on the back of the dryer near the top. Once you have the model number (HTX24GASK1WS), we can match parts accurately.
Use the information on the rating label to identify the right parts for your GE HTX24GASK1WS dryer.
- Model number: identifies the exact dryer design (example: HTX24GASK1WS)
- Serial number: helps confirm production details for part variations
- Electrical or gas information: useful when diagnosing heat or start issues
- Sometimes a list number or additional codes: used for internal configuration
Most GE dryers place the label in one of these spots:
- Inside the door opening on the front cabinet frame
- On the rear panel near the top edge
- Occasionally on the side panel near the back (less common)
After you confirm the model number, compare the part name and ID to what you need. For example, if you are replacing a worn lint filter, we list the GE dryer lint screen WE03X23881.
| What you have | Where to find it | What it helps with |
|---|---|---|
| Model number | Rating label | Ensures parts fit HTX24GASK1WS |
| Serial number | Rating label | Helps confirm version changes |
| Part ID and part name | Parts list | Confirms the exact replacement |
GE often uses similar-looking parts across multiple dryer models. Using the rating label details prevents ordering a look-alike part that does not fit, mount correctly, or connect to your wiring and controls.
Once you have the model number from the label, you can order replacement parts from the parts list for HTX24GASK1WS, or search by model on Sears PartsDirect.
Last updated: February 2026
What are the main parts of a dryer?
For your GE HTX24GASK1WS dryer, the main parts are the drum system (drum and bearings/glides), drive system (motor, idler, belt), airflow system (blower and lint screen), heating system (gas burner or electric heater), and temperature controls (thermostats/timer). These parts work together to tumble, heat, and vent moist air.
- Drum and support: Holds clothes and tumbles them; supported by glides/bearings.
- Drive system: Turns the drum using the motor, belt, and idler pulley.
- Airflow and lint handling: Pulls air through the drum and captures lint before exhaust.
- Heat and temperature control: Produces heat and regulates temperature for safe drying.
- Controls and safety: Timer/buttons start and control cycles; safety devices prevent overheating.
These are some of the most frequently serviced components we see on this model:
- Dryer drum glide bearing, upper WE03X37320
- Dryer drum glide bearing WE03X37319
- Dryer idler pulley WE03X31620
- Dryer operating thermostat WE04X25201
- GE dryer lint screen WE03X23881
| Dryer part | What it does | Common symptom when failing |
|---|---|---|
| Drum glide/bearing | Supports drum as it turns | Squealing, scraping, thumping |
| Idler pulley | Keeps belt tensioned | Squeal, drum not turning |
| Drive motor | Powers drum and blower | Hums, won’t start, no tumble |
| Lint screen | Captures lint for airflow | Long dry times, overheating |
| Thermostat | Regulates drum temperature | No heat, overheating, short cycling |
Knowing the main dryer parts helps you match symptoms to the right repair. For example, noise issues often point to drum support parts, while long dry times usually trace back to airflow restrictions (lint screen, ducting, blower) or heat control problems.
- Match your model number exactly: HTX24GASK1WS.
- Compare the failed part’s location and function (drum support vs airflow vs heat).
- If you are ordering multiple wear items (like glides and an idler), replace them together to restore smooth, quiet operation.
- Order from the parts list for this model, or search by model number on Sears PartsDirect.
Last updated: February 2026
How do I find the right GE part number?
For your GE dryer model HTX24GASK1WS, the most reliable way to get the right part number is to start with the exact model number from the dryer’s ID tag, then match the part by name and diagram location in the model’s parts list. You can also search by part ID on Sears PartsDirect.
On most GE dryers, the model/serial tag is typically located in one of these spots:
- Inside the door opening on the front panel
- On the back panel of the cabinet
- Along the door frame area (around the opening)
- Occasionally behind the lower access panel (if equipped)
Write the model number exactly as shown (for example, HTX24GASK1WS). One wrong character can pull up the wrong diagrams and parts.
Use this process to avoid ordering the wrong item:
- Confirm the symptom or the part you need (noise, no start, no heat, poor drying)
- Find the correct section diagram (drum, controls, burner, etc.)
- Match the part by name, diagram position, and part ID/part number
- Compare your old part to the listing (mounting points, connectors, shape)
- If multiple similar listings appear, choose the one explicitly shown for HTX24GASK1WS
These are examples of parts shown for this model; matching by name plus part ID helps prevent mix-ups:
| What you’re fixing | Part to look up | What it affects |
|---|---|---|
| Clothes taking too long to dry | GE dryer lint screen WE03X23881 | Airflow and drying time |
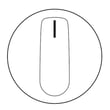
| Dryer won’t start from the console | Dryer power and start button WE04X24719 | Start input to the control circuit |
| Squealing or thumping while tumbling | Dryer idler pulley WE03X31620 | Belt tension and drum rotation |
| Overheating or cycling heat oddly | Dryer operating thermostat WE04X25201 | Temperature regulation |
GE often uses similar-looking parts across multiple dryer series. Matching the part to the HTX24GASK1WS diagram and part ID reduces returns, prevents fit issues, and helps your repair solve the original problem.
If your question is tied to a fault code on a GE dryer, use GE cleanspeak dryer error codes to narrow the repair to the correct circuit and parts group.
Last updated: February 2026
What is the most common problem with a GE electric dryer?
For the GE HTX24GASK1WS dryer, the most common complaint is no heat or long dry times, and the most common root cause is restricted airflow (lint buildup in the screen, housing, or vent). The next most common issue is noise or poor tumbling from worn drum support parts.
- Takes too long to dry: vent restriction, lint buildup, or weak airflow through the blower path
- No heat: heat-control components opening due to overheating, or a failed heat component
- Stops mid-cycle: overheating from poor airflow causing a safety device to open
- Squealing, scraping, thumping: worn drum glides, bearing surfaces, or support hardware
- Won’t start: start button, timer, door switch, or power supply problem
- Clean the lint screen every load; rinse it with warm water if dryer sheets leave a film.
- Check airflow at the outside vent hood; it should be strong and steady.
- Inspect the vent run for crushed flex duct, long runs, or heavy lint buildup.
- Confirm the load size; overloading reduces airflow and increases heat stress.
If airflow is good and symptoms continue, these parts from the HTX24GASK1WS list are common fixes:
| Symptom | What to check | Example part for this model |
|---|---|---|
| Overheating, cycling heat issues | Temperature control | Dryer operating thermostat WE04X25201, dryer high-limit thermostat WE04X26138 |
| Long dry times from lint restriction | Lint capture | GE dryer lint screen WE03X23881 |
| Noise or poor tumbling | Drum support | Dryer drum glide bearing WE03X37319, dryer drum bearing kit WE03X25314 |
| Won’t start | Controls | Dryer power and start button WE04X24719, dryer timer WE04X25586 |
Airflow problems make a dryer run hotter and longer than designed. Fixing venting and lint buildup first improves drying performance and helps prevent repeat failures of thermostats and other heat-control parts.
- Use dryer takes a long time to dry to pinpoint venting and airflow restrictions.
- If your dryer shows a code, check GE cleanspeak dryer error codes for definitions and next steps.
You can order replacement parts for GE HTX24GASK1WS from the parts list for this model, or search by model number on Sears PartsDirect.
Last updated: February 2026