 Installation guide
 Owner’s manual


Where to find part number on GE dryer?
On a GE GTDP301EL1WS electric dryer, we find the model and serial tag (the information you need to match the correct replacement part) on the inside of the dryer door opening, typically on the door frame or just inside the door.
Where to look first
- Open the dryer door and check the door frame (all four sides).
- Look along the inside lip of the front panel near the lint screen opening.
- Check the back panel if the tag is missing or painted over.
- If the label is worn, use a flashlight and take a close-up photo to zoom in.
What numbers you need (and why)
The label usually shows model number and serial number. The “part number” you see on a replacement part (for example, a belt or thermostat) is different; you use the model number to ensure the part fits your exact dryer.
Quick guide
| What you’re looking at | What it’s used for | Example from your dryer |
|---|---|---|
| Model number | Matches parts to your exact design | GTDP301EL1WS |
| Serial number | Identifies production run; helps confirm revisions | (varies by unit) |
| Part number / part ID | Identifies the replacement component | WE03X29897 (example part ID) |
If you’re replacing a common wear item
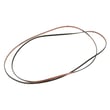
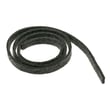
Once you confirm the model number, you can match common parts confidently, such as the dryer drum belt WE03X29897.
Why it matters
GE often uses similar-looking dryers with different internal components. Using the exact model number (GTDP301EL1WS) prevents ordering the wrong drum belt, door switch, timer, or heating component.
For diagrams and model identification details, use the GTDP301EL1WS owner’s manual.
Last updated: February 2026
How to replace GE dryer sensor?
On the GE GTDP301EL1WS electric dryer, most “sensor” replacements fall into two common jobs: replacing a door switch (the dryer thinks the door is open) or replacing a thermostat/temperature sensor (heating and cycling issues). Use the wiring and access steps in the GTDP301EL1WS installation guide to work safely and reassemble correctly.
Before you start (safety and setup)
- Unplug the dryer (or switch off the breaker) before removing any panels.
- If you must move the dryer, avoid crushing or kinking the 4-inch exhaust duct.
- Wear gloves; sheet-metal edges inside the cabinet are sharp.
- Take a clear photo of every wire connection before you remove it.
- Label wires with tape so they go back on the same terminals.
If you meant the door sensor (door switch)
A failed door switch can prevent the dryer from starting or can stop it when the door is closed.
Typical steps
- Open the door and locate the switch near the door opening.
- Remove the mounting screws, then pull the switch forward.
- Transfer wires one at a time to the new switch.
- Reinstall the switch and test door open/close operation.
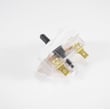
Correct replacement part for this model Use the exact door switch listed for GTDP301EL1WS: dryer door switch WE4M415.
If you meant a temperature sensor (thermostat)
GE electric dryers commonly use thermostats to regulate drum temperature and protect against overheating. If the dryer overheats, shuts off early, or will not heat, a thermostat can be involved.
| Symptom | More likely part type | Example part for this model |
|---|---|---|
| No heat or heat cuts out | Operating thermostat | WE4M216 or WE4M181 |
| Overheats or trips safety | High-limit or safety thermostat | WE4M137 or WE4M160 |
Why it matters
Replacing the correct “sensor” restores safe operation and prevents repeat failures. Many heat-related problems are caused by restricted venting, so checking and cleaning the exhaust path is just as important as replacing a thermostat.
Last updated: February 2026
How to replace a GE dryer belt?
For the GE GTDP301EL1WS electric dryer, replacing the drum belt means unplugging the dryer, opening the cabinet, slipping the new belt around the drum, and routing it under the drum around the motor pulley and idler pulley to restore proper tension. Use the GTDP301EL1WS installation guide for safe power-disconnect steps.
Before you start (safety and access)
- Turn off the 30-amp breaker and unplug the dryer.
- Let the dryer cool completely.
- Pull the dryer out far enough to work safely behind it.
- Keep screws organized by location.
- Take a quick photo of the belt path before removal.
Why the power step matters
The installation instructions call out turning off the breaker and unplugging before servicing electrical connections. Following that same approach during belt replacement reduces shock risk and prevents accidental start-up.
Belt replacement overview (what we do)
- Disconnect power and open the cabinet to access the drum.
- Release belt tension by moving the idler pulley away from the belt.
- Remove the old belt from the drum.
- Install the new belt around the drum with the ribbed side against the drum.
- Reach under the drum and route the belt around the motor pulley and idler pulley so the idler applies tension.
- Reassemble the cabinet, then run a short timed cycle to confirm the drum turns smoothly.
Parts that commonly get replaced together
If the dryer squeals, thumps, or the drum feels rough while you have it open, these parts are common wear items:
| Symptom while turning drum by hand | Common wear part | Example for this model |
|---|---|---|
| Drum will not turn, belt looks cracked/glazed | Drum belt | Dryer drum belt WE03X29897 |
| Squeal or chirp near belt path | Idler pulley | Idler pulley WE12X83 |
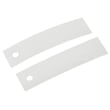
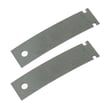
| Scraping or rumbling at the front of drum | Drum glides/pads | Dryer drum front glide pad WE03X37318 |
Quick checks after reassembly
- Drum starts turning within a second or two of pressing Start.
- No burning-rubber smell (belt misrouted can slip).
- No loud squeal (idler pulley or glides may be worn).
- Lint screen and venting are clear so the dryer does not overheat.
Last updated: February 2026
Where is the GE dryer thermal fuse located?
On the GE GTDP301EL1WS electric dryer, the thermal fuse is typically mounted on the blower housing or exhaust duct area inside the cabinet, where it can sense overheating from restricted airflow. Access usually requires removing a panel to reach the blower housing.
Where to look on GTDP301EL1WS
Most GE electric dryers place the thermal fuse in the airflow path near the blower wheel. On GTDP301EL1WS, start by using the panel-removal and wiring reference information in the GTDP301EL1WS installation guide.
Common access points:
- Rear access: remove the rear panel and look near the blower housing and exhaust outlet
- Front access: remove the front panel and/or drum to see the blower housing area
- Control console reference: wiring diagram and service info are often located in the console area
Quick safety steps before you open the dryer
Because this is an electric dryer, we treat it like a 240V appliance.
- Turn off the 30-amp breaker (or remove the dryer fuse at the electrical box)
- Unplug the dryer from the wall receptacle
- Confirm the drum light and controls are off
- Avoid touching terminal block wiring until power is fully disconnected
- Keep screws organized by panel (rear, front, console)
What you will see when you find it
A thermal fuse is a small, flat safety device with two wires connected; it is fastened to the blower housing or duct with screws.
| Item | Typical appearance | Typical mounting spot | What it does |
|---|---|---|---|
| Thermal fuse | Small, flat plastic or metal body with 2 terminals | Blower housing or exhaust duct | Opens if overheating occurs |
| High-limit thermostat | Rounder metal disc style | Heater housing or duct | Limits temperature spikes |
Why it matters
If the thermal fuse opens, the dryer may not run or may run with no heat (depending on the circuit design). The most common root cause is restricted venting or lint buildup, so we correct airflow issues before returning the dryer to service.
Related maintenance guidance: how to clean and maintain your clothes dryer.
Last updated: February 2026





