 Owner’s manual



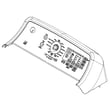
How do I clear the error code on my GE front load washer?
For the GE GTW720BSN1WS (a top-load washer), most codes clear after you correct the cause and restart the cycle; use Power to wake the controls, then press Start/Pause to run the selected cycle. If the display shows a scrolling message (such as “H2O SUPPLY” or “CAnCELEd”), the washer can enter a timed lockout before it will accept new commands.
Quick reset and clear steps (safe first)
- Press Power to put the washer in idle, then press Power again to wake it.
- Close the lid; if “Lid” is scrolling, open and close the lid once, then start again.
- Press Start/Pause to resume; if the cycle will not continue, select Drain & Spin and press Start.
- If “H2O SUPPLY” is scrolling, turn on both house water valves fully and wait for the lockout period to finish.
- If “CAnCELEd” is scrolling, wait for the lockout period to finish, then reselect your cycle and press Start.
For the exact control-panel behavior and message meanings on this model, follow the steps in the GTW720BSN1WS owner’s manual.
What the common messages mean on this model
| Display message | What it usually indicates | What clears it |
|---|---|---|
| “H2O SUPPLY” | Water is not entering the washer | Restore water supply; wait out the lockout; restart cycle |
| “CAnCELEd” | Cycle stopped or was paused too long | Wait out the lockout; reselect cycle; press Start |
| “Lid” | Lid has not been opened after multiple cycles | Open and close lid; start a new cycle |
When a part problem is likely
If the same error returns immediately after you correct the condition (water is on, lid is closed, load is balanced), a failed component is common.
- No drain or standing water: suspect the drain pump
- Lid will not lock or unlock correctly: suspect the lid lock
- No fill or slow fill with good house pressure: suspect the inlet valve
Model-matched parts to check include the GE washer drain pump assembly WH23X28418, GE washer lid lock assembly WH08X37938, and washer water inlet valve assembly WH13X26637.
Why it matters
Clearing the code without fixing the cause can trigger repeated lockouts, incomplete draining, or a no-start condition. Correcting the underlying issue first gets the washer back to normal operation faster and helps prevent water left in the basket.
Last updated: February 2026
How do I tell what model my GE washer is?
You can identify your GE washer model by finding the model and serial number label; on model GTW720BSN1WS, it’s located under the lid. Write down the full model number exactly as shown so you can match the correct parts, manual, and troubleshooting info.
Where to look on a GE washer
For GE GTW720BSN1WS (a top-load washer), check these common label locations:
- Under the lid (most common for this model)
- Along the top rim of the cabinet opening
- On the back of the control panel
- On the side of the main cabinet near the bottom
If you have a GE front-load washer instead, the label is often:
- Behind the door
- On the door jamb
What to write down (and why)
Record these exactly as printed:
- Model number (example format: GTW720BSN1WS)
- Serial number
- Brand (GE)
- Any suffix letters or extra digits (they can change part compatibility)
Why it matters
The model number is how we match your washer to the correct control board, lid lock, drain pump, and other parts. Even small model differences can change which part fits.
Quick reference table
| Washer type | Most common model tag location | What it looks like |
|---|---|---|
| Top-load (like GTW720BSN1WS) | Under the lid | Sticker/plate with model and serial |
| Front-load | Door jamb or behind door | Sticker/plate near the opening |
Helpful next steps after you find it
- Compare your model number to the cover of the GTW720BSN1WS owner’s manual
- If you’re ordering parts, match the model first, then the part ID (for example, a lid lock or drain pump)
- If the washer is showing an error, use the GE gtw top load washer error codes guide to narrow down the failure
Last updated: February 2026
What is the average lifespan of a GE washing machine?
A GE washing machine typically lasts 10 to 14 years with normal household use. For your GE GTW720BSN1WS top-load washer, consistent care (proper loading, hose replacement, and routine cleaning) is what most directly determines whether you land closer to 10 years or closer to 14.
Typical lifespan and what affects it
Most washer life is driven by usage and maintenance, not just the brand name.
- Loads per week: more cycles equals more wear on the drive system and drain components
- Overloading: strains the motor, clutch, and suspension; can shorten life
- Water quality: hard water can increase residue and odor issues
- Ventilation and drying: leaving the lid open after use helps reduce moisture and mildew
- Hose condition: GE recommends replacing fill hoses about every 5 years
Maintenance that helps you reach the high end of the range
Use these habits to reduce breakdowns and extend the life of the tub, motor, and control system.
- Follow the loading guidance in the GTW720BSN1WS owner’s manual
- Avoid packing the basket tight; keep items loose so they can circulate
- Turn off water faucets when not in use to reduce leak risk
- Replace inlet hoses on a 5-year schedule (or sooner if bulging or cracking)
- Run periodic cleaning cycles and wipe the lid and top panel dry
Quick reference: lifespan expectations
| Item | Typical expectation | What usually ends life early |
|---|---|---|
| Washer overall | 10 to 14 years | chronic overloading, poor leveling, neglected cleaning |
| Fill hoses | About 5 years | bulges, cracks, slow seepage |
| Service decision point | Around year 10+ | repeated leaks, no-drain, or major drive issues |
Why it matters
Knowing the average lifespan helps us decide whether a repair is a smart investment. For example, if your washer is draining slowly or not draining at all, replacing a common wear item like the GE washer drain pump assembly WH23X28418 can be a practical fix, especially if the machine is mid-life.
Last updated: February 2026
What is the most common problem with GE washers?
The most common GE washer problem we see is a no-drain or no-spin complaint. On the GE GTW720BSN1WS top-load washer, that usually traces back to a drain restriction, a failing lid lock, or a load that is out of balance and never reaches full spin.
Most common symptoms and what they usually mean
- Won’t drain or leaves water in the tub: drain hose restriction, clogged pump, or failed pump
- Won’t spin or stops before spin: lid lock not engaging, out-of-balance load, or drive system issue
- Pauses or changes spin speed: often normal load-sensing and speed adjustments
- Controls don’t respond for a few minutes: normal lock-out behavior after certain stops or cancellations
- “Lid” message on the display: the washer needs the lid opened before starting another cycle
Quick checks we recommend first (no tools)
- Confirm the lid fully closes and the latch area is clear.
- Redistribute the load; bulky items can prevent a stable spin.
- Check the standpipe and drain hose for kinks or a clog.
- Use the right amount of HE detergent; too much can cause oversudsing and poor performance.
- Review display messages and indicator lights in the GTW720BSN1WS owner’s manual.
Parts that commonly fix no-drain or no-spin on this model
| Symptom | Common part to inspect | What it does |
|---|---|---|
| Won’t drain | GE washer drain pump assembly WH23X28418 | Pumps water out during drain and spin |
| Won’t spin, lid won’t lock | GE washer lid lock assembly WH08X37938 | Confirms lid is locked so the washer can spin |
| Won’t fill or fills slowly | Washer water inlet valve assembly WH13X26637 | Controls hot/cold water flow into the washer |
Why it matters
Drain and spin problems stop the cycle from finishing and can leave clothes soaking wet. Catching a restriction or a weak lid lock early can prevent repeat cycle failures and reduce wear on the motor, clutch, and control system.
Helpful reference
If you’re seeing a code or a repeating display message, use our GE gtw top load washer error codes guide to match the symptom to the most likely cause.
Last updated: February 2026
Why is my GE washing machine not draining water?
On the GE GTW720BSN1WS washer, a no-drain problem is usually caused by a kinked or incorrectly installed drain hose, a clog at the pump or hose, or a failed drain pump. We recommend checking the drain setup first, then inspecting for blockages, then testing the pump.
Quick checks that fix most no-drain issues
- Unplug the washer for safety before touching hoses or wiring.
- Make sure the drain hose is not kinked and the washer is not sitting on it.
- Confirm the drain outlet height is under about 8 ft (2.44 m) above the floor.
- Check that the drain hose is not shoved too far into the standpipe; no more than about 5 inches should go down the pipe and there must be an air gap.
- If the tub is full and the washer just hums during drain, suspect a jammed or failing pump.
Drain hose setup: what “improperly connected” means
The GTW720BSN1WS can siphon or drain poorly if the hose is installed incorrectly. Use the drain routing guidance in the GTW720BSN1WS owner's manual.
| Drain setup item | What to look for | What it can cause |
|---|---|---|
| Hose depth in standpipe | Too deep, tight fit, no air gap | Siphoning, odd drain behavior |
| Hose kink/crush | Bent behind washer | Slow drain or no drain |
| Standpipe height | Too high | Pump cannot push water out |
When a part is likely needed
If the hose and standpipe setup are correct and you still have standing water, the most common repair is the drain pump.
- Check the pump area and hoses for coins, lint, socks, or debris.
- If the pump runs but water does not move, the impeller may be blocked or damaged.
- If the pump is silent during the drain portion of the cycle, wiring or the control may be involved.
For replacement, match by model and use the correct pump assembly: GE washer drain pump assembly WH23X28418.
Why it matters
A washer that cannot drain will not spin properly, can leave clothes soaking wet, and can trigger automatic draining behaviors. Correct drain hose installation and a clear pump path protect the motor, control, and laundry results.
Last updated: February 2026


