





Can I replace dishwasher parts myself?
Yes, for GE model GDT670SGV1BB you can replace many common dishwasher parts yourself if you’re comfortable with basic hand tools and you shut off power and water first. Simple mechanical items (like spray arms and racks) are the best DIY wins; electrical and leak-related repairs take more care.
Here’s a practical way to decide what to tackle.
- Good DIY (low risk): spray arms, racks, some hoses, door hardware
- DIY with extra care: drain pump, water valve, heating circuit parts
- Better for a pro: control board diagnostics, wiring harness damage, persistent leaks you can’t pinpoint
| Repair type | What you’ll do | Typical difficulty | Common risk |
|---|---|---|---|
| Spray arm replacement | Remove and swap the arm | Easy | Stripped threads, misalignment |
| Drain issue repair | Clear blockage or replace pump/hose | Medium | Water spill, clamp leaks |
| No-heat/drying issue | Check heater circuit, replace heater | Medium | Electrical shock if power isn’t off |
| No-start/electronics | Diagnose UI/control, wiring | Hard | Misdiagnosis, repeat failures |
These are common, straightforward replacements when symptoms match:
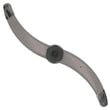
- Spray arm WD22X33499 (poor cleaning, not spinning)
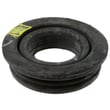
- Dishwasher drain hose WD24X10062 (drain leaks, cracked hose)
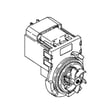
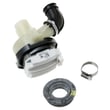
- Dishwasher drain pump WD19X25461 (won’t drain, loud hum)
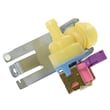
- Water valve assembly WD15X27703 (not filling, slow fill)
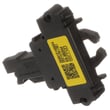
- Dishwasher door latch lock WD01X29878 (won’t start because door won’t latch)
- Turn off power at the breaker (dishwashers are hardwired or plugged in under the sink).
- Shut off the water supply valve under the sink.
- Put towels down and use a shallow pan for hoses and pumps.
- Take a photo of wire connections before disconnecting anything.
- Run a short test cycle after reassembly and check for leaks.
DIY replacement can save time and service costs, but dishwashers combine water, heat, and electricity. Choosing the right repair level helps prevent repeat problems, leaks, and unnecessary part returns.
For troubleshooting help before you buy parts, use GE dishwasher error codes.
Last updated: February 2026
What is the average lifespan of a GE dishwasher?
A GE dishwasher typically lasts 10 to 12 years. For your GE GDT670SGV1BB, lifespan depends most on water quality, how often it runs, and routine cleaning; consistent maintenance helps you reach the upper end of the normal range.
Most dishwashers fall into a predictable window based on use and care:
- 8 to 10 years: heavy daily use, hard water, limited cleaning
- 10 to 12 years: average household use and basic upkeep
- 12 to 15 years: lighter use, good water conditions, strong maintenance habits
| Usage pattern | What you’ll usually see | Best focus area |
|---|---|---|
| Heavy (1 to 2 loads/day) | Shorter lifespan | Cleaning and leak prevention |
| Average (4 to 7 loads/week) | Typical lifespan | Filter area and spray performance |
| Light (1 to 3 loads/week) | Longer lifespan | Seals, hoses, and periodic deep clean |
These are the most common causes of early failure in GE dishwashers:
- Hard water scale buildup on internal components
- Chronic clogs that strain the drain system
- Overloading that blocks spray coverage
- Heat and moisture damage from leaks or poor sealing
- Running with poor wash circulation (weak spray)
We recommend these habits to keep the GDT670SGV1BB running longer:
- Clean the filter area and remove debris weekly
- Inspect and clear spray arm holes; replace a worn arm if it no longer spins freely (see spray arm WD22X33499)
- Run a monthly cleaning cycle using a dishwasher-safe cleaner
- Check for slow draining and address clogs early (drain issues often point to the dishwasher drain pump WD19X25461)
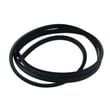
- Watch for drips at the door and tub edge; replace a flattened seal (see dishwasher tub gasket WD08X23477)
Dishwashers usually do not “wear out” all at once; performance drops first (poor cleaning, standing water, leaks). Catching those symptoms early reduces strain on high-wear parts like the wash system, drain system, and door sealing surfaces.
Last updated: February 2026
What is the most common problem with GE dishwashers?
For GE dishwashers like model GDT670SGV1BB, the most common problems we see are not draining, not cleaning well, and not starting. These issues usually trace back to a clogged drain path, restricted spray circulation, or a door latch or control-related interruption.
- Water left in the bottom: drain hose restriction, drain pump issue, or a blockage in the sump area
- Dishes still dirty: spray arm ports clogged, low water fill, or circulation problem
- Won’t start or stops mid-cycle: door not latching fully, UI/control glitch, or a safety condition detected
- Leaks at the front: tub gasket not sealing, door not closing squarely, or oversudsing
- Poor drying: heater circuit issue, rinse aid problem, or cycle selection
- Cancel/Drain the cycle and listen for the drain pump running.
- Check the sink drain/disposal connection and confirm the dishwasher drain line is not kinked.
- Inspect spray arms for debris and confirm they spin freely.
- Run hot water at the sink for 30 to 60 seconds before starting a cycle.
- Use the correct detergent amount; too much can cause suds and performance issues.
| Problem | Common fix | Example part for this model |
|---|---|---|
| Not draining | Clear blockage; replace drain pump if it hums but won’t move water | Dishwasher drain pump WD19X25461 |
| Not cleaning | Clean/replace spray arm if ports are clogged or cracked | Spray arm WD22X33499 |
| Won’t start | Check latch alignment; replace latch if it won’t hold closed | Dishwasher door latch lock WD01X29878 |
| Filling issues | Verify water supply; replace inlet valve if not opening | Water valve assembly WD15X27703 |
If your GE dishwasher is showing a code or blinking pattern, match it to the symptom before replacing parts. Use our GE electronic dishwasher error codes reference to narrow the failure to draining, filling, heating, or control sensing.
Drain, wash, and start problems often look similar from the outside, but they involve different systems (drain pump, spray arms, door latch, water valve). A few quick checks can prevent replacing the wrong part and get your GE dishwasher back to normal cycle performance faster.
Last updated: February 2026





