
Who manufactures the X3?
For the Superwinch X3 winch (model X3), Superwinch is the manufacturer. If you are seeing “X3” used for a vehicle (such as the BMW X3), that is a different product and the manufacturer information will not apply to this Superwinch winch model.
Check these identifiers on the winch and its labeling so you match the correct brand, parts, and wiring:
- Data plate or sticker on the winch housing or motor end cap
- Packaging label (brand name and model)
- Control pack/solenoid box label
- Any stamped markings on the drum support or gearbox housing
- Your purchase paperwork (brand and model)
Winches that share a similar model name can use completely different electrical components and hardware. Matching the correct manufacturer helps you avoid:
- Ordering the wrong solenoid/contactor or remote
- Using an incorrect wiring diagram (risk of blown fuse or damaged cables)
- Mismatching drum, brake, or geartrain components
- Incorrect mounting hardware or fairlead fitment
| “X3” you mean | Product type | Manufacturer |
|---|---|---|
| Superwinch X3 | Winch | Superwinch |
| BMW X3 | Vehicle | BMW |
If you are diagnosing power or control issues on the Superwinch X3, start with basic electrical checks (battery connections, fuse, and cable condition). Our DIY electrical testing guides are a good fit for winch troubleshooting:
- How to tell if a fuse is blown
- How to use a multimeter to test electrical parts video
- How to repair broken or damaged wires video
Last updated: February 2026
How do I find the model number on my X3?
On a Superwinch X3 winch, the model number is typically on the product ID label attached to the winch housing, motor, gearbox end, or the control pack/solenoid box. Match that label to model X3 when ordering parts or diagrams.
- Motor side: Label or stamped plate on or near the motor housing.
- Gearbox side: Tag on the gear housing or end cap.
- Control pack: Sticker on the solenoid/contactor box (often near the wiring entry).
- Mounting area: Sometimes on the baseplate or near the drum supports.
- Model number: X3
- Serial number: If present, record it for version changes.
- Voltage rating: Commonly 12V on vehicle winches; confirm from the label.
- Line pull rating: Helps confirm you are looking at the correct unit.
| If you see… | It usually means… | What to do |
|---|---|---|
| Multiple stickers | One may be for the control pack, one for the winch | Use the label physically on the winch body first |
| Worn or missing label | Model info may be stamped or on paperwork | Check stamped markings and any original documentation |
| Similar-looking winches | Different revisions can share housings | Use model plus serial number when available |
For a visual walkthrough on locating model numbers, use [how to find your appliance model number (and what it means for parts)].
Superwinch parts and wiring can vary by revision; using the exact model identification helps ensure the correct diagrams and replacement components for your X3.
Last updated: March 2026
How do I troubleshoot my X3?
For the Superwinch X3 winch, most problems trace to power delivery (battery, cables, ground), control circuit (switch/solenoid), or mechanical load (rope bind, brake, drum). We troubleshoot fastest by checking voltage under load, then isolating the control and motor.
- Keep hands clear of the drum, fairlead, and hook.
- Disconnect power before inspecting wiring or opening the control pack.
- Use a rated winch line damper and gloves when testing under load.
- Battery state: Confirm the vehicle battery is fully charged; weak batteries cause slow pull or clicking.
- Connections: Clean and tighten battery terminals, winch power leads, and the chassis ground.
- Voltage drop under load: While spooling in, measure battery voltage; a big drop points to battery/cable issues.
- Control input: If you hear a click but no motor, suspect solenoid/contactor or high resistance connections.
- Free-spool and line condition: Make sure the clutch is fully engaged for powered operation; check for rope binding, crushed wraps, or a jam at the fairlead.
- Thermal protection: If it stops after heavy use, let it cool; repeated stalls overheat the motor and contactor.
| Symptom | Most likely cause | What to do next |
|---|---|---|
| No sound, no movement | No power, blown fuse/breaker, bad ground | Check battery voltage, main fuse/breaker, ground point |
| Clicking only | Low battery, loose cables, failing solenoid/contactor | Load-test battery, tighten/clean cables, test contactor |
| Runs but very slow | Voltage drop, undersized/overheated cables, excessive load | Measure voltage at motor, reduce load, inspect cables |
| Spools out but not in (or vice versa) | Control switch issue, contactor direction circuit | Test switch output and contactor terminals |
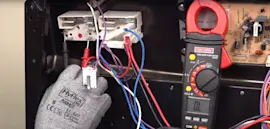
- Use a multimeter to confirm 12V at the winch input and at the motor when the switch is pressed.
- If voltage reaches the motor but it will not turn, the motor or mechanical load is the next focus.
For help with testing and tracing circuits, use [how to use a multimeter to test electrical parts video] and [how to tell if a fuse is blown].
A winch can draw very high current; small resistance from corrosion or a loose ground creates big voltage loss, which looks like a “bad winch” but is often a simple power-path fix.
Last updated: March 2026