Installation guide
 Owner’s manual
 Error Codes
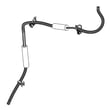


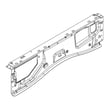
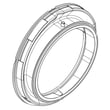

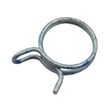
Are Whirlpool washer parts interchangeable?
Whirlpool washer parts are not universally interchangeable; we match parts to your exact washer model so the fit, wiring, and performance are correct. For Whirlpool model WFW560CHW0, use the parts listed for this model and follow the WFW560CHW0 owner's manual guidance on using factory specified parts.
What “interchangeable” really means
Even within Whirlpool, two parts that look similar can differ in mounting points, electrical connectors, hose routing, or software compatibility.
Common examples where model matching matters:
- Electronic controls: boards and consoles can be programmed differently.
- Door lock and strike: latch geometry and switch timing must match.
- Water valve: coil ratings and port layout can vary.
- Drain pump: impeller design and harness connector style can differ.
- Bellows (door boot): clamp locations and drain ports must align.
How we recommend choosing the right part for WFW560CHW0
Use your model number and compare the part ID and description, not just the photo.
A quick checklist:
- Confirm the model is WFW560CHW0 (from the rating label)
- Match the part ID exactly
- Verify the part name matches the function you are repairing
- Check for any notes in the manual about “factory specified” parts
- Replace related wear items (clamps, hoses) when recommended
Common WFW560CHW0 parts customers replace
| Symptom | Likely part to check | Example part for this model |
|---|---|---|
| Won’t drain, water left in tub | Drain pump | Washer drain pump assembly W11458345 |
| Won’t fill or fills slowly | Water valve or inlet hoses | Water valve W11688995 |
| Door won’t lock or cycle won’t start | Door lock/strike | Strike, door W11316914 |
Why it matters
Using the correct Whirlpool factory specified part helps prevent leaks, error codes, repeat failures, and damage caused by mismatched electrical or mechanical connections. It also supports proper operation under the washer’s published use and installation instructions.
Last updated: February 2026
What is the most common problem with Whirlpool washers?
For the Whirlpool WFW560CHW0 washer, the most common customer-reported issues are not draining or not spinning (wet loads) and vibration/off-balance. These problems are often caused by load size, detergent suds, drain hose setup, or a drain restriction; our WFW560CHW0 owner's manual troubleshooting steps cover the fastest checks.
Most common symptoms and what usually causes them
- Washer not draining or spinning; clothes still wet: oversudsing from too much detergent, a slow-spin cycle selection, a restricted drain path, or a pump issue.
- Vibration, rocking, or “walking”: washer not level, feet not firmly on the floor, jam nuts not tight, or an unbalanced load.
- Door won’t lock (F5 E2 / F05 E02): door not fully closed, laundry item blocking the latch area, or a door lock/strike problem.
Quick checks we recommend first (WFW560CHW0)
- Reduce suds: Use only HE detergent and measure carefully; too many suds can slow or stop draining/spinning.
- Fix the load: Avoid tightly packing; do not wash single heavy items alone (balance with a few extra items).
- Confirm drain hose setup: Remove clogs, secure the hose, and keep the drain hose end below 96 in. (2.4 m) above the floor.
- Level the washer: Make sure all feet contact the floor and the jam nuts are tight; use a 3/4 in. plywood sheet under the washer if the floor flexes.
When a part is the likely fix
If the basics above do not change anything, these parts commonly relate to the same symptoms:
| Symptom | Common part to inspect | What it affects |
|---|---|---|
| Won’t drain, won’t spin, water left in tub | Washer drain pump assembly W11458345 | Pumps water out during drain/spin |
| Won’t fill or fills slowly | Water valve W11688995 | Controls hot/cold water entering washer |
| Door won’t lock error | Ha15g janus- W11565030 and strike, door W11316914 | Allows cycle to start and stay locked |
Why it matters
Drain/spin and balance problems can look like “major failures,” but they are often setup or usage issues (detergent, load size, leveling, drain hose height). Fixing those first prevents repeat errors and protects the control system and drive components.
Last updated: February 2026
What's the average lifespan of a Whirlpool washing machine?
Whirlpool washers typically last 10 to 14 years in normal household use. For your Whirlpool WFW560CHW0 front-load washer, lifespan depends most on using HE detergent, avoiding overloads, and keeping water and drain systems clean and leak-free (see the WFW560CHW0 owner's manual).
Typical lifespan ranges (what to expect)
Most washers fall into a predictable range based on use and maintenance.
- Average household use: 10 to 14 years
- Heavy use (large family, daily loads): closer to 8 to 12 years
- Light use (few loads per week): often 12 to 16 years
- Best practice for this model: use HE (High Efficiency) detergent as specified for this front-load design
| Usage pattern | What usually shortens life | What helps most |
|---|---|---|
| Heavy, frequent loads | Overloading, vibration, heat buildup | Smaller loads, correct cycle selection |
| Normal weekly use | Detergent buildup, minor leaks | Monthly cleaning, quick leak checks |
| Light use | Seal/mildew from sitting wet | Door ajar between loads, wipe gasket |
What affects lifespan the most on a front-load washer
These are the most common factors we see that determine whether a washer reaches the high end of its lifespan.
- Detergent choice and amount: too much detergent causes residue and odors; use HE and measure carefully
- Door gasket care: wipe the bellow area and leave the door slightly open to dry
- Drain performance: slow draining strains the pump and can trigger drain errors (the washer drain pump assembly W11458345 is the key drain component)
- Water fill health: restricted screens or a failing valve can cause long fills or no-fill symptoms (the water valve W11688995 controls incoming water)
- Hose condition: replace aging or bulging fill hoses to prevent leaks (common replacements include washer fill hose set 8212545RP)
Why it matters
A washer that is maintained for long-term use typically avoids the most expensive failures (water leaks, drain issues, and control-related problems). Small habits like correct HE detergent use and keeping the door seal dry can add years of reliable service.
Last updated: February 2026
Where to find model number on Whirlpool front load washer?
On the Whirlpool WFW560CHW0 front load washer, we typically find the model and serial number label in the door opening (door jamb) or on the cabinet near the lower front edge. Checking these spots first is the fastest way to confirm the exact model for parts and service.
Most common label locations to check
- Open the washer door and inspect the door jamb (around the opening)
- Look just behind the door opening on the front cabinet frame
- Check the side panels near the bottom front corners
- Inspect the back of the control panel area (rear of the console)
- Look on the rear cabinet panel if the washer is accessible
Quick steps to find it fast
- Open the door and scan the door jamb for a sticker or metal tag.
- Wipe the area with a damp cloth; detergent residue can hide the print.
- Use your phone flashlight and take a photo, then zoom in to read it.
- Write down both the model number and serial number for ordering parts.
What the label usually looks like
| What you will see | Why it matters |
|---|---|
| Model number (example: WFW560CHW0) | Ensures exact-fit parts and correct diagrams |
| Serial number | Helps identify production series and service details |
| Electrical ratings | Useful for troubleshooting and technician support |
Why it matters
We use the model number to match the correct Whirlpool parts list, installation details, and troubleshooting steps. Even small model changes can affect items like the door lock, water valve, or drain pump fitment.
For additional model-specific details and documentation, use the WFW560CHW0 owner’s manual.
Last updated: February 2026