 Owner’s manual





How do I diagnose my GE washer?
To diagnose your GE GTW750CSL0WS washer, we start with what the display and status lights report (such as “Lid” or “CAnCELEd”), then verify basic start conditions like lid closed and proper loading. For model-specific indicators, use the GTW750CSL0WS owner's manual.
Quick checks that solve most “won’t start” and “stops mid-cycle” issues
- Press Power to wake the display.
- Close the lid; most cycles will not start with the lid open.
- If “Lid” shows, open and close the lid, then restart.
- If “CAnCELEd” scrolls, wait the 4-minute lockout to finish, then restart.
- Load items loosely around the Infusor/agitator; avoid overloading.
- Use HE detergent; place pods in the bottom of the basket before clothes.
What common messages mean
| Display message/symptom | What it indicates | What we do next |
|---|---|---|
| “Lid” | Lid must be opened between cycles | Open, close, restart |
| “CAnCELEd” | Pause too long or cycle stopped; lockout starts | Wait 4 minutes, restart |
| Controls won’t respond | Controls locked or in lockout | Wait, then try again |
| Lid Lock light on | Lid locked during operation | Wait for unlock; do not force |
Use error codes to narrow the failure
If you see an error code or repeated stopping, match the code to the system involved (lid lock, drain, motor sensing) and inspect that area first.
- Reference: GE top load washer error codes
Parts often involved when symptoms point to a failure
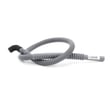
- Won’t drain: washer drain pump assembly WH23X28418, washer drain hose WH41X32477
- Lid won’t lock: washer lid lock WH08X37938
Why it matters
A quick, structured diagnosis prevents replacing good parts and helps you focus on the system actually stopping the cycle (lid logic, lockout behavior, or draining).
Last updated: February 2026
How to identify GE washer model?
For the GE GTW750CSL0WS washer, the model and serial number are printed on the rating label under the lid. Write both down exactly as shown; that model number is what we use to match the correct parts, owner’s manual, and troubleshooting info.
Where to look on model GTW750CSL0WS
Check these common spots in this order:
- Under the washer lid (primary location for this model)
- On the underside of the lid itself
- Around the top rim of the cabinet opening
- On the back of the cabinet (less common)
Use the GTW750CSL0WS owner’s manual to confirm the label location and how GE lists the model and serial fields.
How to record the model number correctly
Small character differences matter (especially 0 vs O and 1 vs I). We recommend:
- Copy the model number exactly: GTW750CSL0WS
- Copy the serial number exactly as printed
- Take a clear photo of the label for reference
- Keep the info with your purchase paperwork or inside your manual
Why the model number matters for parts
GE often uses similar-looking model families (for example GTW750 vs GTW755), but parts can differ by revision. The model number ensures you get the right fit for items like a lid lock, drain pump, or water inlet valve.
| What you’re doing | What to use | Why it helps |
|---|---|---|
| Ordering replacement parts | Model number + serial number | Matches the correct version and wiring/fit |
| Looking up error messages | Model number | Points you to the right code list |
| Using operating features | Owner’s manual | Confirms cycles, options, and lid lock behavior |
If you’re trying to identify the washer from an error or symptom
If the display is showing an error or the washer stops mid-cycle, use the model number to reference GE-specific code charts like GE gtw top load washer error codes.
Why it matters
Using the exact model number prevents wrong-part returns and speeds up troubleshooting, especially on top-load washers with lid lock and control features.
Last updated: February 2026
How to rebalance a GE washer?
To rebalance your GE GTW750CSL0WS washer, pause the cycle, redistribute the items evenly in the basket, then run Drain & Spin if the load ends wetter than normal. When the washer detects an out-of-balance load, it automatically tries to correct it and may reduce spin speed.
Quick rebalance steps (what we recommend)
- Press Start/Pause to stop the washer safely.
- Open the lid and spread items loosely and evenly around the infusor/agitator area.
- Remove a few items if the basket is tightly packed (overloading makes balance harder).
- Close the lid and select Drain & Spin to remove extra water.
- If the Spin light was blinking, re-run the spin after redistributing until the load spins normally.
- If vibration continues, check that the washer sits solidly on the floor and adjust leveling legs.
What the blinking Spin light means
If the washer detects an out-of-balance condition, the Spin light can blink during the rest of the cycle and stay on briefly after the cycle. The washer is actively trying to correct the imbalance; if it cannot, the load may finish wetter than normal, and a redistributed Drain & Spin is the right next step.
Common causes and the best fix
| What you notice | Most common cause | What to do |
|---|---|---|
| Loud banging during spin | Single heavy item (blanket, rug, jeans) | Add a few towels or redistribute evenly |
| Washer “walks” | Washer not level, weak floor | Level the legs; move to a sturdier spot |
| Wet clothes at end | Washer reduced spin speed to protect itself | Redistribute; run Drain & Spin |
| Repeated imbalance | Load size or mix is inconsistent | Wash bulky items on the proper cycle; avoid overloading |
Why it matters
A balanced load lets the washer reach full spin speed, which removes more water and reduces vibration. That protects key drive components like the shifter and speed sensing system over time.
For cycle and loading guidance specific to this washer, use the GTW750CSL0WS owner’s manual.
Last updated: February 2026
What is the capacity of the GE GTW750CSL0WS?
The GE GTW750CSL0WS washer has a 5.0 cu. ft. capacity, which is considered a large-capacity top-load washing machine and is designed to handle bulky loads like comforters and towels. For cycle and load guidance, use the GTW750CSL0WS owner's manual.
What 5.0 cu. ft. means for everyday loads
A 5.0 cu. ft. washer tub typically supports:
- King/queen comforter (check thickness and care label)
- Large towel loads (multiple bath towels plus washcloths)
- Mixed weekly laundry for a family
- Bulky items like blankets and hoodies (load loosely)
Loading tips to get the best wash performance
How you load matters as much as capacity.
- Load items loosely; do not pack or compress
- Keep the load below the top of the basket so items can circulate
- Mix large and small items to reduce imbalance during spin
- Use the correct load size / soil level selections for best cleaning
- If the washer bangs or stops to rebalance, redistribute the load and restart
Quick reference: capacity and what to watch
| Spec | GE GTW750CSL0WS | Why it matters |
|---|---|---|
| Tub capacity | 5.0 cu. ft. | Determines how much you can wash per load |
| Overloading risk | Higher with bulky items | Can cause poor cleaning, out-of-balance spins |
| Best practice | Loose, even loading | Improves wash action and spin performance |
Why it matters
Using the right load size for a 5.0 cu. ft. GE top-load washer helps prevent out-of-balance errors, improves rinse performance, and reduces strain on drive components such as the washer shifter WH03X30517 and washer speed sensor WH03X32158.
Last updated: February 2026
What is the most common problem with GE washers?
The most common GE washer problem we see is a no-drain or weak-drain condition that leads to poor spinning and wet clothes. On the GE GTW750CSL0WS top-load washer, this is often tied to a drain restriction (hose/standpipe) or a failing drain component; start with the checks in the GTW750CSL0WS owner's manual.
Most common symptoms customers notice
- Washer won’t drain at the end of the cycle
- Clothes come out wetter than normal (spin is limited or stops)
- Cycle pauses or seems to “hang” while trying to drain
- Water remains in the basket after Cancel/Drain
- You hear the pump hum but water flow is slow
Quick checks that fix many “won’t drain/spin” complaints
We recommend these steps first because they address the most frequent root causes without replacing parts.
- Make sure the drain hose is not kinked, crushed, or pinned under the washer
- Confirm the top of the drain outlet (standpipe) is less than 8 ft above the floor
- Check for a slow household drain or partially clogged standpipe (water backs up during drain)
- Reduce oversudsing: use HE detergent and avoid using too much (excess suds can interfere with draining and rinsing)
- Level the washer if it rocks or squeaks; an unlevel washer can affect spin performance
Parts that commonly solve the issue on this model
If the hose and standpipe are correct and the washer still drains poorly, these parts are common fixes on GTW750CSL0WS:
| Symptom | Likely area | Example part for GTW750CSL0WS |
|---|---|---|
| Hums but won’t move water | Drain pump | Washer drain pump assembly WH23X28418 |
| Drains but won’t shift into spin correctly | Drive system shifting | Washer shifter WH03X30517 |
| Lid won’t lock, spin won’t start | Lid lock circuit | Washer lid lock WH08X37938 |
Why it matters
A washer that cannot drain properly often cannot reach full spin speed, so clothes stay wet and cycles may pause while the control tries to protect the drive system. Fixing the drain path first prevents unnecessary part replacement and repeat failures.
Last updated: February 2026


