Installation guide
 Owner’s manual
 Error Codes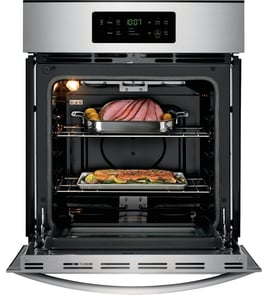

How long do Dacor wall ovens last?
Most Dacor wall ovens, including model EORS130SCH, last about 15 years with normal household use and basic maintenance. Heavy use, frequent self-clean cycles, and poor ventilation can shorten lifespan; prompt repairs and correct installation help the oven reach its full service life.
Typical lifespan and what affects it
A wall oven’s life is mostly driven by heat stress on components (elements, sensors, control board) and how well the unit is installed and ventilated.
- Average lifespan: 15 years
- Heavier cooking schedules: can reduce lifespan
- Frequent self-cleaning: increases heat stress on wiring, thermal cutoffs, and controls
- Power quality: surges can damage electronic controls
- Installation quality: correct grounding and secure electrical connections matter
Parts that usually wear out first
These are the most common “life-limiting” parts in electric wall ovens.
- Bake element or hidden bake element
- Broil element
- Oven temperature sensor
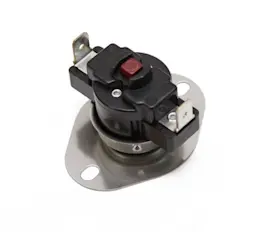
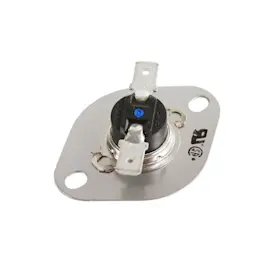
- Thermal switch or high-limit safety device
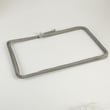
- Door gasket (heat leaks cause longer run times)
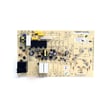
- Control board or touch panel (especially after repeated high-heat events)
Maintenance that helps you get the full 15 years
Use these habits to reduce overheating and shorten preheat times.
- Keep the door gasket clean and intact so heat stays in the cavity.
- Avoid running back-to-back self-clean cycles.
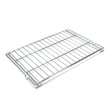
- Use proper rack placement and cookware to prevent long bake times.
- If temperatures seem off, calibrate the oven settings using the owner's manual.
- If the oven will not heat, follow a structured diagnostic path like the 7 reasons your oven isnt working and how to fix the problems guide.
Quick reference: lifespan vs. repair decision
| Situation | What we recommend | Why |
|---|---|---|
| Oven is under ~10 years old | Repair is usually worth it | Plenty of remaining service life |
| Around 10 to 15 years old | Repair if the fix is limited (element, sensor, gasket) | Common wear items are cost-effective |
| Over 15 years old | Repair only if the issue is minor | Multiple failures become more likely |
Why it matters
Knowing the typical 15-year lifespan helps you decide whether to troubleshoot a no-heat problem, replace a temperature sensor, or plan for replacement. Correct installation and safe servicing practices in the installation guide also reduce nuisance failures caused by loose connections or improper clearances.
You can look up diagrams and replacement parts for Dacor EORS130SCH on the model parts list, or search by model number on Sears PartsDirect.
Last updated: February 2026
How much does a 30 inch wall oven weigh?
A 30-inch single electric wall oven typically weighs 150 to 250 lb. For the Dacor EORS130SCH, use that planning range and follow the handling and cabinet-support requirements in the installation guide because this oven is heavy and requires at least two people to set into the cutout.
What to plan for when lifting and installing
Use these practical guidelines to move and position a built-in wall oven safely:
- Plan manpower for two people minimum (three for stairs or tight spaces)
- Remove racks and accessories to reduce shifting weight during handling
- Lift using the oven case as the gripping point; do not lift by the door or handle
- Set the oven onto a solid, level support platform in the cabinet
- Slide the oven in slowly so the electrical conduit is not pinched
Cabinet support and safety checklist
The installation instructions focus on safe support and secure mounting, which matters more than an exact pound value during planning.
| Planning item | What to do | Why it matters |
|---|---|---|
| Support platform | Use a rigid, level platform (3/4-inch plywood is commonly used) | Prevents sagging and frame twist |
| Mounting screws | Install all mounting screws correctly | Helps prevent movement or tipping |
| Air exhaust | Keep the bottom air exhaust clear | Prevents overheating and poor performance |
Why it matters
Weight affects safety, cabinet integrity, and alignment. A properly supported oven stays square in the cutout, seals correctly, and is less likely to shift over time.
Parts lookup tip
When ordering replacement parts, match the full model number EORS130SCH; you can also search by model on Sears PartsDirect.
Last updated: February 2026
Is Dacor wall oven good?
Dacor wall ovens like model EORS130SCH are a solid choice when you want premium built-in performance and long-term durability; they are designed for consistent baking and broiling when the oven is installed correctly and supplied with proper power per the installation guide.
What “good” means for a wall oven
A wall oven is “good” when it delivers stable temperatures, reliable heating, and safe operation over years of use. For the EORS130SCH, the installation instructions emphasize correct grounding, correct electrical supply, and proper clearances, which directly affect performance and safety.
Quick evaluation checklist
- The oven heats in Bake and Broil without error codes.
- Temperatures stay consistent (no big swings or hot spots).
- The door seals well and closes evenly.
- Controls respond normally (no delayed starts or random beeps).
- The unit is installed level with required clearances.
How to judge performance on your EORS130SCH
The installation instructions include a simple heat verification that’s useful for judging basic operation.
- Start BAKE; after about 3 minutes, the lower element should begin glowing red.
- Cancel, then start BROIL; after about 3 minutes, the upper element should begin glowing red (some models place it behind a glass panel).
If results are not good
- Confirm the circuit breaker is on and the oven has power.
- If power is present, shut off power at the breaker and re-check electrical connections.
- Repeat the bake and broil heat checks.
| Symptom | What it usually points to | What to do next |
|---|---|---|
| Won’t heat at all | Power supply or wiring issue | Verify breaker, then check connections with power off |
| Bakes unevenly | Rack placement, calibration, airflow | Review rack positions and temperature adjustment steps |
| Broil weak or intermittent | Broil circuit or element issue | Run the 3-minute broil glow test |
Why it matters
A “good” wall oven depends as much on installation and electrical supply as it does on the brand. A properly installed EORS130SCH is built to deliver dependable bake and broil performance; poor power or incorrect fit can cause inconsistent cooking and service issues.
For repair help and parts lookup by model number, start with the model parts list and search on Sears PartsDirect.
Last updated: February 2026