Get free shipping on your order, with any water filter subscription. Find my filter

Open Hamburger Menu
Sears Parts Direct
Tips to find your model number

GE PT7800SH8SS electric oven/microwave combo Parts

Here are the diagrams and repair parts for GE PT7800SH8SS electric oven/microwave combo, as well as links to manuals and error code tables, if available.

GE PT7800SH8SS electric oven/microwave combo
By Schematic
By Part
SELECT DIAGRAM
?

This is the number corresponding to the part on the diagram / schematic

Browse Parts for PT7800SH8SS Electric Oven/Microwave Combo

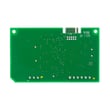
  • Wall Oven Bridge Board for GE PT7800SH8SS - Part WB27X25692

    Center spacer diagram

    Wall Oven Bridge Board

    Part #WB27X25692
    This item is not returnable
    In Stock
    $57.71
    9% OFF Phone Price : $63.71Info Icon
    Minus Item
    Qty
    Plus Item
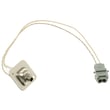
  • Meat Probe for GE PT7800SH8SS - Part WB18X23585

    Body parts diagram

    Meat Probe

    In Stock
    $58.16
    9% OFF Phone Price : $64.16Info Icon
    Minus Item
    Qty
    Plus Item
  • Door Removal for GE PT7800SH8SS - Part WB01X34910

    Microwave door diagram

    Door Service

    Part #WB01X10364

    Replaced by #WB01X34910

    Info Icon
    Manufacturer substitution
    This part replaces WB01X10364. Substitute parts can look different from the original.
    In Stock
    $37.96
    Minus Item
    Qty
    Plus Item
  • Noise Filter for GE PT7800SH8SS - Part WB02X35865

    Insulator parts diagram

    Noise Filter

    Part #WB27X22108

    Replaced by #WB02X35865

    Info Icon
    Manufacturer substitution
    This part replaces WB27X22108. Substitute parts can look different from the original.
    In Stock
    $107.76
    Minus Item
    Qty
    Plus Item
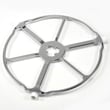
  • Microwave Turntable Tray Support for GE PT7800SH8SS - Part WB02X32600

    Oven cavity parts diagram

    Microwave Turntable Tray Support

    Part #WB06X10651

    Replaced by #WB02X32600

    Info Icon
    Manufacturer substitution
    This part replaces WB06X10651. Substitute parts can look different from the original.
    In Stock
    $107.36
    10% OFF Phone Price : $119.36Info Icon
    Minus Item
    Qty
    Plus Item
  • Dryer Screw for GE PT7800SH8SS - Part WH2X930

    Screw

    Part #WH02X0930

    Replaced by #WH2X930

    Info Icon
    Manufacturer substitution
    This part replaces WH02X0930. Substitute parts can look different from the original.
    This item is not returnable
    In Stock
    $9.01
    10% OFF Phone Price : $10.01Info Icon
    Minus Item
    Qty
    Plus Item
  • Microwave Turntable Motor Coupler for GE PT7800SH8SS - Part WB06X10693

    Oven cavity parts diagram

    Microwave Turntable Motor Coupler

    In Stock
    $79.64
    7% OFF Phone Price : $85.64Info Icon
    Minus Item
    Qty
    Plus Item
  • Complete Fan Blade for GE PT7800SH8SS - Part WB02T10598

    Convection fan diagram

    Complete Fan Blade

    In Stock
    $25.37
    19% OFF Phone Price : $31.37Info Icon
    Minus Item
    Qty
    Plus Item
  • Motor for GE PT7800SH8SS - Part WB26X10248

    Insulator parts diagram

    Motor

    In Stock
    $96.88
    Minus Item
    Qty
    Plus Item
  • Broil Elemen for GE PT7800SH8SS - Part WB44X48680

    Body parts diagram

    Range Broil Element

    Part #WB44T10124

    Replaced by #WB44X48680

    Info Icon
    Manufacturer substitution
    This part replaces WB44T10124. Substitute parts can look different from the original.
    In Stock
    $104.34
    Minus Item
    Qty
    Plus Item

GE Electric Oven/Microwave Combo PT7800SH8SS FAQs

On the GE PT7800SH8SS wall oven/microwave combo, we find the model and serial number on the rating label located either on the side trim or on the front of the lower oven behind the oven door. This label is the most reliable ID for parts and service.

Where to look on model PT7800SH8SS

Check these common label locations:

  • Side trim (the vertical trim along the oven opening)
  • Front frame of the lower oven, behind the lower oven door
  • Near the oven frame where the door closes (look for a printed sticker/plate)

If you do not see it right away, use a flashlight and look along the left and right trim edges.

What the label usually includes

The rating label typically lists:

  • Model number (example: PT7800SH8SS)
  • Serial number
  • Electrical rating information (useful for installation and diagnostics)
What you need Why you need it Example format
Model number Ensures parts fit your exact unit PT7800SH8SS
Serial number Helps identify production details Varies
Why it matters

We use the exact model number to match compatible parts (like a control board, temperature sensor, or door components) and to pull the correct wiring and installation information. Even small model-number differences can change which parts fit.

Helpful tip if the oven is installed tight

If the label is on the side trim and the oven sits very flush, you may need to open the lower door fully and look along the trim edge from an angle. For installation-related access and safety notes, refer to the PT7800SH8SS owner’s manual.

Last updated: January 2026

For the GE PT7800SH8SS wall oven/microwave combo, the correct breaker size is based on the unit’s nameplate kW rating, not a generic “20 amp wall oven” rule. Use the dedicated circuit size chart and wiring method in the PT7800SH8SS installation guide.

How to choose the breaker size for PT7800SH8SS

We size the breaker from the appliance kW rating shown on the rating plate (typically on the oven frame/side trim), then match it to the dedicated circuit size chart.

  • Find the kW rating on the rating plate.
  • Confirm whether your supply is 120/240V or 120/208V.
  • Use the installation guide’s kW-to-breaker chart to select the dedicated circuit size.
  • Use copper conductors sized to the breaker and local electrical code.
  • Hard-wire to an approved junction box (no plug and receptacle for this product).
Quick reference: kW rating to dedicated circuit (from the install guide)
Nameplate kW rating (240V) Nameplate kW rating (208V) Recommended dedicated circuit
Up to 4.8 kW Up to 4.1 kW 20 amp
4.9 to 7.2 kW 4.2 to 6.2 kW 30 amp
7.3 to 9.6 kW 6.3 to 8.3 kW 40 amp
9.7 to 12.0 kW 8.4 to 10.4 kW 50 amp
Wire size guidance (typical)

Exact wire gauge depends on breaker size, conductor material, insulation temperature rating, and local code. As a practical starting point for copper conductors:

  • 20 amp: typically 12 AWG copper
  • 30 amp: typically 10 AWG copper
  • 40 amp: typically 8 AWG copper
  • 50 amp: typically 6 AWG copper
Why it matters

An undersized breaker or wire can nuisance-trip, overheat connections at the junction box, and shorten component life. Correct sizing also helps the oven heat consistently during bake, broil, and convection.

Last updated: January 2026

GE wall ovens, including the GE PT7800SH8SS wall oven/microwave combo, typically last 12 to 15 years with normal household use and basic maintenance. Real-world lifespan depends most on heat exposure, ventilation, cleaning habits, and how often the oven and microwave are used.

Typical lifespan for this appliance type

Most customers see these ranges for built-in electric wall ovens and combination units:

  • 12–15 years: common service life for the oven section
  • 10–15 years: common service life for the microwave section (varies with use)
  • 8–12 years: when heavy daily use or poor ventilation speeds wear
  • 15+ years: when usage is moderate and airflow and cleaning are consistently maintained

For operating and care guidance specific to your unit, use the PT7800SH8SS owner’s manual.

What affects lifespan the most

A wall oven/microwave combo is sensitive to heat and airflow. These factors usually matter more than brand:

  • Keeping the cooling airflow paths clear (cabinet vents and trim areas)
  • Avoiding frequent high-heat self-clean cycles (they are hard on electronics)
  • Cleaning spills before they carbonize (reduces smoke and overheating)
  • Preventing door slams and keeping door seals clean
  • Using the microwave correctly (no metal, correct cookware, no empty runs)
Quick “repair or replace” guide

If your GE PT7800SH8SS is approaching the 12–15 year mark, this simple comparison helps:

Situation Usually makes sense to…
Minor wear (light bulb out, rack issues) Repair
Heating is inconsistent but unit is otherwise solid Diagnose and repair
Repeated shutdowns, error behavior, or multiple failures Consider replacement planning
Why it matters

Knowing the expected lifespan helps us plan maintenance and decide when a symptom is likely a simple wear item versus a larger electrical or control issue. For example, temperature problems can sometimes point to a sensor rather than the whole oven.

Last updated: January 2026
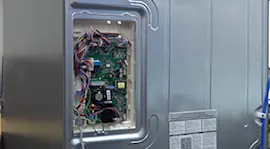
Repair guides for bottom-mount refrigerators

How to replace an electronic control board on the back of a refrigerator

How to replace an electronic control board on the back of a refrigerator

If your refrigerator isn't running, an electronic control board failure could be the problem. A service technician can d…

Repair time and Difficulty

 15 minutes or less
How to replace a door gasket in a French-door refrigerator

How to replace a door gasket in a French-door refrigerator

The door gasket, often called a door seal, seals the gap around the door to keep the cold air in and the warm air out. R…

Repair time and Difficulty

 15 minutes or less
How to replace an in-door ice maker on a French door refrigerator

How to replace an in-door ice maker on a French door refrigerator

Follow these step-by-step instructions how to replace the in-door ice maker in Kenmore TRIO and LG French door refrigera…

Repair time and Difficulty

 15 minutes or less

Articles and videos for bottom-mount refrigerators

How to Replace the Water Filter in a Maytag Refrigerator

How to Replace the Water Filter in a Maytag Refrigerator

No matter what style Maytag refrigerator you have, we can walk you through replacing the water filter.…

Are DIY appliance repairs safe?

Are DIY appliance repairs safe?

Find out how to stay safe when repairing your appliances.…

How to disassemble the ice and water dispenser on a GE refrigerator

How to disassemble the ice and water dispenser on a GE refrigerator

See how to disassemble the dispenser on common GE refrigerators.…

Parts & More

Air Compressor
Angle Grinder
Bottom-Mount Refrigerator
Dishwasher
Dryer
Freestanding Freezer
Front-Engine Lawn Tractor
Furnace
Gas Line Trimmer
Lawn & Garden Engine
Miter Saw
Parts
Power Screwdriver
Side-By-Side Refrigerator
Television
Washer