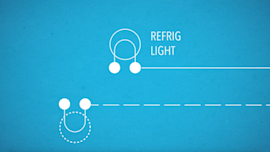
Error Codes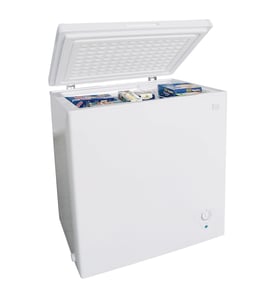





Is there a reset button on chest freezers?
Most chest freezers, including Kenmore model 25319501991, do not have a dedicated reset button. The practical “reset” is a power reset: unplug the freezer (or switch off the breaker) for about 30 seconds, then restore power and allow time for the control to restart.
How to reset a Kenmore chest freezer safely
- Unplug the freezer from the wall outlet (preferred), or turn the circuit breaker off.
- Wait 30 seconds.
- Restore power.
- Wait 5 to 10 minutes to see if the control stabilizes.
- If the freezer was warm, allow 24 hours to fully pull down to temperature.
If lights blink or the freezer will not run after a reset
A blinking light or no response after restoring power usually points to a power supply issue, a wiring connection problem, or a control-related fault.
- Confirm the outlet has power (try a lamp or small appliance).
- Check that the cord is fully seated and not damaged.
- If you recently moved the freezer, inspect for pinched wiring.
- If your model uses an electronic control and is showing a fault pattern, use our Kenmore electronic control module freezer error codes reference to identify the code.
Quick checks: symptoms and what they usually mean
| What you notice | Common cause | What to do next |
|---|---|---|
| No lights, no sound | No power to unit | Check outlet, breaker, cord |
| Runs but not cold | Airflow or sealed system issue | Clean around unit; allow 24 hours |
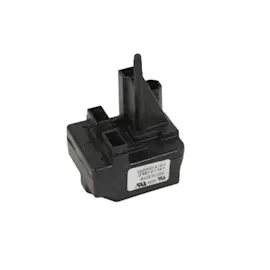
| Clicking, tries to start | Start device or compressor issue | Use a start-relay troubleshooting guide |
| Light blinks after outage | Control needs restart | Do the 30-second power reset |
Why it matters
A power reset clears minor control glitches after a power outage or surge and is the fastest first step before replacing parts. If problems continue, checking wiring connections (such as the electronic harness 216696400) is a practical next step.
Last updated: February 2026
What are the common chest freezer problems?
Common problems we see with the Kenmore 25319501991 chest freezer are not freezing or running too warm, excessive frost buildup, constant running, unusual noises, and water leaks. Many issues start with airflow, dirty condenser areas, or a lid seal that is not closing tightly, but sealed-system and electrical failures can also be the cause.
Most common symptoms and what they usually point to
- Freezer too warm or not freezing: poor airflow, dirty condenser area, weak compressor, or a control/thermostat issue
- Freezer runs all the time: warm air leak at the lid, heavy frost, dirty condenser coil, or low refrigerant/sealed-system problem
- Heavy frost buildup: lid not sealing, frequent openings, humid room, or a defrost-related issue (on models that use defrost components)
- Clicking or buzzing near the compressor: start device problem or compressor struggling to start
- Water on the floor: drain/condensation issues, lid left ajar, or high humidity causing excess sweating
Quick checks we recommend before replacing parts
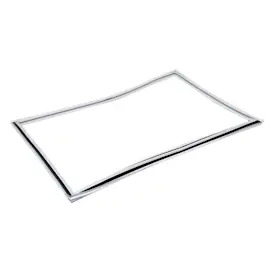
- Confirm the lid closes and seals all the way around; clean the gasket and the rim.
- Reduce overpacking so cold air can circulate; keep items below the top edge.
- Clean the condenser area (especially if the unit is in a dusty garage or basement).
- Check the temperature control setting; allow 24 hours after changes.
- Listen for the compressor: steady hum is normal; repeated clicking suggests a start problem.
Parts that are commonly involved (when a repair is needed)
| Symptom | Common repair area | Example part on this model page |
|---|---|---|
| Poor cooling, long run times | Sealed system (refrigerant flow) | Filter drier 5303305677 |
| Poor cooling, high cabinet temps | Heat rejection (condenser) | Freezer condenser coil 5300120779 |
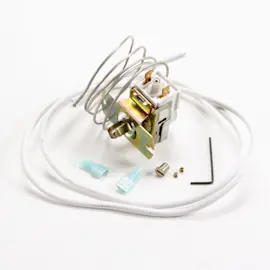
| Intermittent operation, wiring issues | Electrical connections | Electronic harness 216696400 |
Error codes (if your freezer has an electronic display)
If your Kenmore chest freezer shows an error code, match it to the symptom first, then test the related circuit or component before ordering parts. Use our Kenmore electronic control module freezer error codes reference to narrow the diagnosis.
Why it matters
A chest freezer that runs warm or builds heavy frost wastes energy and can spoil food quickly. Catching airflow problems and lid seal leaks early also helps prevent compressor strain, which is one of the most expensive repairs.
Last updated: February 2026
Where is the model number on a Kenmore chest freezer?
On a Kenmore chest freezer like model 25319501991, the model number is printed on a rating label that’s usually inside the cabinet near the top edge, or on an exterior surface such as the back. Checking these common label spots is the fastest way to match the correct parts.
Most common places to check
Look for a paper or foil rating label in these areas:
- Inside the freezer on a side wall, just below the lid opening
- Inside the freezer near the front rim (upper lip) of the cabinet
- On the back of the freezer cabinet
- Near the lower rear area by the compressor compartment access area
- Along the hinge side near the lid opening
What the label looks like
The label typically includes several identifiers. Use the model number for parts lookup.
| Label item | What it’s used for |
|---|---|
| Model number | Finding the correct parts list and diagrams |
| Serial number | Identifying production run and age |
| Electrical ratings | Verifying power requirements |
Tips to find it quickly (and avoid mistakes)
- Unplug the freezer before moving it to check the back.
- Use a flashlight; labels are often in shadowed corners.
- Wipe frost or residue with a damp cloth so the numbers are readable.
- Write the model number exactly as shown (for this unit: 25319501991).
- Once you have it, match parts by model, then by part ID, for example the access panel 216329402 if you’re working in the rear service area.
Why it matters
Kenmore freezers can look similar across multiple model numbers, but parts like wiring, panels, and sealed-system components vary by model. Using the exact model number helps ensure the replacement part fits and installs correctly the first time.
Last updated: February 2026
Why is my chest freezer leaking water underneath?
Water under a Kenmore 25319501991 chest freezer is usually caused by condensation or defrost meltwater that cannot evaporate fast enough, often after the lid is left open, the gasket leaks warm air, or the freezer is in a humid area. A refrigerant-system issue is less common but possible.
Quick checks we recommend (most common fixes)
- Wipe and watch: Dry the floor and bottom edges; check again after 12 to 24 hours to confirm it is active leaking (not an old spill).
- Check the lid seal: Look for gaps, tears, or areas that do not grip paper when the lid is closed.
- Reduce moisture load: Limit lid-open time; cool hot foods before freezing; keep items bagged to reduce frost.
- Level and placement: Make sure the freezer sits level and is not touching a wall where condensation can run down.
- Look for ice buildup: Heavy frost can melt during off-cycles and drip out around the lid.
If you see heavy frost or ice, defrost and reset
Manual-defrost chest freezers can drip during partial thaws. A full defrost often stops recurring puddles.
- Unplug the freezer and move food to coolers.
- Let ice melt naturally; use towels to catch water.
- Clean and dry the interior; restart and monitor.
For step-by-step guidance, use our how to defrost a freestanding freezer article.
When to suspect a sealed-system or condenser-area problem
If the puddle returns quickly and you also notice weak cooling, unusual heat at the cabinet sides, or oily residue, the issue can involve the condenser area or sealed system.
| What you notice | Likely cause | What to do next |
|---|---|---|
| Water only after humid days or long lid openings | Condensation | Improve seal habits; check gasket contact |
| Heavy frost, then puddles | Defrost meltwater | Fully defrost; reduce moisture |
| Poor cooling plus recurring puddles | Refrigeration system issue | Have a technician diagnose; parts may be needed |
If a technician confirms a sealed-system repair, model-matched parts that may apply include the filter drier 5303305677 and freezer condenser coil 5300120779.
Why it matters
Water under the freezer can damage flooring and can also signal air leaks that raise energy use and cause freezer burn.
Last updated: February 2026